การกำหนดค่า/ปรับแต่งพอร์ทัล
บทความนี้จะอธิบายว่าผู้ใช้ที่มีสิทธิ์การดูแลระบบ Kintone และผู้ใช้และผู้ดูแลระบบ Kintone สามารถเปลี่ยนการตั้งค่าของพอร์ทัลได้อย่างไร
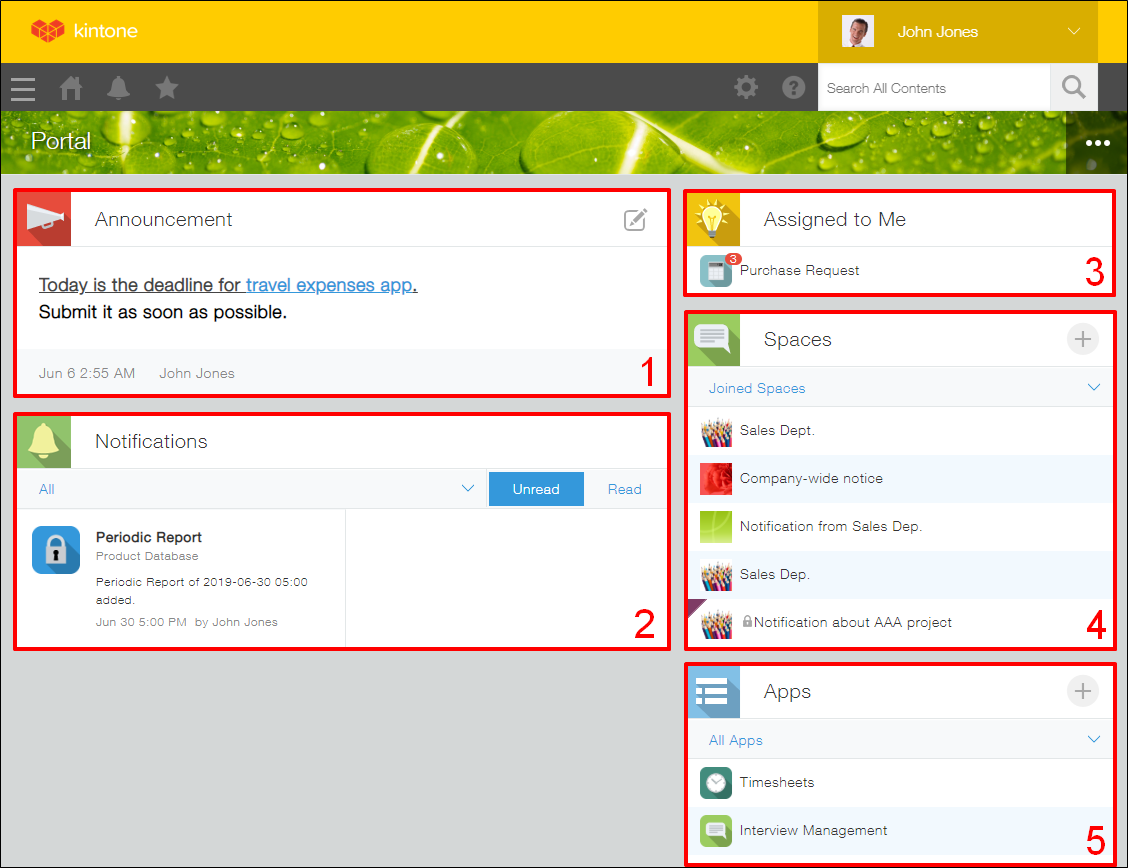
โดยค่าเริ่มต้น พอร์ทัลจะแสดงส่วนต่างๆ ต่อไปนี้
- ประกาศ
- การแจ้งเตือน
- ผู้ได้รับมอบหมาย ฉัน
- สเปซ
- แอปพลิเคชัน
สําหรับรายละเอียดของแต่ละส่วนที่แสดงบนพอร์ทัล โปรดดูที่หน้าต่อไปนี้
ภาพรวม พอร์ทัล
การเปลี่ยนแปลงการตั้งค่าพอร์ทัล
ส่วนนี้อธิบายวิธีกําหนดการตั้งค่าในกล่องโต้ตอบการตั้งค่า พอร์ทัล รวมถึงชื่อพอร์ทัลและรูปภาพหน้าปก
หากต้องการแก้ไขเนื้อหาในส่วน ประกาศ ให้คลิกไอคอน ประกาศ แก้ไข ที่มุมขวา บนสําหรับรายละเอียด โปรดดูหน้าต่อไปนี้
การแก้ไขส่วน "ประกาศ" ของพอร์ทัล
ขั้นตอน
-
คลิกไอคอน ตัวเลือก (จุดสามจุด) ที่ด้านขวาบนของพอร์ทัลของคุณ และเลือก การตั้งค่าพอร์ทัล ปัจจุบัน

-
ในกล่องโต้ตอบ การตั้งค่า พอร์ทัล ให้กำหนดค่าการตั้งค่าตามต้องการ
สามารถกำหนดค่าการตั้งค่าต่อไปนี้ได้- ชื่อ
- ภาพปก
สามารถใช้ไฟล์รูปภาพขนาดสูงสุด 5 MB เป็นรูปภาพหน้าปกได้ สำหรับมุมมองเดสก์ท็อป ความสูงของรูปภาพหน้าปกจะถูกกำหนดไว้ที่ 64 พิกเซล และความกว้างจะปรับให้พอดีกับเว็บเบราว์เซอร์ของคุณโดยอัตโนมัติ - เนื้อหาในพอร์ทัลนี้
สามารถแสดงส่วนต่อไปนี้บนพอร์ทัลของคุณได้- ประกาศ
- การแจ้งเตือน
- ผู้ได้รับมอบหมาย ฉัน
- สเปซ
- แอปพลิเคชัน
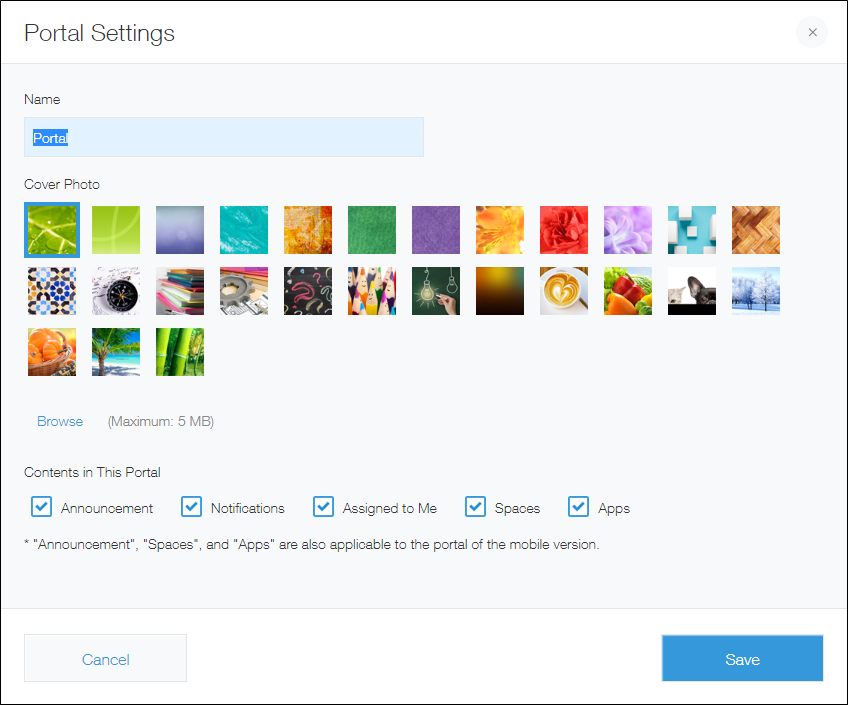
-
คลิก บันทึก
การปรับแต่งพอร์ทัลของคุณ
คุณสามารถปรับแต่งพอร์ทัลของคุณได้โดยใช้ API
การปรับแต่งด้วย API
วิธีหนึ่งในการปรับแต่งพอร์ทัลของคุณคือการสร้างโปรแกรม JavaScript โดยใช้ API ที่ Kintone จัดเตรียมไว้และนำไปใช้กับสภาพแวดล้อม Kintone ของคุณ การปรับแต่งประเภทนี้ช่วยให้คุณทำสิ่งต่างๆ เช่น เพิ่มปุ่มลงในพอร์ทัลของคุณได้
สำหรับรายละเอียดเกี่ยวกับวิธีการนำไฟล์ JavaScript มาใช้กับ Kintone โปรดดูที่หน้าต่อไปนี้
การปรับแต่งระบบ Kintone ทั่วทั้งระบบโดยใช้ JavaScript และ CSS