การเปิดใช้งาน/ปิดใช้งาน การรวม Slack
การรวม Kintone เข้ากับ Slack ช่วยให้ผู้ใช้สามารถรับการแจ้งเตือนผ่านข้อความโดยตรงของ Slack เมื่อพวกเขาถูกกำหนดให้เป็นผู้รับมอบหมายบันทึก
สิ่งนี้จะเป็นประโยชน์หากผู้ใช้จัดการงานโดยใช้แอป Kintone และ Slack
ข้อกำหนดเบื้องต้นสำหรับการใช้ การรวม Slack
- ที่อยู่อีเมลที่ลงทะเบียนใน Kintone จะต้องตรงกับที่อยู่อีเมลที่ลงทะเบียนในพื้นที่ทำงาน Slack
- สามารถตั้งค่า การรวม Slack สำหรับแอปในพื้นที่ส่วนตัวหรือพื้นที่ของแขกได้
ผู้ใช้งานประเภทเกสต์ ยังสามารถรับการแจ้งเตือน การรวม Slack ได้ หากที่อยู่อีเมลที่ลงทะเบียนไว้ใน Kintone ตรงกับที่อยู่อีเมลที่ลงทะเบียนไว้ในพื้นที่ทำงาน Slack - ไม่สามารถใช้ การรวม Slack เมื่อเปิดใช้งานการควบคุมการเข้าถึง แผนก ตรวจสอบให้แน่ใจว่าการควบคุมการเข้าถึง แผนก ปิดใช้งานอยู่
อ้างอิง: การจํากัดความสามารถในการดูโปรไฟล์ผู้ใช้และข้อมูลแผนกของผู้ใช้ในแผนกอื่น
ภาพรวมขั้นตอนการตั้งค่า การรวม Slack
หากต้องการตั้งค่า การรวม Slack ให้ทำตามขั้นตอนด้านล่างนี้
1. ตั้งค่าที่อยู่อีเมลที่จะใช้สำหรับรับการแจ้งเตือน การรวม Slack
2. เปิดใช้งาน งานการบูรณาการภายนอกบนหน้าจอ "ผู้ใช้และการดูแลระบบ"
3. กำหนดค่าการตั้งค่าการจัดการกระบวนการในการตั้งค่าแอป Kintone
4. ตั้งค่า การรวม Slack ในการตั้งค่าแอป Kintone
ส่วนต่อไปนี้จะอธิบายรายละเอียดของแต่ละขั้นตอน
การตั้งค่าที่อยู่อีเมลที่จะใช้สำหรับรับการแจ้งเตือน การรวม Slack
ต้องตั้งค่าที่อยู่อีเมลเดียวกันสำหรับ Kintone และพื้นที่ทำงาน Slack
หัวข้อนี้จะอธิบายวิธีการตั้งค่าที่อยู่อีเมลสำหรับ Kintone ผ่านหน้าจอ "ผู้ใช้และการดูแลระบบ"
ในการดำเนินการตามขั้นตอนที่อธิบายไว้ด้านล่าง คุณต้องมีผู้ใช้ Kintone และได้รับอนุญาตการดูแลระบบ
-
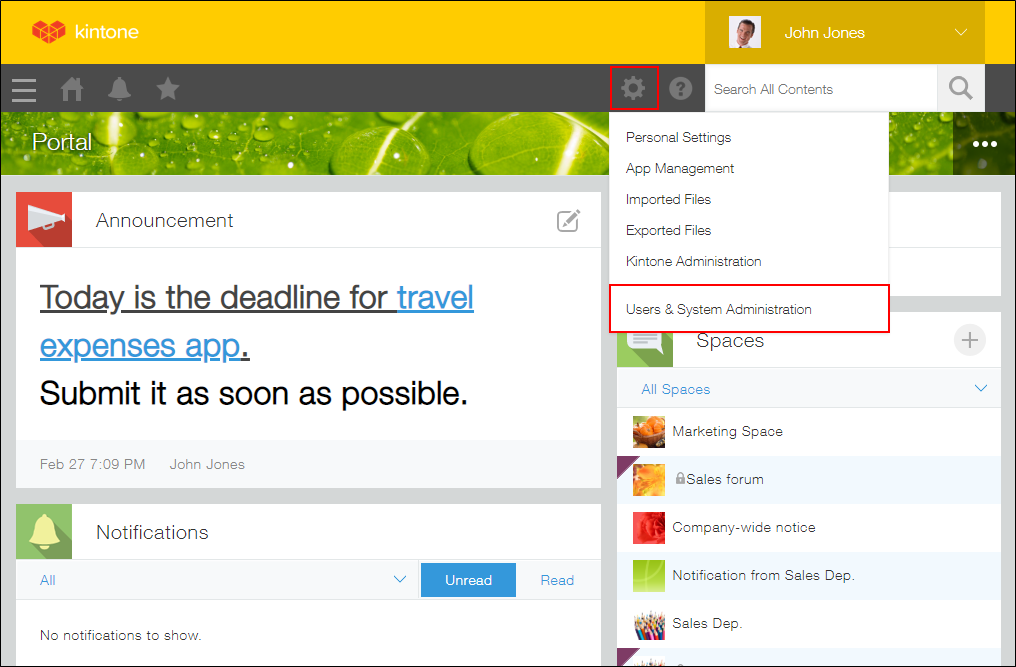
คลิกไอคอน การตั้งค่า (ไอคอนรูปเฟืองที่ด้านบนของ Kintone) จากนั้นคลิก ผู้ใช้และการดูแลระบบ
-
คลิก แผนก และผู้ใช้ ภายใต้ การดูแล ผู้ใช้งาน จากนั้นคลิกไอคอน เปลี่ยนแปลงข้อมูลผู้ใช้ ทางด้านซ้ายของผู้ใช้ที่คุณต้องการตั้งค่าที่อยู่อีเมล
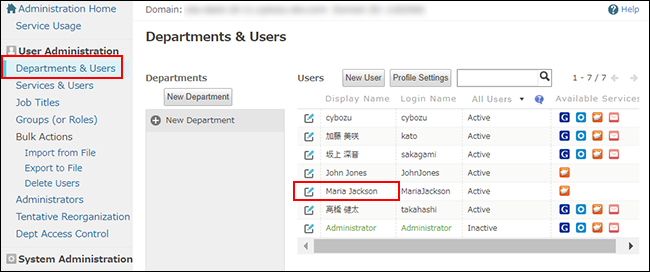 หน้าจอ "เปลี่ยนแปลงข้อมูล ผู้ใช้งาน" จะปรากฏขึ้น
 -
กรอกที่อยู่อีเมล จากนั้นคลิก บันทึก
การเปิดใช้งานการบูรณาการภายนอก
เปิดใช้งาน การผสานรวมภายนอกบนหน้าจอ "ผู้ใช้และการดูแลระบบ" การเปิดใช้งานการผสานรวมภายนอกที่นี่ช่วยให้คุณสามารถตั้งค่า การรวม Slack ในแต่ละแอปได้
ในการดําเนินการตามขั้นตอนที่อธิบายไว้ด้านล่าง คุณต้องมีสิทธิ์ผู้ดูแลระบบ Kintone ผู้ใช้และระบบ
-
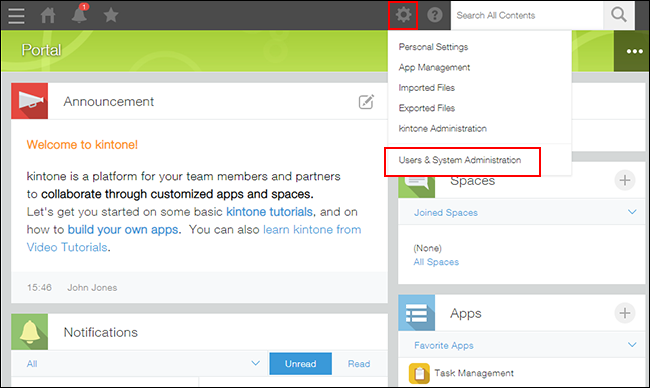
คลิกไอคอน การตั้งค่า (ไอคอนรูปเฟืองที่ด้านบนของ Kintone) จากนั้นคลิก ผู้ใช้และการดูแลระบบ
-
คลิก OAuth ภายใต้ การบูรณาการ
-
เปิดใช้งานตัวเลือกสำหรับ Slack เพื่อเปลี่ยนสถานะเป็น เปิดใช้งานแล้ว
การกำหนดค่าการตั้งค่าการจัดการกระบวนการบนแอป Kintone
กำหนดค่าการตั้งค่าการจัดการกระบวนการบนแอป Kintone ที่คุณต้องการตั้งค่า การรวม Slack
การกำหนดค่าการตั้งค่าการจัดการกระบวนการ
หากคุณกำลังใช้คุณลักษณะการจัดการกระบวนการบนแอปอยู่แล้ว ให้ดำเนินการตามขั้นตอนถัดไป
การตั้ง การรวม Slack
-
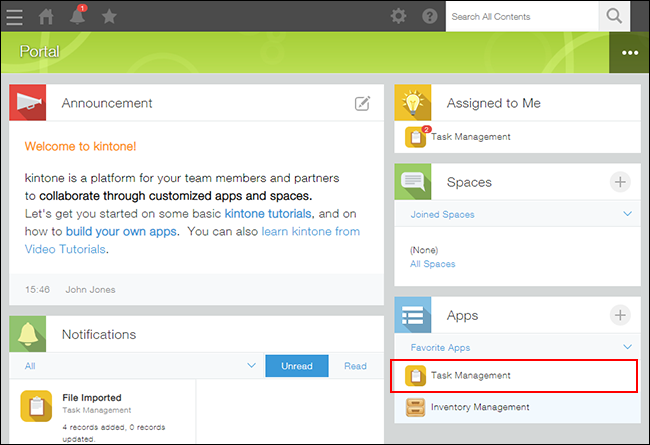
บน พอร์ทัล ของ Kintone ของคุณ คลิกแอป Kintone ที่คุณต้องการรวมเข้ากับ Slack
ที่นี่ เพื่อวัตถุประสงค์ในการอธิบาย คุณจะเปิดแอป "การจัดการ งาน"
-
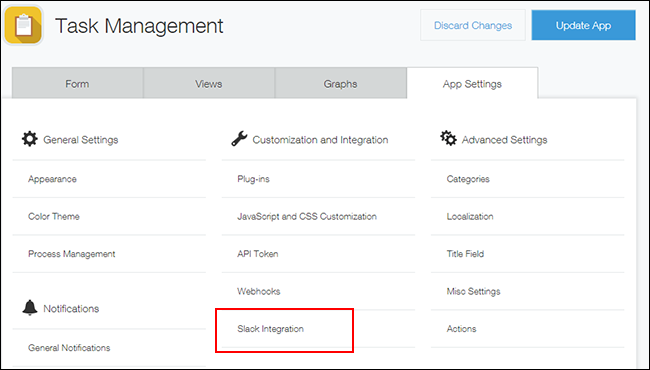
คลิกไอคอน การตั้งค่าแอป (ไอคอนรูปเฟือง) ที่ด้านขวาบนของหน้าจอ ดู

-
เลือก แท็บ การตั้งค่าแอป ในการตั้งค่าแอป จากนั้นคลิก การรวม Slack ภายใต้ การกำหนดเอง และการรวม
-
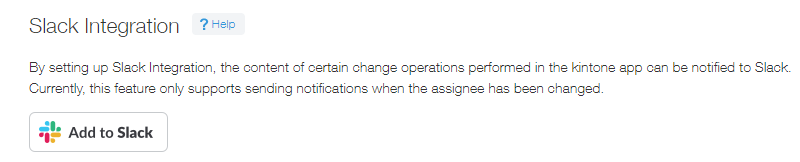
คลิก เพิ่มไปยัง Slack บนหน้าจอ "การรวม Slack"
-
บน Slack ให้ตรวจสอบพื้นที่ทำงาน Slack ที่คุณต้องการรวมเข้ากับแอปของคุณ จากนั้นคลิก อนุญาต
ในตัวอย่างนี้ แอปจะรวมเข้ากับพื้นที่ทำงาน Slack "Cybozu" หากคุณต้องการเปลี่ยนพื้นที่ทำงาน Slack ที่จะรวมเข้า ให้คลิกลูกศรลงบนเมนูแบบดรอปดาวน์ที่ด้านบนขวาของหน้าจอ -
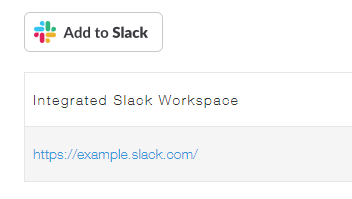
บนหน้าจอ "การรวม Slack" ของแอป Kintone ตรวจสอบว่ามีการแสดง URL ของพื้นที่ทำงาน Slack ที่รวมอยู่หรือไม่
ใน Slack ของคุณ ผู้ใช้บอท "Kintone" จะถูกเพิ่มลงใน แอปพลิเคชัน
-
คลิก กลับไปที่การตั้งค่าแอป ที่ด้านซ้ายล่างของหน้าจอ
-
บนหน้าจอ การตั้งค่าแอป คลิก อัปเดตแอป
-
ในกล่องโต้ตอบ อัปเดตแอป คลิก อัปเดตแอป
การส่งการแจ้งเตือน
ทดสอบ เพื่อดูว่ามีการส่งการแจ้งเตือนหรือไม่
-
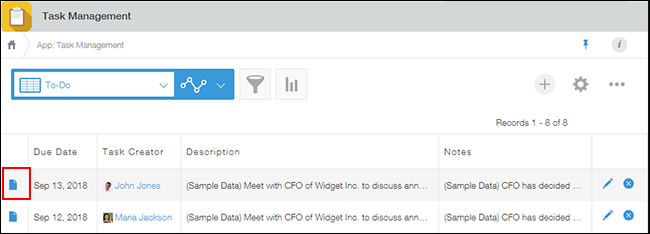
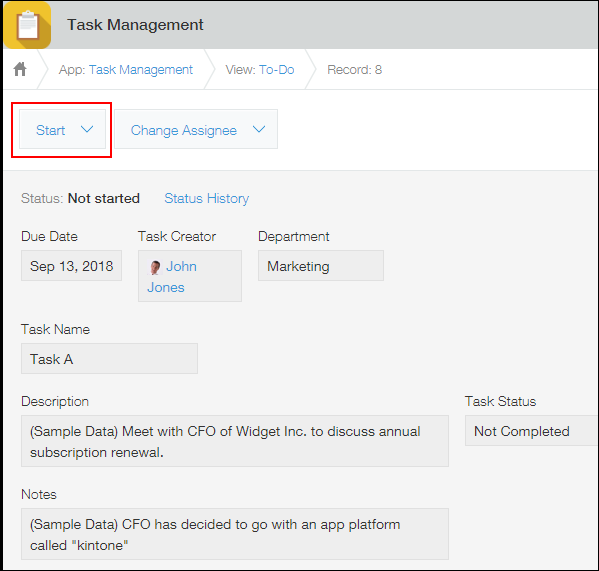
ไปที่แอป Kintone ที่คุณรวมเข้ากับ Slack และเปิดบันทึก
-
บนหน้าจอ "รายละเอียดบันทึก" คลิก เริ่ม
-
เลือก ผู้ใช้ที่จะกำหนดงานให้และคลิก ยืนยัน
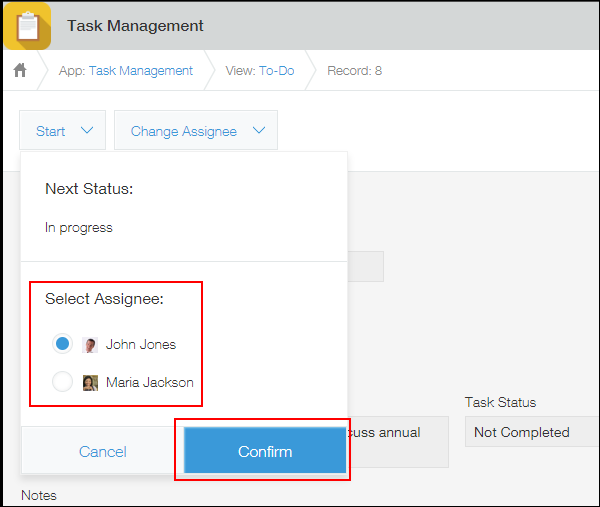
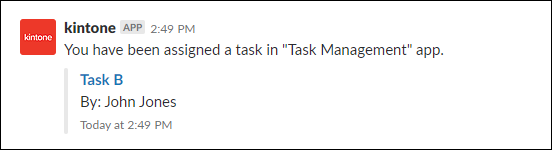
ผู้รับมอบหมายงานจะได้รับข้อความโดยตรงบน Slack
ข้อความโดยตรงจะแสดงชื่อของระเบียน ในกรณีต่อไปนี้ ข้อความโดยตรงจะแสดง URL ของระเบียน: เมื่อหมายเลขระเบียนถูกกำหนดเป็นชื่อระเบียน เมื่อผู้ใช้ที่ได้รับมอบหมายไม่มีสิทธิ์ในการดูชื่อ หรือเมื่อชื่อว่างเปล่า
การลบ การรวม Slack
การรวมเข้ากับพื้นที่ทำงาน Slack สามารถลบออกจากหน้าจอการตั้งค่าแอปได้
-
คลิกไอคอน การตั้งค่าแอป (ไอคอนรูปเฟือง) ที่ด้านขวาบนของหน้าจอ ดู
-
เลือก แท็บ การตั้งค่าแอป ในการตั้งค่าแอป จากนั้นคลิก การรวม Slack ภายใต้ การกำหนดเอง และการรวม
-
บนหน้าจอ "การรวม Slack" คลิกไอคอน ลบ การรวม ทางด้านขวาของพื้นที่ทำงาน Slack ที่คุณต้องการลบการรวม จากนั้นคลิก ลบ

-
คลิก กลับไปที่การตั้งค่าแอป ที่ด้านซ้ายล่างของหน้าจอ
-
บนหน้าจอ การตั้งค่าแอป คลิก อัปเดตแอป
-
ในกล่องโต้ตอบ อัปเดตแอป คลิก อัปเดตแอป