การกำหนดค่าหมวดหมู่
บทความนี้อธิบายวิธีการเปิดใช้งานคุณลักษณะ หมวดหมู่ และวิธีการเพิ่มหรือลบหมวดหมู่ในแผนผังประเภท
เปิดใช้งาน คุณสมบัติหมวดหมู่และเพิ่มหมวดหมู่
ส่วนนี้อธิบายวิธีเปิดใช้งานคุณลักษณะ หมวดหมู่ และเพิ่มหมวดหมู่
-
คลิกไอคอน การตั้งค่าแอป (ไอคอนรูปเฟือง) ที่ด้านขวาบนของหน้าจอ ดู

-
บนหน้าจอ การตั้งค่าแอป ให้เลือกแท็บ การตั้งค่าแอป จากนั้นคลิก หมวดหมู่ ภายใต้ การตั้งค่า ขั้นสูง
-
บนหน้าจอ หมวดหมู่ ให้เลือกช่องทําเครื่องหมาย ใช้หมวดหมู่ เพื่อเปิดใช้งานหมวดหมู่
-
ในส่วน หมวดหมู่ แผนผัง ให้เพิ่มหมวดหมู่โดยคลิกไอคอน เพิ่ม (ไอคอนรูปเครื่องหมายบวก) ทางด้านขวาของช่องป้อนข้อมูล และป้อนชื่อสําหรับหมวดหมู่
- คุณสามารถเพิ่มหมวดหมู่ได้สูงสุดถึง 1,000 หมวดหมู่ โดยมีลำดับชั้นได้สูงสุดถึง 5 ระดับ รวมถึงหมวดหมู่หลัก
- ชื่อหมวดหมู่สามารถมีความยาวได้ไม่เกิน 64 ตัวอักษร
-
บนหน้าจอ การตั้งค่าแอป คลิก อัปเดตแอป
-
คลิก อัปเดตแอป ที่ด้านขวาบนของหน้าจอ
-
ในกล่องโต้ตอบ อัปเดตแอป คลิก อัปเดตแอป
จำแนกประเภทบันทึกตามหมวดหมู่
หากต้องการจัดหมวดหมู่บันทึกเป็นหมวดหมู่ที่คุณกำหนดค่าไว้ ให้ไปที่หน้าจอ แก้ไข บันทึก ของบันทึกแต่ละรายการ และเลือกหมวดหมู่ที่คุณต้องการ
คุณสามารถเลือกหมวดหมู่ได้หลายรายการ
ลบ หมวดหมู่
หากต้องการลบหมวดหมู่ ให้ทำตามขั้นตอนต่อไปนี้
ตรวจสอบว่าไม่มีรายการใดที่จัดอยู่ในหมวดหมู่ที่คุณต้องการลบ
ตรวจสอบให้แน่ใจว่าได้ตรวจสอบบันทึกทั้งใน แอปพลิเคชันที่เปิดใช้งาน และสภาพแวดล้อมการทดสอบของแอป
การดำเนินการทดสอบฟังก์ชันบนแอป
-
คลิกแอปเพื่อเปิดหน้าจอ ดู
-
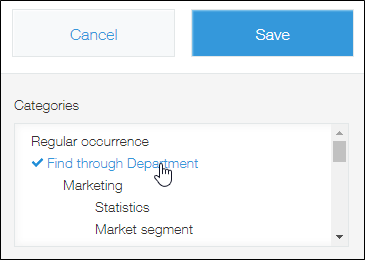
คลิกหมวดหมู่ที่คุณต้องการลบ
-
ตรวจสอบว่ามีบันทึกอยู่ในหมวดหมู่หรือไม่
-
หากมีบันทึกใดๆ ให้แก้ไขบันทึกนั้นเพื่อเปลี่ยนหมวดหมู่ที่บันทึกนั้นเป็นสมาชิกอยู่ หรือยกเลิกการเลือกหมวดหมู่
ทำซ้ำขั้นตอนที่ 2 ถึง 4 จนกว่าจะไม่มีระเบียนใดถูกจัดประเภทในหมวดหมู่ที่คุณต้องการลบ
ลบ หมวดหมู่
-
คลิกไอคอน การตั้งค่าแอป (ไอคอนรูปเฟือง) ที่ด้านขวาบนของหน้าจอ ดู
-
บนหน้าจอ การตั้งค่าแอป ให้เลือก หมวดหมู่ ภายใต้ การตั้งค่า ขั้นสูง บนแท็บ การตั้งค่าแอป
-
บนหน้าจอ หมวดหมู่ ให้คลิกไอคอน ลบ ทางด้านขวาของหมวดหมู่ที่คุณต้องการลบ
-
คลิก บันทึก ที่ด้านขวาล่างของหน้าจอ
-
บนหน้าจอ การตั้งค่าแอป คลิก อัปเดตแอป
-
ในกล่องโต้ตอบ อัปเดตแอป คลิก อัปเดตแอป
ข้อความ ข้อผิดพลาด และวิธีแก้ไข
ติดตาม วิธีแก้ไขด้านล่างเมื่อข้อความแสดงข้อผิดพลาดนี้ปรากฏขึ้น:
หมวดหมู่ที่คุณพยายามลบไม่สามารถลบได้ เนื่องจากมีรายการที่ถูกจัดประเภทอยู่ภายใต้หมวดหมู่นั้น
หากหมวดหมู่ที่คุณต้องการลบมีระเบียนใดๆ อยู่ คุณจะต้องทำให้ไม่มีระเบียนใดๆ ในหมวดหมู่นั้น
ตรวจสอบว่าไม่มีรายการใดที่จัดอยู่ในหมวดหมู่ที่คุณต้องการลบ
โปรดทราบว่าข้อความแสดงข้อผิดพลาดนี้จะรวมชื่อหมวดหมู่เพียงชื่อเดียว ถึงแม้จะมีหมวดหมู่มากกว่าหนึ่งหมวดหมู่ที่ไม่สามารถลบได้ก็ตาม