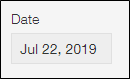
วันที่
การวางช่อง วันที่ ในแบบฟอร์มแอปของคุณจะสร้างช่องป้อนข้อมูลสำหรับป้อนวัน เดือน และปี
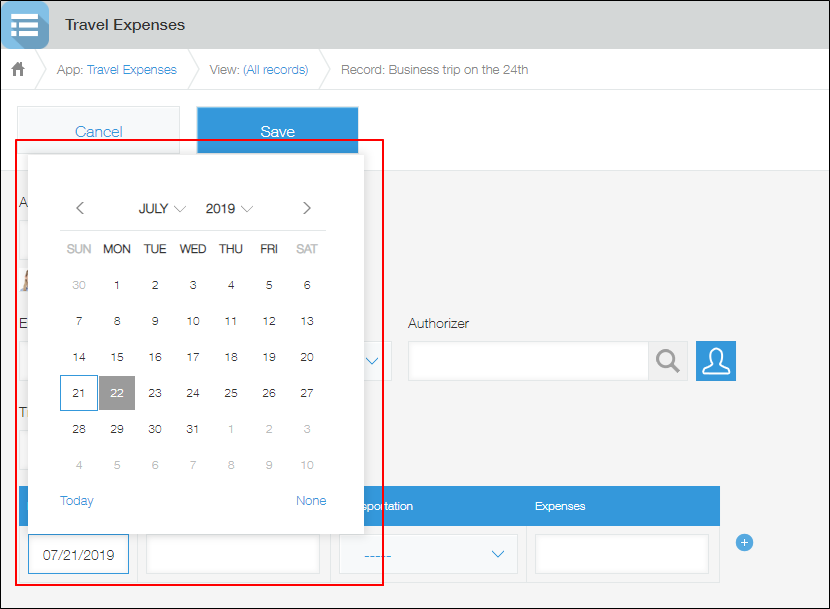
หากคุณคลิกที่ช่องป้อนวันที่บนหน้า จอบันทึกใหม่ หรือหน้าจอ แก้ไข บันทึก ปฏิทินจะปรากฏขึ้น ซึ่งคุณสามารถเลือกวัน เดือน และปีได้ คุณสามารถเปลี่ยนปีและเดือนของปฏิทินได้จากรายการแบบเลื่อนลงปีและเดือน
คุณยังสามารถใช้แป้นพิมพ์เพื่อป้อนวันที่ลงในช่องป้อนข้อมูลได้โดยตรง
การตั้งค่าฟิลด์
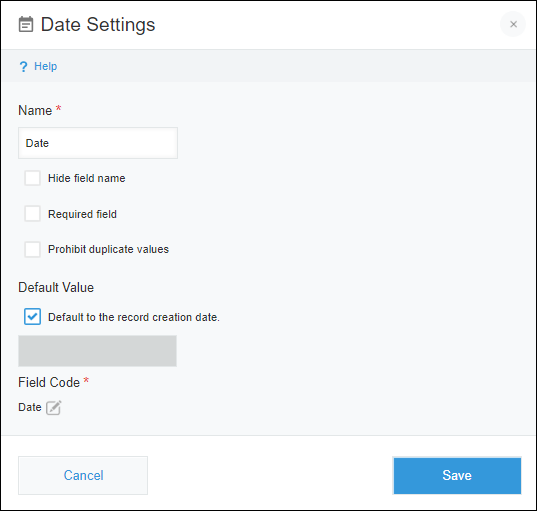
ชื่อ
ระบุชื่อฟิลด์ ชื่อฟิลด์จะแสดงเป็นป้ายกำกับของฟิลด์ในแอป
ซ่อนชื่อฟิลด์
การเลือกช่องทําเครื่องหมาย ซ่อนชื่อฟิลด์ จะซ่อนชื่อฟิลด์บนหน้าจอต่อไปนี้
- หน้าจอ บันทึกใหม่
- หน้าจอ แก้ไข บันทึก
- การ บันทึก หน้าจอ
- หน้าจอสำหรับพิมพ์บันทึก
- หน้าจอการตั้งค่า แบบฟอร์ม
ฟิลด์ที่ต้องระบุ
การเลือกช่องกาเครื่องหมาย ฟิลด์ที่ต้องระบุ จะทำให้ต้องระบุค่าช่อง
ห้ามใช้ค่าซ้ำ
การเลือกช่องกา ห้ามใช้ค่าซ้ำ จะห้ามไม่ให้ระบุค่าวันที่เดียวกันในหลายระเบียน
ค่า ค่าเริ่มต้น
การตั้งค่านี้ช่วยให้คุณตั้งค่าฟิลด์เริ่มต้นได้
ถ้าคุณต้องการให้ค่าเขตข้อมูลเริ่มต้นเป็นวันที่สร้างระเบียน ให้เลือกกล่องกาเครื่องหมาย ตั้งค่าวันที่สร้างบันทึกเป็นค่าเริ่มต้น
หากคุณต้องการป้อนวันที่อื่นเป็นค่าเริ่มต้น ให้ยกเลิกการเลือกช่องทําเครื่องหมาย ตั้งค่าวันที่สร้างบันทึกเป็นค่าเริ่มต้น และป้อนวันที่ที่คุณต้องการในช่องป้อนข้อมูล
หากคุณไม่ต้องการตั้งค่าเริ่มต้น ให้ยกเลิกการเลือกช่องทําเครื่องหมาย ตั้งค่าวันที่สร้างบันทึกเป็นค่าเริ่มต้น และปล่อยให้ช่องป้อนวันที่ว่างไว้
รหัสฟิลด์
สตริงอักขระที่ใช้ในการระบุฟิลด์ในสูตรหรือ API
รูปแบบวันที่สำหรับช่องป้อนข้อมูล
รูปแบบวันที่ของช่องป้อนข้อมูลจะแตกต่างกันไปขึ้นอยู่กับภาษาที่ใช้แสดงผลของผู้ใช้และการตั้งค่าภาษาของเว็บเบราว์เซอร์
ปี-เดือน-วัน
ป้อนวันที่ในรูปแบบ "ปี-เดือน-วัน" ในกรณีต่อไปนี้
- การตั้งค่า ภาษา ในการตั้งค่าบัญชีของคุณเป็นหนึ่งในสิ่งต่อไปนี้:
- 日本語
- 中文 (简体)
- 中文 (繁體)
- ภาษาสเปน
- ภาษา ในการตั้งค่าบัญชีของคุณถูกตั้งค่าเป็น ใช้การตั้งค่าเว็บเบราเซอร์ และภาษาของเว็บเบราว์เซอร์ของคุณไม่ได้ตั้งค่าเป็นค่าใดๆ ต่อไปนี้:
- ภาษาสเปน
อย่างไรก็ตาม โปรดทราบว่าภาษาสเปน (สหรัฐอเมริกา) และภาษาสเปน (เม็กซิโก) จะถูกยกเว้น - แบบไทย
- โปรตุเกส (บราซิล)
- ภาษาอังกฤษ
- ภาษาอังกฤษ (สหรัฐอเมริกา)
- อังกฤษ (สหราชอาณาจักร, OXENDICT)
- ภาษาอังกฤษ (สหราชอาณาจักร)
- อังกฤษ (ออสเตรเลีย)
- ภาษาสเปน
เดือน/วัน/ปี
ป้อนวันที่ในรูปแบบ "เดือน/วัน/ปี" ในกรณีต่อไปนี้
- ภาษา ในการตั้งค่าบัญชีของคุณถูกตั้งค่าเป็น English (US)
- ภาษา ในการตั้งค่าบัญชีของคุณถูกตั้งค่าเป็น ใช้การตั้งค่าเว็บเบราเซอร์ และภาษาของเว็บเบราว์เซอร์ของคุณถูกตั้งค่าเป็นอย่างใดอย่างหนึ่งต่อไปนี้:
- ภาษาอังกฤษ
- ภาษาอังกฤษ (สหรัฐอเมริกา)
วัน/เดือน/ปี
ป้อนวันที่ในรูปแบบ "วัน/เดือน/ปี" ในกรณีต่อไปนี้
- การตั้งค่า ภาษา ในการตั้งค่าบัญชีของคุณเป็นหนึ่งในสิ่งต่อไปนี้:
- โปรตุเกส (บราซิล)
- ไทย
- ภาษา ในการตั้งค่าบัญชีของคุณถูกตั้งค่าเป็น ใช้การตั้งค่าเว็บเบราเซอร์ และภาษาของเว็บเบราว์เซอร์ของคุณถูกตั้งค่าเป็นอย่างใดอย่างหนึ่งต่อไปนี้:
- ภาษาสเปน
อย่างไรก็ตาม โปรดทราบว่าภาษาสเปน (สหรัฐอเมริกา) และภาษาสเปน (เม็กซิโก) จะถูกยกเว้น - แบบไทย
- โปรตุเกส (บราซิล)
- อังกฤษ (สหราชอาณาจักร, OXENDICT)
- ภาษาอังกฤษ (สหราชอาณาจักร)
- อังกฤษ (ออสเตรเลีย)
- ภาษาสเปน
ตัวอย่างการใช้งาน
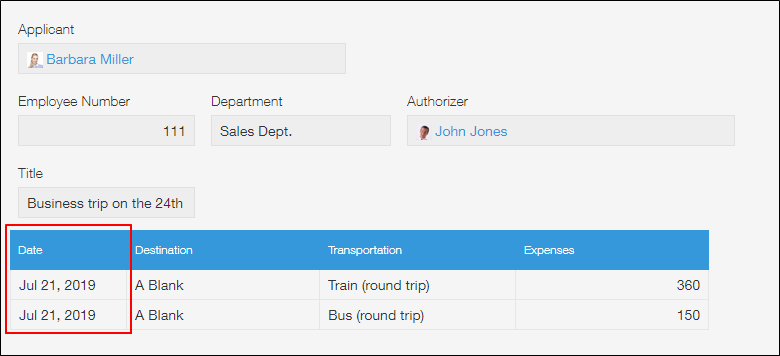
ใช้ฟิลด์ วันที่ เมื่อคุณต้องการฟิลด์อินพุตสำหรับป้อนวันที่ ตัวอย่างเช่น คุณสามารถใช้ฟิลด์ วันที่ได้ ในลักษณะต่อไปนี้
- เป็นช่องสำหรับกรอกวันที่ใช้งานในแอปอนุมัติค่าใช้จ่ายขนส่ง หรือ แอปขออนุมัติค่าใช้จ่ายอื่นๆ
- เป็นช่องสำหรับกรอกกำหนดเวลาการตอบในแอปจัดการการสอบถาม
- เป็นช่องสำหรับกรอกวันที่กิจกรรมในแอปบริหารจัดการเคส
ใช้ช่อง "วันที่" เพื่อคำนวณกำหนดเวลา
เนื่องจากสามารถใช้ฟิลด์ วันที่ ในสูตรได้ คุณจึงสามารถตั้งค่าสูตรให้แสดงกำหนดเวลาตอบกลับสอง วัน หลังจากวันที่ในฟิลด์ วันที่ได้
ในตัวอย่างนี้ สูตรจะถูกตั้งค่าในฟิลด์ ผลคำนวณ
วางช่อง วันที่ และช่อง ผลคำนวณ บนแบบฟอร์มแอปของคุณ ระบุสูตรต่อไปนี้ในช่อง ผลคำนวณ และตั้งค่าให้แสดงผลลัพธ์การคำนวณเป็นวันที่
Date+(60*60*24)*2
สำหรับข้อมูลเกี่ยวกับฟิลด์ ผลคำนวณ โปรดดูหน้าต่อไปนี้
ผลคำนวณ
สำหรับข้อมูลเกี่ยวกับวิธีคำนวณวันที่ โปรดดูหน้าถัดไป
การคำนวณวัน เวลา และวันและเวลา