การเพิ่มผู้ใช้
ใช้ข้อมูลในบทความนี้เพื่อเริ่มเพิ่มผู้ใช้ใน Kintone
สามารถใช้วิธีการที่อธิบายไว้ที่นี่เพื่อเพิ่มผู้ใช้ได้ตลอดเวลา ซึ่งแตกต่างจากการเชิญผู้ใช้จากหน้าจอที่ปรากฏขึ้นระหว่างการเข้าสู่ระบบครั้งแรกและช่วงทดลองใช้งานฟรี
คุณสามารถเพิ่มผู้ใช้ได้แม้ว่าคุณจะไม่ได้เพิ่มแผนกใดๆ ก็ตาม
นอกจากนี้ คุณยังสามารถเพิ่มแผนกได้ในภายหลังหลังจากเพิ่มผู้ใช้แล้ว สำหรับข้อมูลเกี่ยวกับวิธีการเพิ่มแผนก โปรดดูหน้าถัดไป
การเพิ่มแผนก
ขั้นตอน
โปรดทราบว่าเฉพาะผู้ใช้ Kintone และผู้ดูแลระบบเท่านั้นที่สามารถเพิ่มผู้ใช้ได้
-
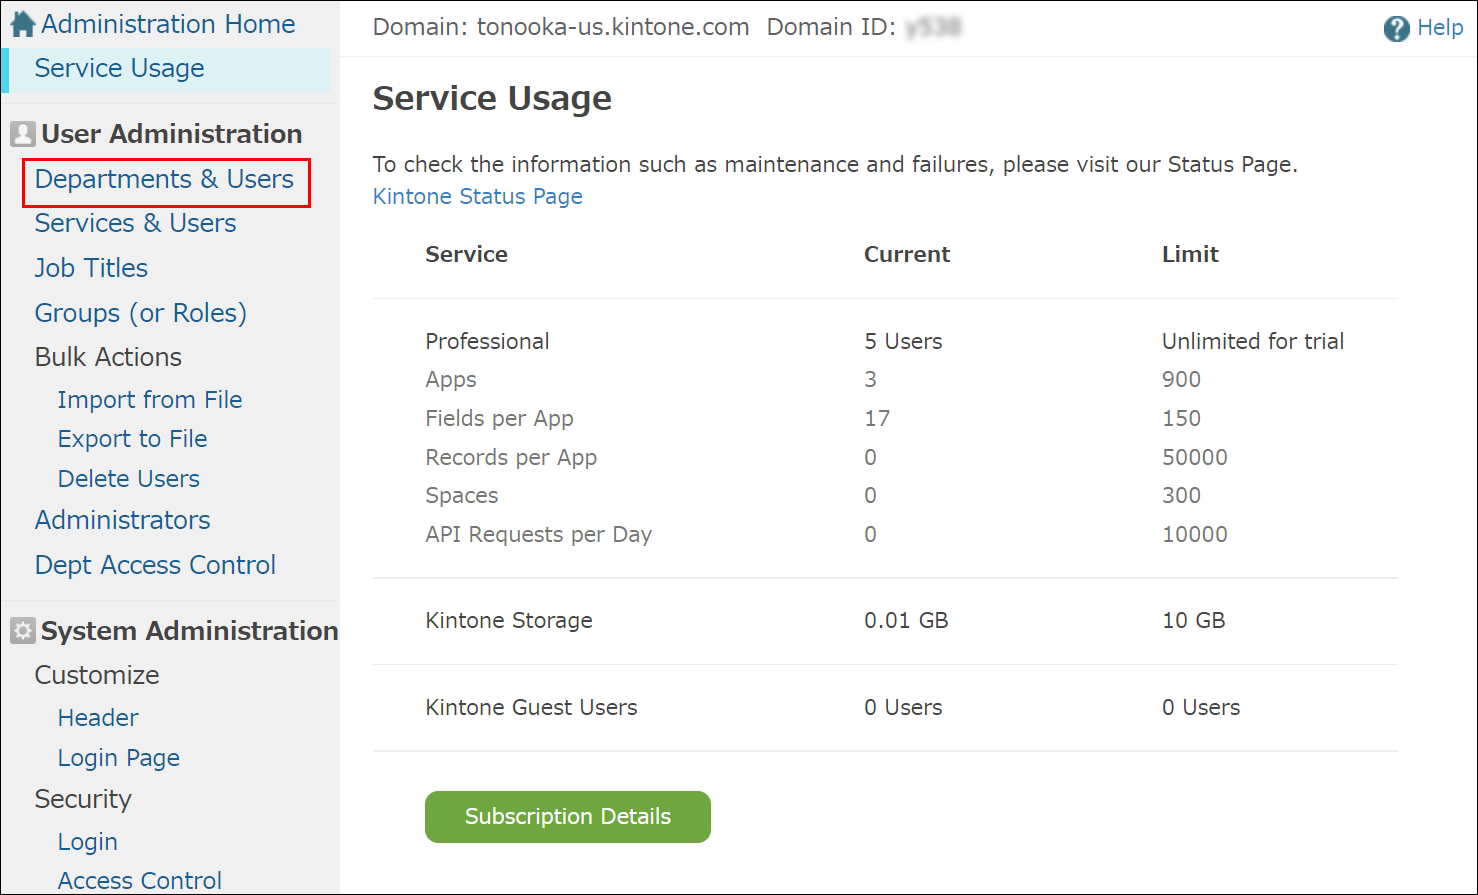
คลิกไอคอน การตั้งค่า (ไอคอนรูปเฟือง) ที่ด้านบนของ Kintone จากนั้นคลิก ผู้ใช้และการดูแลระบบ

-
บนหน้าจอ ผู้ใช้และการดูแลระบบ คลิก แผนก และผู้ใช้ ภายใต้ การดูแล ผู้ใช้งาน
-
เลือกอย่างใดอย่างหนึ่งด้านล่าง ขึ้นอยู่กับว่าคุณต้องการกำหนดแผนกให้กับผู้ใช้หรือไม่ (คุณสามารถเปลี่ยนหรือตั้งค่าแผนกของผู้ใช้หลังจากเพิ่มผู้ใช้แล้วได้เช่นกัน)
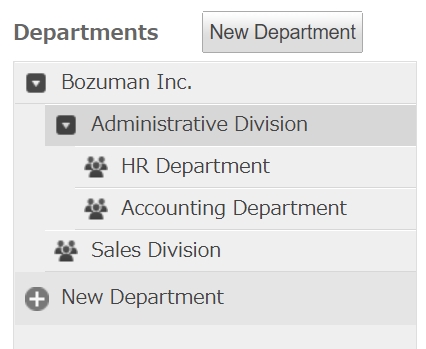
- หากต้องการตั้งค่าแผนกของผู้ใช้ ให้ขยายโครงสร้างแผนกและเลือกแผนก
- หากคุณไม่ต้องการกำหนดแผนกให้กับผู้ใช้: คลิก ผู้ใช้ที่ยังไม่ได้รับมอบหมาย
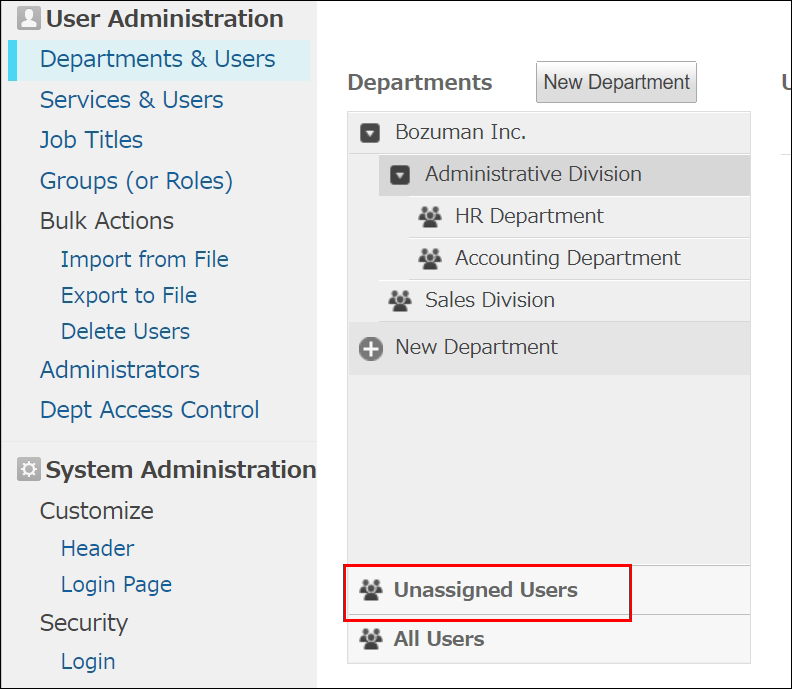
- หากต้องการตั้งค่าแผนกของผู้ใช้ ให้ขยายโครงสร้างแผนกและเลือกแผนก
-
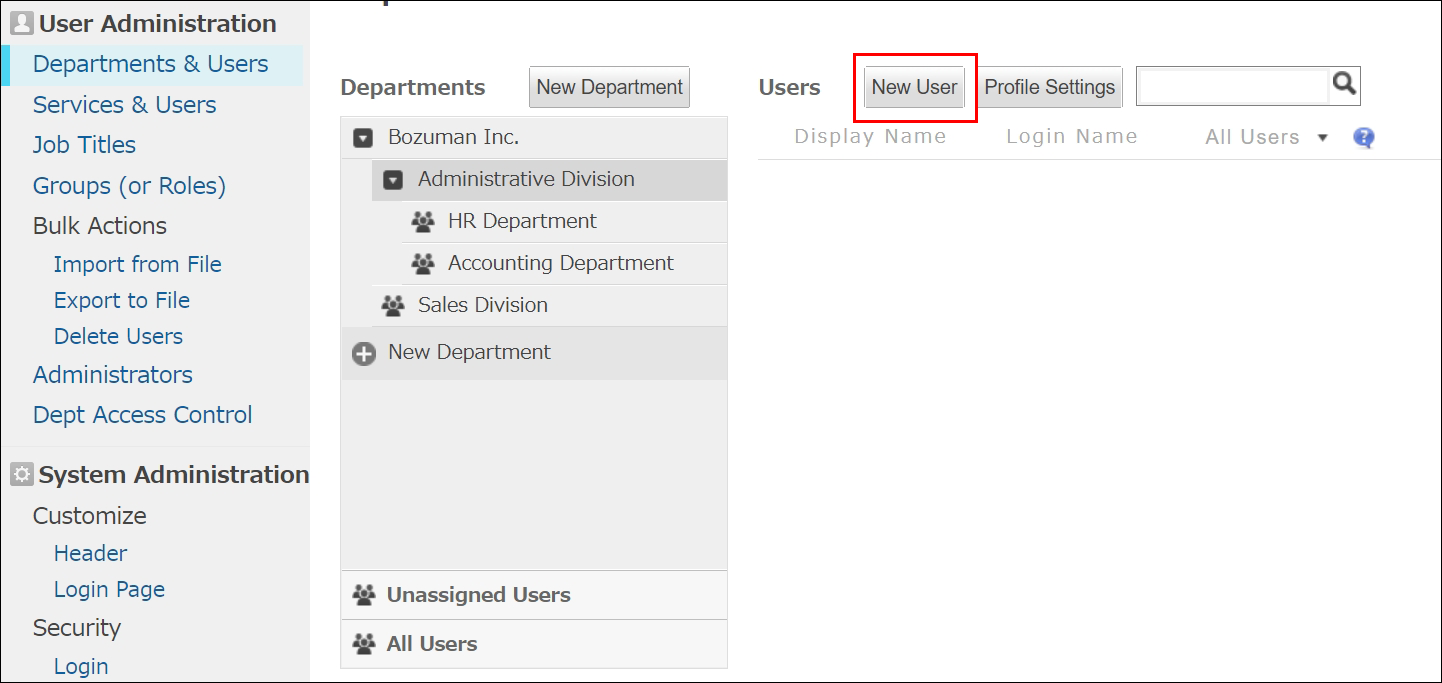
คลิก เพิ่มผู้ใช้
-
กำหนดค่าการตั้งค่าบนหน้าจอ เพิ่มผู้ใช้
-
บัญชี
-
ชื่อที่แสดง (จำเป็น):
กรอกชื่อผู้ใช้ที่จะแสดงบน Kintone -
ที่อยู่อีเมล:
ป้อนที่อยู่อีเมลของผู้ใช้ ที่อยู่อีเมลที่ระบุในที่นี้จะใช้สำหรับรับอีเมลแจ้งเตือนจาก Kintone และรีเซ็ตรหัสผ่านในกรณีที่ผู้ใช้ลืมรหัสผ่าน โปรดอย่าระบุที่อยู่อีเมลที่ใช้ร่วมกันสำหรับรายการนี้ -
ใช้ที่อยู่อีเมลเป็นชื่อเข้าสู่ระบบ:
กล่องกาเครื่องหมายนี้ถูกเลือกไว้ตามค่าเริ่มต้น หากผู้ใช้ที่คุณเพิ่มไม่มีที่อยู่อีเมลหรือคุณไม่ต้องการใช้ที่อยู่อีเมลของพวกเขาเป็นชื่อเข้าสู่ระบบ ให้ยกเลิกการเลือกกล่องกาเครื่องหมายและตั้งชื่อเข้าสู่ระบบ -
ชื่อล็อกอิน (จำเป็น) :
หากยกเลิกการเลือกช่องกาเครื่องหมาย ใช้ที่อยู่อีเมลเป็นชื่อเข้าสู่ระบบ ให้ป้อน ID สำหรับเข้าสู่ระบบ Kintone สำหรับข้อมูลเกี่ยวกับประเภทอักขระที่ยอมรับได้และความยาวสูงสุดของชื่อเข้าสู่ระบบ โปรดดูหน้าต่อไปนี้
อักขระที่สามารถใช้เป็นชื่อเข้าระบบและรหัสผ่าน -
รหัสผ่าน (จำเป็น):
ตั้งรหัสผ่านของผู้ใช้โดยใช้วิธีใดวิธีหนึ่งต่อไปนี้- หากคุณต้องการใช้รหัสผ่านที่สร้างโดยอัตโนมัติ:
ตรวจสอบให้แน่ใจว่าได้เลือกช่องทำ เครื่องหมาย สร้างรหัสผ่านโดยอัตโนมัติ โดยช่องทำเครื่องหมายนี้จะถูกเลือกไว้ตามค่าเริ่มต้น - หากคุณต้องการตั้งรหัสผ่านด้วยตนเอง:
ยกเลิกการเลือก การเลือกช่องทำ เครื่องหมาย "สร้างรหัสผ่านอัตโนมัติ" แล้วป้อนรหัสผ่าน สำหรับข้อมูลเกี่ยวกับประเภทอักขระที่ยอมรับและความยาวสูงสุดของรหัสผ่าน โปรดดูหน้าถัดไป
อักขระที่สามารถใช้สำหรับชื่อเข้าระบบและรหัสผ่าน
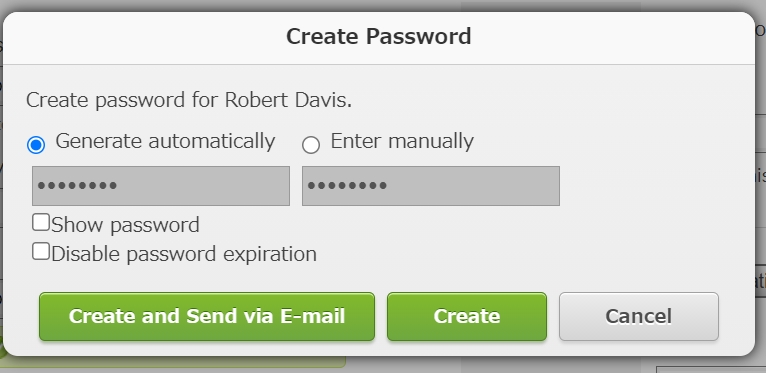
- หากต้องการดูรหัสผ่านที่ป้อนในช่อง รหัสผ่าน ให้เลือกช่องทําเครื่องหมาย แสดง รหัสผ่าน
- หากคุณเลือก ปิดใช้งาน หมดอายุของรหัสผ่าน รหัสผ่านของผู้ใช้จะยังคงใช้ได้อย่างไม่มีกําหนด โดยไม่คํานึงถึงการตั้งค่านโยบายรหัสผ่านปัจจุบันของคุณ สําหรับรายละเอียดเกี่ยวกับการตั้งค่านโยบายรหัสผ่าน โปรดดูที่หน้าต่อไปนี้
นโยบาย รหัสผ่าน
- หากคุณต้องการใช้รหัสผ่านที่สร้างโดยอัตโนมัติ:
-
-
สถานะบัญชี
- สถานะ:
เลือก กำลังใช้งาน หรือ ไม่มีการใช้งาน เป็นสถานะบัญชี - บริการ พร้อมใช้งาน:
ส่วนนี้จะแสดงบริการต่างๆ ที่สามารถใช้งานได้กับใบอนุญาตของคุณ และบริการที่คุณสมัครทดลองใช้งาน โปรดตรวจสอบให้แน่ใจว่าได้เลือกช่องทำเครื่องหมาย Kintone แล้ว
- สถานะ:
-
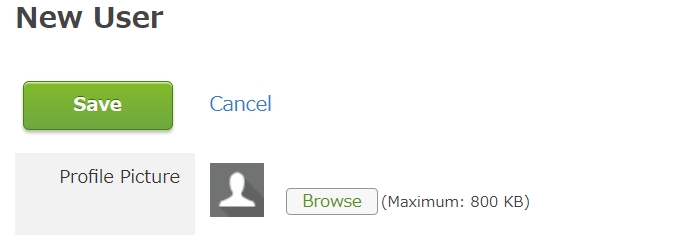
โปรไฟล์ พื้นฐาน
- รูปโปรไฟล์:
เลือก ไฟล์รูปภาพที่มีขนาดไม่เกิน 800 KB รองรับรูปแบบไฟล์รูปภาพต่อไปนี้: GIF, JPEG, PNG และ BMP - ชื่อจริง และ นามสกุล:
กรอกชื่อสกุลและชื่อผู้ใช้งาน - ชื่อตามเสียง และ นามสกุลตามเสียง:
กรอกการออกเสียงชื่อและนามสกุลของผู้ใช้
- รูปโปรไฟล์:
-
แผนก
- แผนก:
กําหนดแผนกและตําแหน่งงานของผู้ใช้ สําหรับรายละเอียดเกี่ยวกับวิธีการเพิ่มแผนกหรือตําแหน่งงาน โปรดดูหน้าต่อไปนี้ - แผนก ลำดับความสำคัญ:
เลือก แผนกที่จะให้ความสำคัญในการแสดงบนหน้าจอของผู้ใช้หากพวกเขาอยู่ในหลายแผนก
- แผนก:
-
ข้อมูลติดต่อ
- โทรศัพท์:
ป้อนหมายเลขโทรศัพท์ของผู้ใช้ - สกุลไฟล์:
กรอกหมายเลขต่อของผู้ใช้ - โทรศัพท์มือถือ โทรศัพท์:
ป้อนหมายเลขโทรศัพท์มือถือสําหรับผู้ใช้ - ที่อยู่:
กรอก URL หน้าเว็บสำหรับผู้ใช้ - ชื่อสไกป์:
กรอกชื่อ Skype สำหรับผู้ใช้
- โทรศัพท์:
-
สถานที่
- ภาษา:
เลือก ภาษาที่ผู้ใช้จะใช้ใน Kintone. - เขตเวลา:
เลือก โซนเวลาของผู้ใช้
- ภาษา:
-
ชื่อที่แสดง ในภาษาที่แตกต่างกัน
- ภาษาที่แสดง:
เลือก ภาษาอื่นที่ผู้ใช้จะใช้ใน Kintone - ชื่อที่แสดง ในภาษาต่างๆ:
ป้อนชื่อที่จะแสดงเป็นภาษาอื่นที่ระบุใน Kintone หากไม่ได้ระบุชื่อที่นี่ ชื่อที่ตั้งไว้ภายใต้ ชื่อที่แสดง จะแสดงเป็นชื่อผู้ใช้ใน Kintone
- ภาษาที่แสดง:
-
อื่นๆ
สำหรับรายละเอียดเกี่ยวกับวิธีการกำหนดค่าการตั้งค่า ตัวเลือก โปรดดูที่หน้าต่อไปนี้
รายการข้อมูลของผู้ใช้งาน -
ลำดับการแสดง
- ลำดับการแสดง:
ระบุลําดับความสําคัญสําหรับการแสดงผู้ใช้บนหน้าจอการเลือกผู้ใช้และในรายการผู้ใช้อื่นๆ สําหรับรายละเอียด โปรดดูหน้าต่อไปนี้
การเปลี่ยนลําดับการแสดงผลของผู้ใช้
- ลำดับการแสดง:
-
-
คลิก เพิ่มผู้ใช้
-
กล่องโต้ตอบ เพิ่มผู้ใช้ จะปรากฏขึ้น เลือก ว่าจะส่งรหัสผ่านและข้อมูลการเข้าสู่ระบบของผู้ใช้ไปยังพวกเขาทางอีเมลหรือไม่
- หากต้องการส่งอีเมลถึงผู้ใช้: คลิก พรีวิว อีเมล แก้ไข ช่องที่อยู่อีเมล และ เนื้อหา ข้อความ หากจำเป็น และเลือก ส่ง
- หากไม่ต้องการส่งอีเมลถึงผู้ใช้ ให้คลิก เพิ่มผู้ใช้โดยไม่ส่งอีเมล จากนั้นแจ้งข้อมูลต่อไปนี้ให้ผู้ใช้ทราบ
- URL การเข้าถึงของ Kintone (ตัวอย่าง: https:// subdomain-name.kintone.com/k/)
- ชื่อล็อกอิน
- รหัสผ่าน
การตั้งค่าความปลอดภัย ผู้ใช้งาน
คุณลักษณะด้านความปลอดภัยต่อไปนี้มีไว้เพื่อควบคุมการเข้าถึงของผู้ใช้ โปรดพิจารณาใช้ตามความจำเป็น
การลงชื่อเข้าใช้ครั้งเดียวพร้อมการตรวจสอบสิทธิ์ SAML
ผู้ใช้สามารถลงชื่อเข้าใช้ครั้งเดียว (SSO) ใน Kintone ได้โดยใช้บัญชีผู้ใช้ที่ลงทะเบียนกับผู้ให้บริการข้อมูลประจำตัว (IdP)
สำหรับรายละเอียดเพิ่มเติมโปรดดูที่หน้าถัดไป
การตรวจสอบสิทธิ์ SAML
การยืนยันตัวตนแบบสองขั้นตอน (ใช้แอปยืนยันตัวตน)
ผู้ใช้จะต้องป้อนรหัสยืนยันที่ได้รับจากแอปพลิเคชันตรวจสอบสิทธิ์ (เช่น Google Authenticator และ Microsoft Authenticator) ควบคู่ไปกับชื่อผู้ใช้และรหัสผ่าน วิธีนี้ช่วยให้ผู้ใช้สามารถเข้าสู่ Kintone ได้อย่างปลอดภัยยิ่งขึ้น
สำหรับรายละเอียดเพิ่มเติมโปรดดูที่หน้าถัดไป
การยืนยันตัวตนแบบสองปัจจัย
การจำกัดที่อยู่ IP
คุณสามารถจำกัดเครือข่ายที่สามารถเข้าถึง Kintone ได้โดยใช้ที่อยู่ IP
สำหรับรายละเอียดเพิ่มเติมโปรดดูหน้าถัดไป
การจำกัดที่อยู่ IP