Agregar vistas
Puede crear vistas adicionales para mostrar registros en su aplicación que muestren ciertos campos de registro o tengan condiciones de filtrado de registros específicas aplicadas.
Los pasos para configurar una vista son los siguientes.
Establecer un nombre para la vista
-
Haga clic en el ícono de configuración de la aplicación (el ícono con forma de engranaje) en la parte superior derecha de la pantalla Vista.

-
En la pantalla de configuración de la aplicación, haga clic en la pestaña Vista.
-
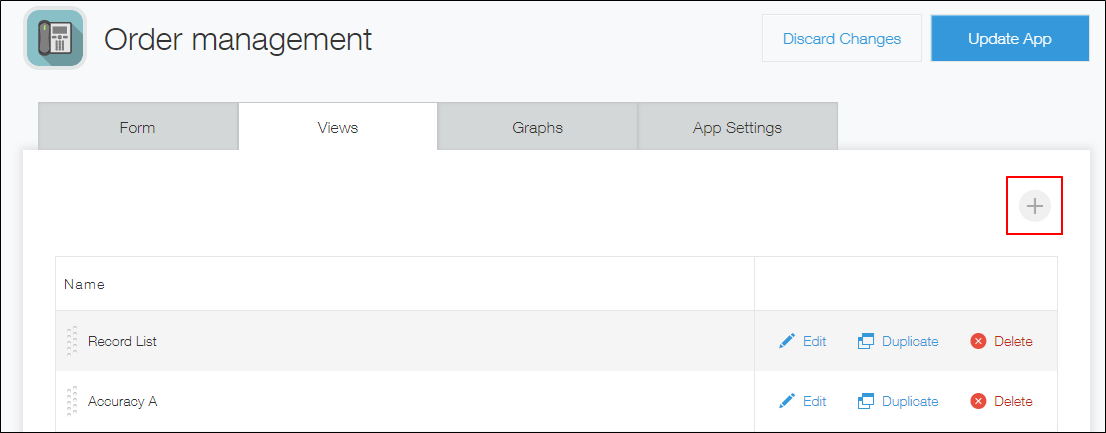
Haga clic en el ícono Agregar vista (el ícono con forma de signo más) a la derecha de la pantalla.
-
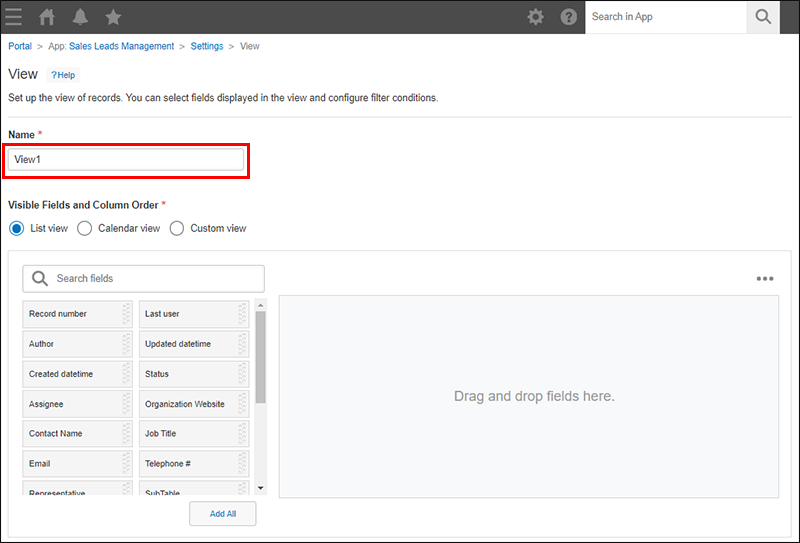
En la pantalla Vista, ingrese un nombre de vista en la sección Nombre.
Establezca un formato de visualización de la vista y los campos que se mostrarán
-
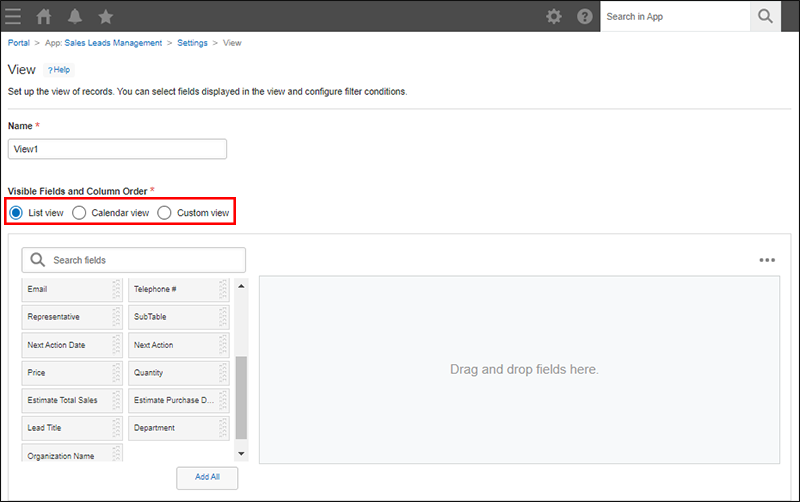
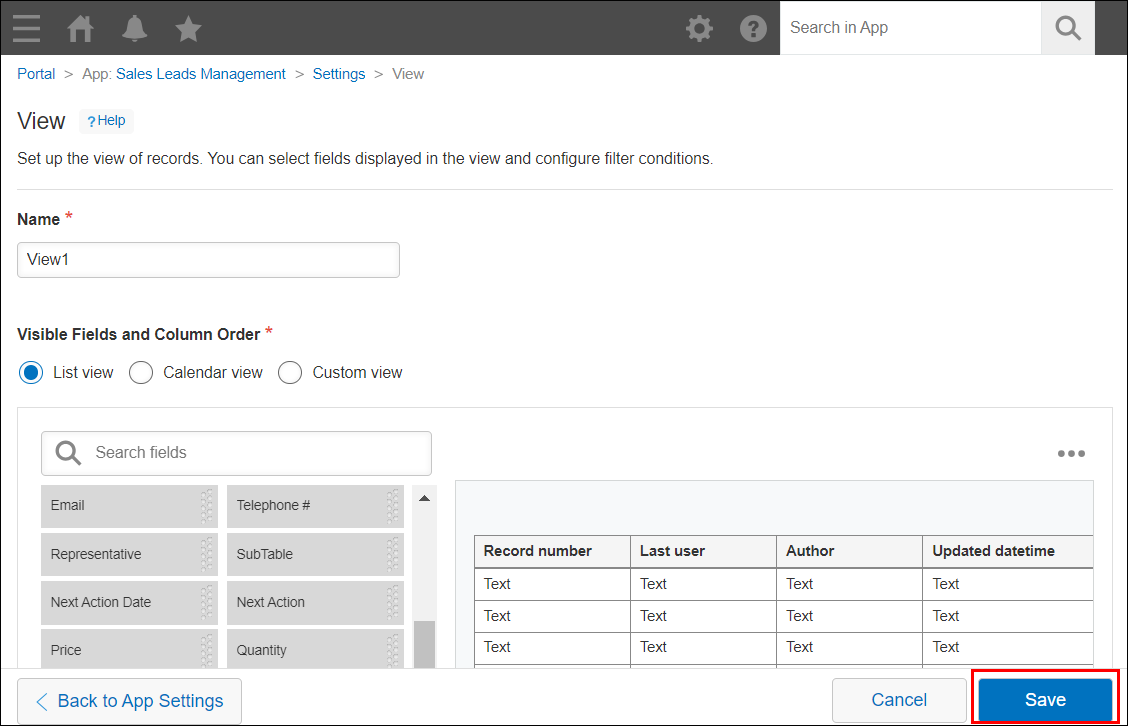
Especifique un formato de visualización en la sección Campos visibles y orden de columnas.
Se pueden seleccionar los siguientes tres formatos de visualización.- Vista de lista
- Vista de calendario
- Vista personalizada
Para crear o editar una vista personalizada, se requiere el permiso administrativo Kintone. Si no lo tiene, la opción Vista personalizada Kintone no se mostrará en la sección "Campos visibles y orden de columnas" de la pantalla Configuración de Vista.
-
Configurar lo que se mostrará en la vista. Los ajustes que se pueden configurar dependen del formato de visualización que seleccionó.
Si seleccionó "Vista de lista"
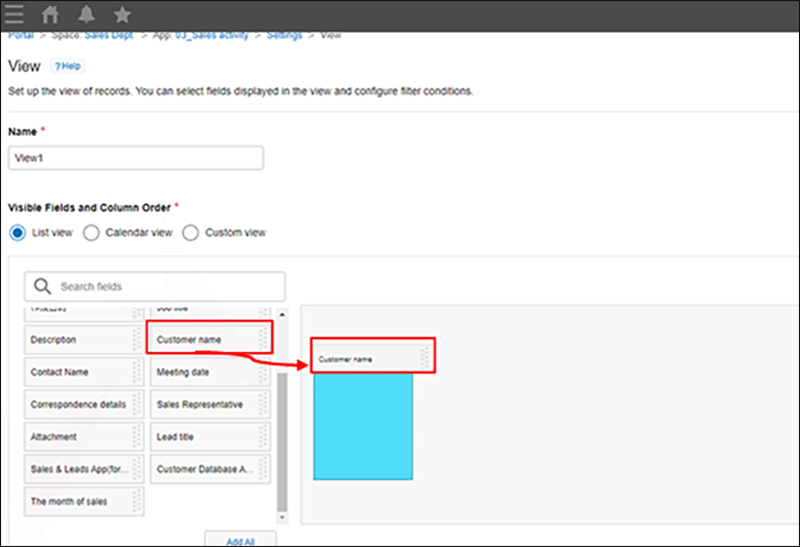
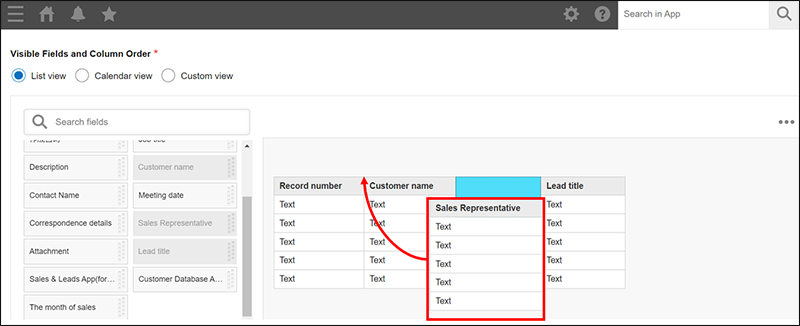
Coloca los campos que deseas que se muestren en la pantalla Vista.
Para colocar campos, arrástrelos desde la lista del lado izquierdo de la pantalla y suéltelos en el área de la derecha.
Campos se muestran en la pantalla Vista en el orden en que aparecen en el área del lado derecho de la pantalla.
Puede reordenar los campos colocados arrastrándolos y soltándolos.
Si desea eliminar campos uno por uno, haga clic en el ícono Ajustes (el ícono con forma de engranaje) a la derecha de cada campo y seleccione Elim..

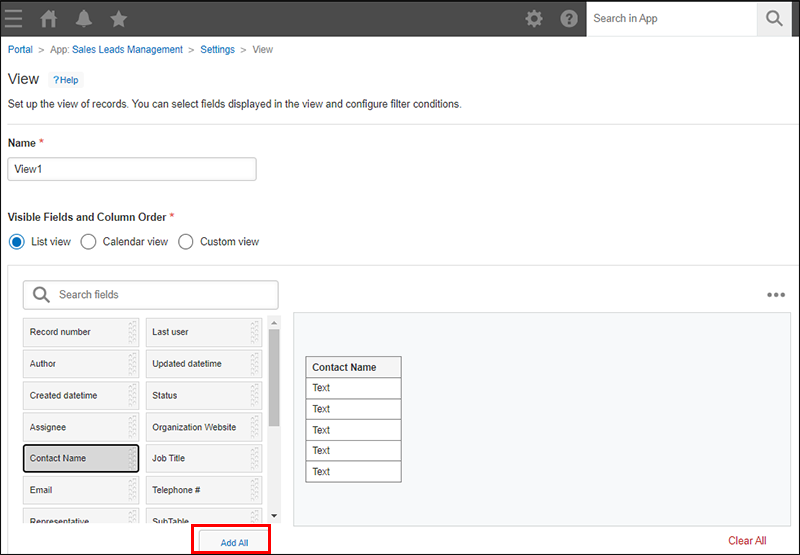
Agregar todos los campos disponibles
Para agregar todos los campos disponibles, haga clic en Añadir todo.
Esto le permite agregar todos los campos restantes con un solo clic, sin necesidad de arrastrar y soltar los campos uno por uno.
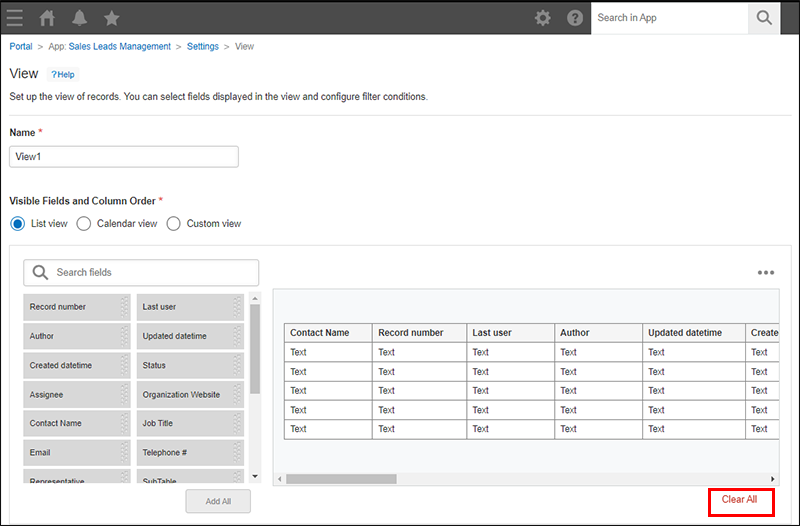
Borrar todos los campos
Para borrar todos los campos que se han colocado, haga clic Borrar todo.
Esto es útil cuando desea editar una vista ya configurada o cuando desea restablecer el orden de los campos y comenzar desde el principio.
Si seleccionó "Vista de calendario"
Configure los ajustes de Fecha y Título.
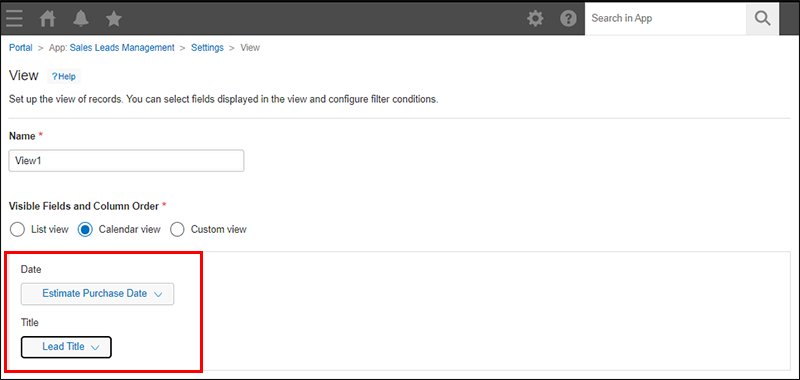
Fecha
Seleccionar un campo para especificar en qué fecha desea mostrar los títulos del calendario.
Registros se mostrarán en el calendario según la fecha o la fecha y hora especificadas en el campo.
Puede seleccionar los siguientes tipos de campos.
- Fecha/hora creación
- Fecha/hora de actualización
- Fecha
- Fecha y hora
Título
Seleccionar un campo que se mostrará como título en el calendario.
Puede seleccionar los siguientes tipos de campos.
- Número de registro
- Texto
- Área de texto
- Texto enriquecido
- Adjunto
- Selección del usuario
- Selección departamento
- Selección grupo
- Creado por
- Actualizado por
- Asignatario
- Número
- Calculado
- Enlace
- Búsqueda
Si seleccionó "Vista personalizada"
Configure las opciones Usar esta vista en, Activar la paginación y HTML.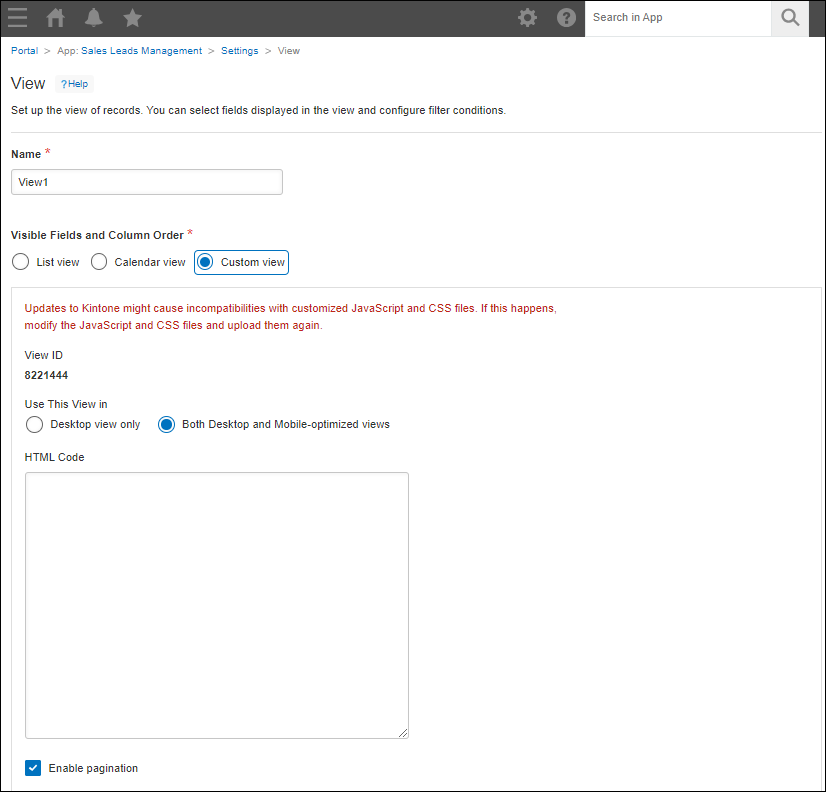
Utilice esta vista en
Seleccionar Solo vista de escritorio o Vistas optimizadas para escritorio y dispositivos móviles.
Vista ID
Muestra el ID de la vista. El ID se asigna automáticamente.
Activar la paginación
Si se selecciona esta casilla de verificación, la paginación se muestra en la pantalla Vista.
HTML
Escriba código HTML para la vista.
Las siguientes etiquetas no son necesarias:
<html>
<head>
<body>
No se puede utilizar código JavaScript. Si desea utilizar JavaScript, utilice la función de personalización de JavaScript y CSS.
Establecer las condiciones para mostrar registros en la vista
Si es necesario, configure las condiciones para mostrar registros en la pantalla Vista.
En la sección Filtrar, especifique uno o varios campos por los que filtrar los registros, junto con las condiciones de filtrado.
Cuando especifique las condiciones de filtro, consulte la página siguiente.
Filtrado de registros para mostrar en una vista
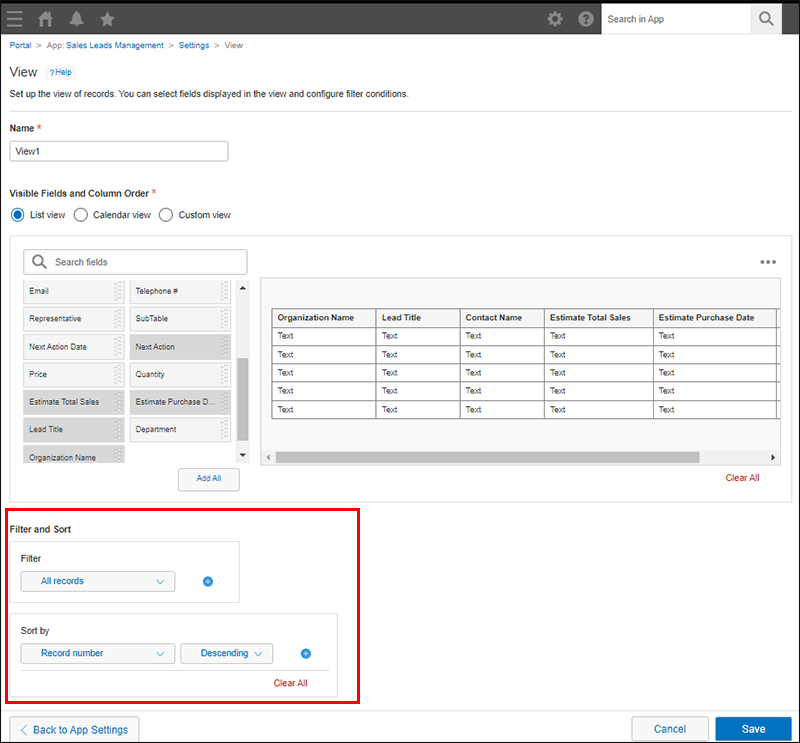
Establecer el orden de visualización de los registros que se muestran en la vista
Si es necesario, configure el orden de visualización de los registros que se muestran en la pantalla Vista.
En la sección Ordenar por, especifique el orden de visualización de los registros. Puede especificar hasta cinco condiciones de orden de visualización.
Guardar la configuración de la vista
-
Haga clic en Guardar en la parte inferior derecha de la pantalla Vista.
-
En la pantalla de configuración de la aplicación, haga clic en Actualizar aplicación.
-
En el cuadro de diálogo Actualizar aplicación, haga clic en Actualizar aplicación.