Enabling/Disabling Slack Integration
Integrating Kintone with Slack enables users to receive a notification via Slack direct message when they are set as an assignee of a record.
This is beneficial if users are managing tasks using Kintone apps and Slack.
Prerequisites for using Slack Integration
- The e-mail address registered in Kintone must match the e-mail address registered in the Slack workspace.
- Slack Integration can also be set up for apps in private spaces or guest spaces.
Guest users can also receive Slack Integration notifications if their e-mail address registered in Kintone matches the e-mail address registered in the Slack workspace. - Slack Integration cannot be used when Department Access Control is enabled. Make sure that Department Access Control is disabled.
Reference: Restricting the Ability to View User Profile and Department Information of Users in a Different Department
Overview of the steps to set up Slack Integration
To set up Slack Integration, follow the steps below.
1. Set the e-mail address to be used for receiving Slack Integration notifications.
2. Enable external integrations on the "Users & system administration" screen.
3. Configure the Process Management settings in the Kintone App Settings.
4. Set up Slack Integration in the Kintone App Settings.
The following sections describe the details of each step.
Setting the e-mail address to be used for receiving Slack Integration notifications
The same e-mail address must be set for Kintone and the Slack workspace.
This section explains how to set an e-mail address for Kintone via the "Users & system administration" screen.
To carry out the steps described below, you need to have Kintone users & system administrative permission.
-
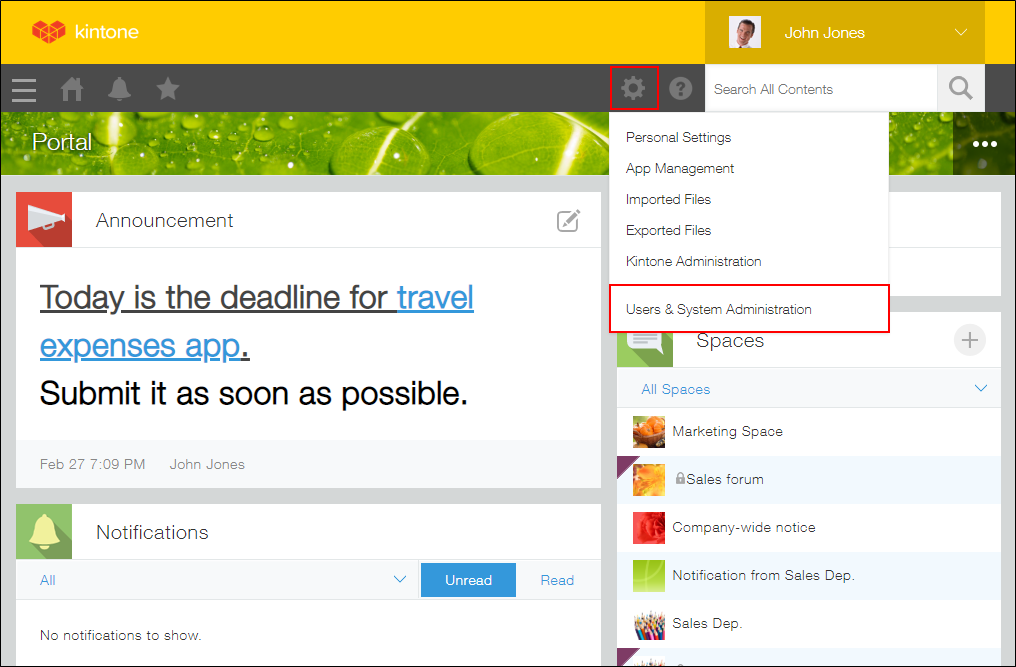
Click the Settings icon (the gear-shaped icon at the top of Kintone), then click Users & system administration.
-
Click Departments & Users under User Administration, then click the Change User Information icon to the left of the user for whom you want to set an e-mail address.
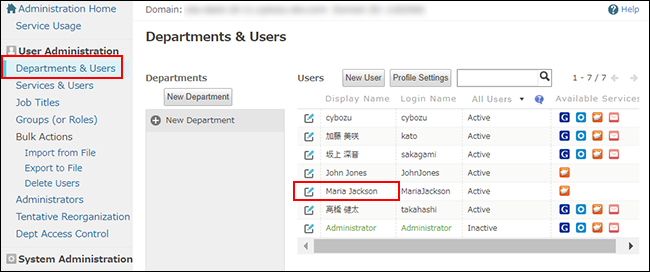 The "Change User Information" screen will appear.
 -
Enter an e-mail address and then click Save.
Enabling external integrations
Enable external integrations on the "Users & system administration" screen. Enabling external integrations here allows you to set up Slack Integration on each app.
To carry out the steps described below, you need to have Kintone users & system administrative permission.
-
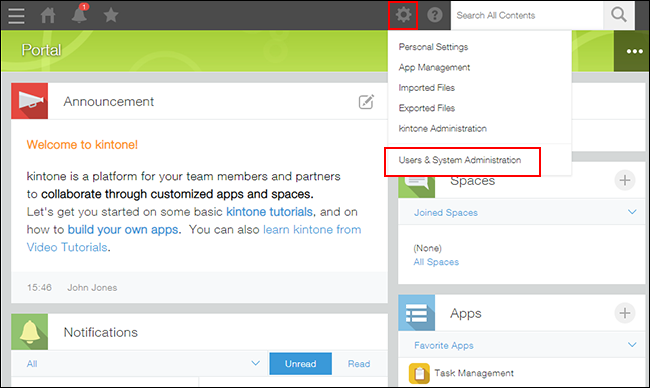
Click the Settings icon (the gear-shaped icon at the top of Kintone), then click Users & system administration.
-
Click OAuth under Integrations.
-
Toggle on the option for Slack to change the state to Enabled.
Configuring the Process Management settings on the Kintone app
Configure the Process Management setting on the Kintone app for which you want to set up Slack Integration.
Configuring the Process Management setting
If you are already using the Process Management feature on the app, proceed to the next step.
Setting up Slack Integration
-
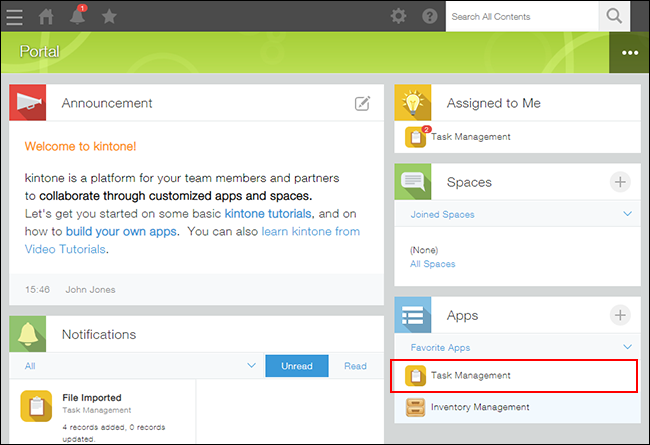
On Portal of your Kintone, click the Kintone app you want to integrate with Slack.
Here, for the purpose of explanation, you will open the "Task Management" app.
-
Click the App Settings icon (the gear-shaped icon) at the upper right of the "View" screen.

-
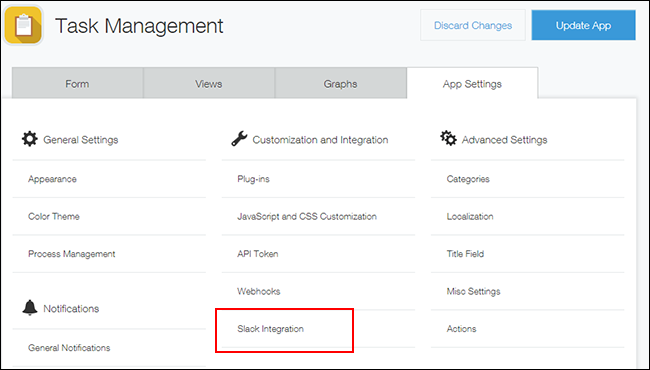
Select the App Settings tab in App Settings, then click Slack Integration under Customization and Integration.
-
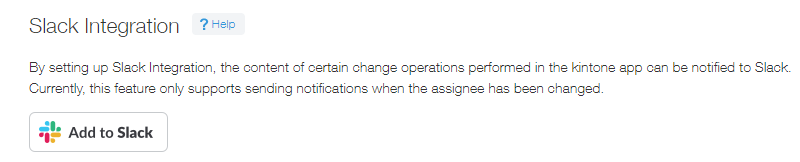
Click Add to Slack on the "Slack Integration" screen.
-
On Slack, check the Slack workspace that you want to integrate with your app, then click Authorize.
In this example, the app will be integrated with the Slack workspace "Cybozu". If you want to change the Slack workspace to integrate, click the down arrow on the drop-down at the upper right of the screen. -
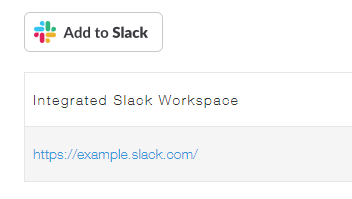
On the "Slack Integration" screen of the Kintone app, check that the URL of the integrated Slack workspace is displayed.
On your Slack, a bot user "Kintone" is added to Apps.
-
Click Back to App Settings at the bottom left of the screen.
-
On the "App Settings" screen, click Update App.
-
On the "Update App" dialog, click Update App.
Sending a notification
Test to see if a notification is sent.
-
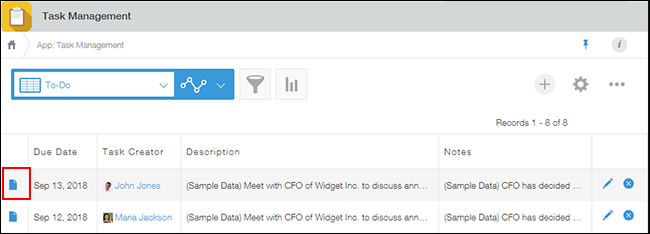
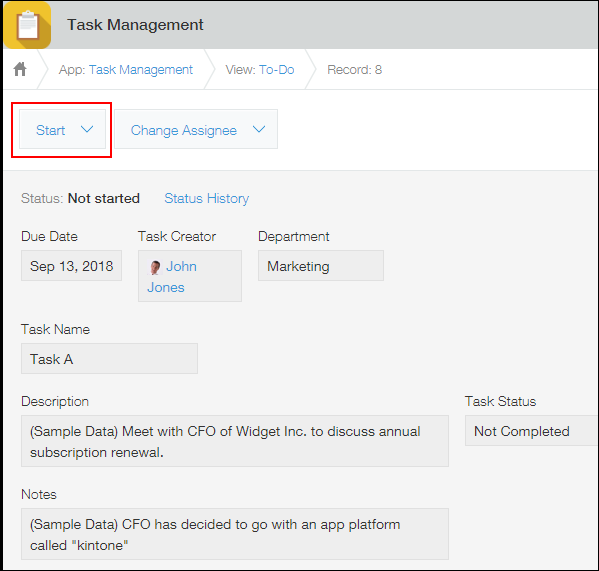
Navigate to the Kintone app you have integrated with Slack and open a record.
-
On the "Record Details" screen, click Start.
-
Select a user to assign the task to and click Confirm.
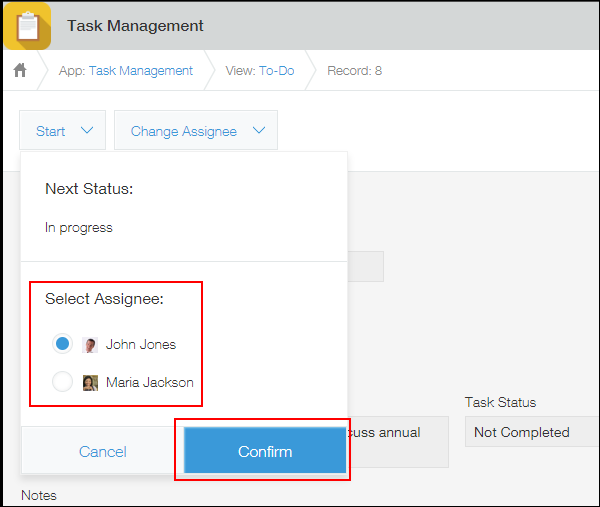
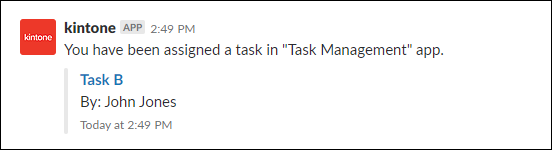
The assignee of the task receives a direct message on Slack.
The direct message displays the title of the record. In the following cases, the direct message displays the URL of the record: when record numbers are set as record titles, when the user who has become an assignee does not have permission to view the title, or when the title is empty.
Removing Slack Integration
Integration with a Slack workspace can be removed on the app settings screen.
-
Click the App Settings icon (the gear-shaped icon) at the upper right of the "View" screen.
-
Select the App Settings tab in App Settings, then click Slack Integration under Customization and Integration.
-
On the "Slack Integration" screen, click the Remove Integration icon to the right of the Slack workspace for which you want to remove integration, then click Remove.

-
Click Back to App Settings at the bottom left of the screen.
-
On the "App Settings" screen, click Update App.
-
On the "Update App" dialog, click Update App.