Inviting team members
During the Kintone 30-day free trial period, you can add members to Kintone using the Invitation feature.
Invite members of your department or project team to try out data sharing and communication using Kintone.
Using the Invitation feature from the "Welcome to Kintone!" dialog
When you log in to Kintone for the first time after signing up for a free trial, the "Welcome to Kintone!" dialog appears. You can use the Invitation feature from this welcome dialog.
-
Click Next in the welcome dialog.
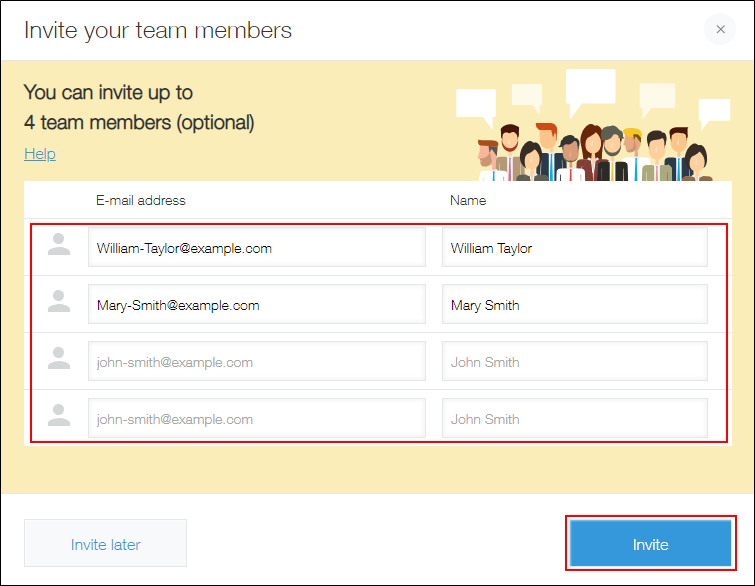
The "Invite your team members" dialog appears. -
Enter the e-mail addresses and the names of the members whom you want to invite. Then, click Invite.
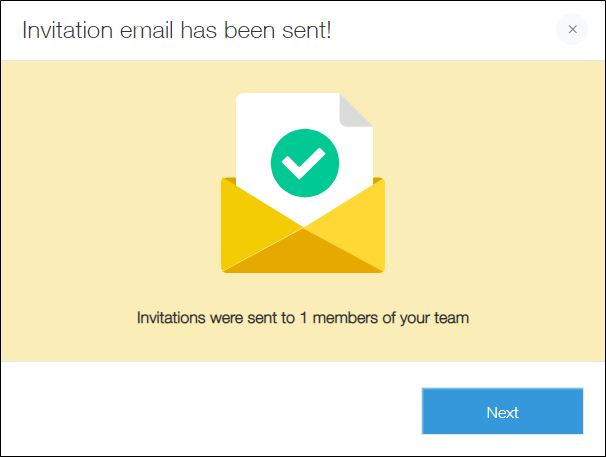
When the "Invitation email has been sent!" message appears, it means that the invitation has been successfully sent. When you click Next, the tutorial will start.
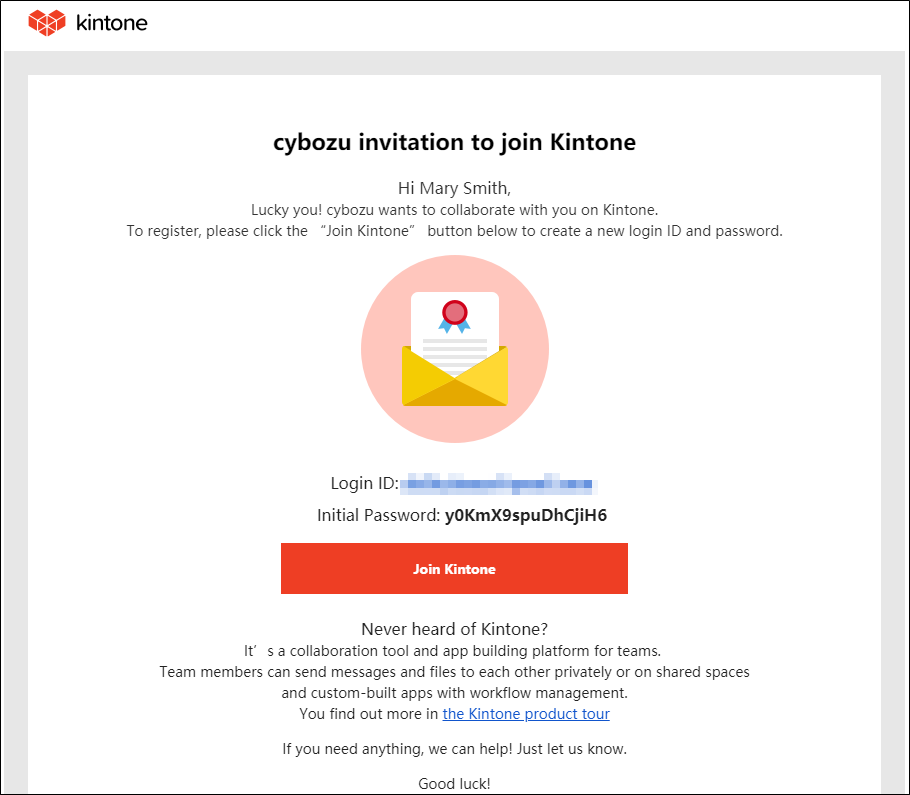
The invited members will receive the invitation e-mail.
Using the Invitation feature during the free trial period
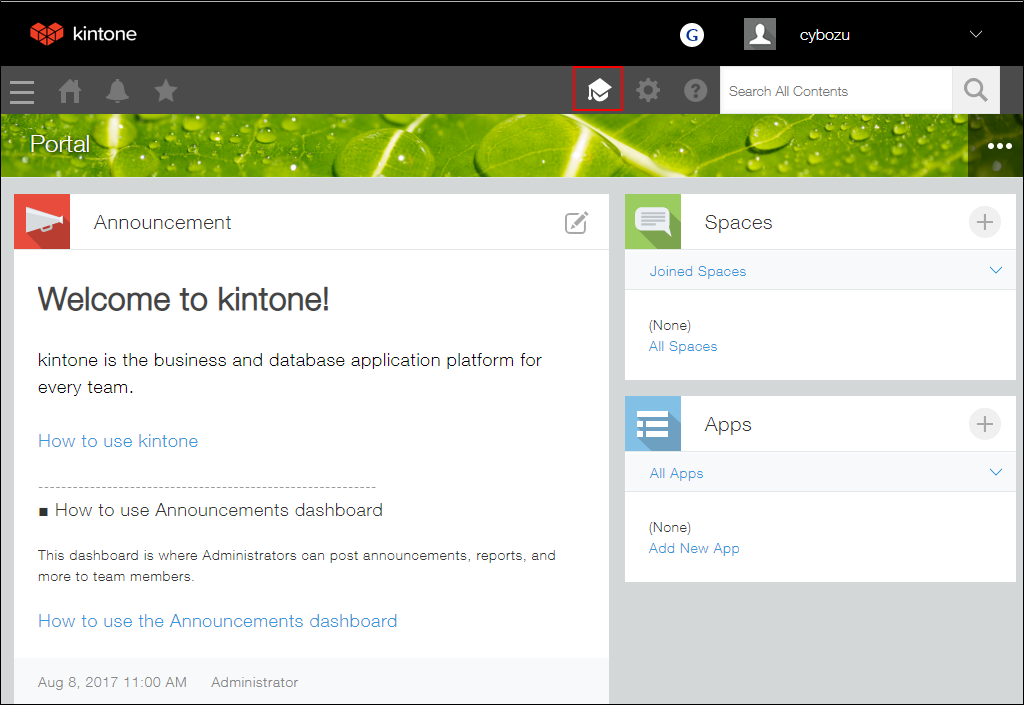
During the free trial period, you can click the school-cap icon located at the upper part of the screen to use the Invitation feature as many times as you want.
-
Click the school-cap icon at the upper part of the screen on Kintone.
-
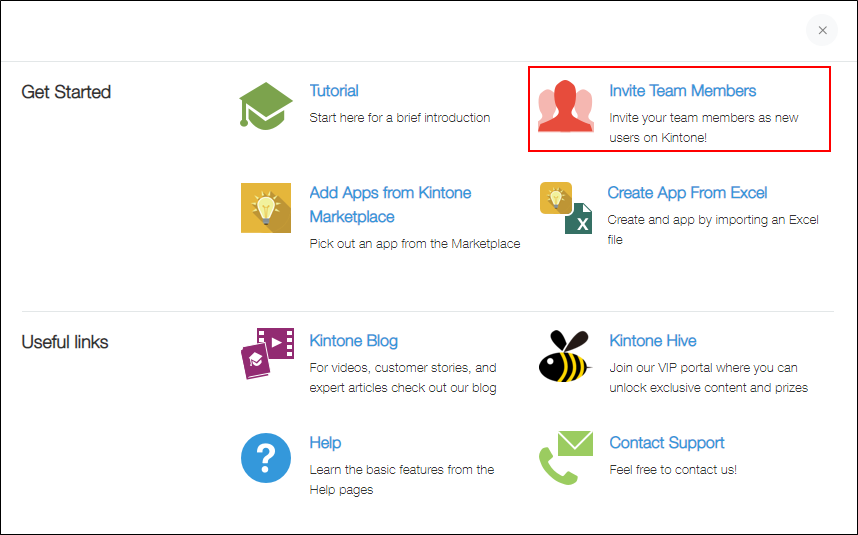
Click Invite Team Members.
-
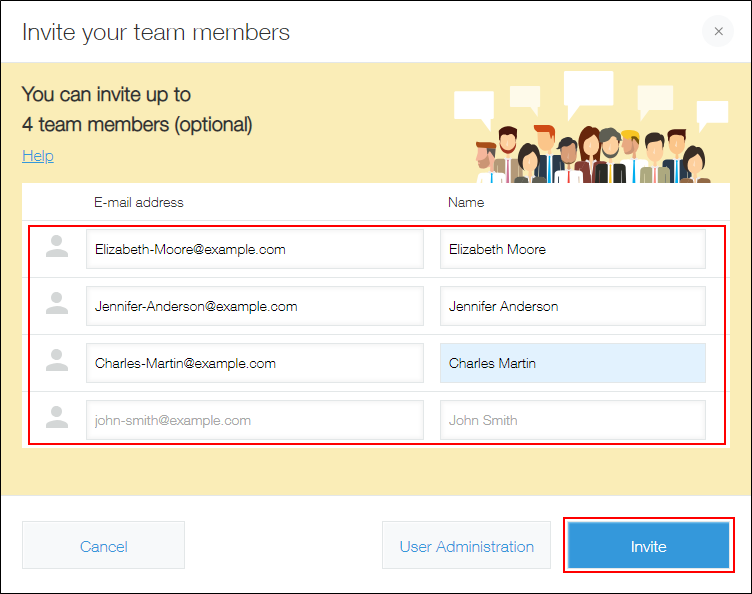
When the "Invite your team members" screen appears, enter the e-mail addresses and names of the members you want to invite and then click Invite.
When the "Invitation email has been sent!" message appears, it means that the invitation has been successfully sent. Click Next.
The invited members will receive the invitation e-mail.
