Creating a space for your team
A space plays a role of a place for your team; a space puts interactions and information necessary for your team in one place. You can create a space by team or by project, and then add whoever you want to invite as members.
This article provides you with step by step instructions on how to create a simple space. Let's start creating a space by performing the following steps and you will get to know hot to use your space.
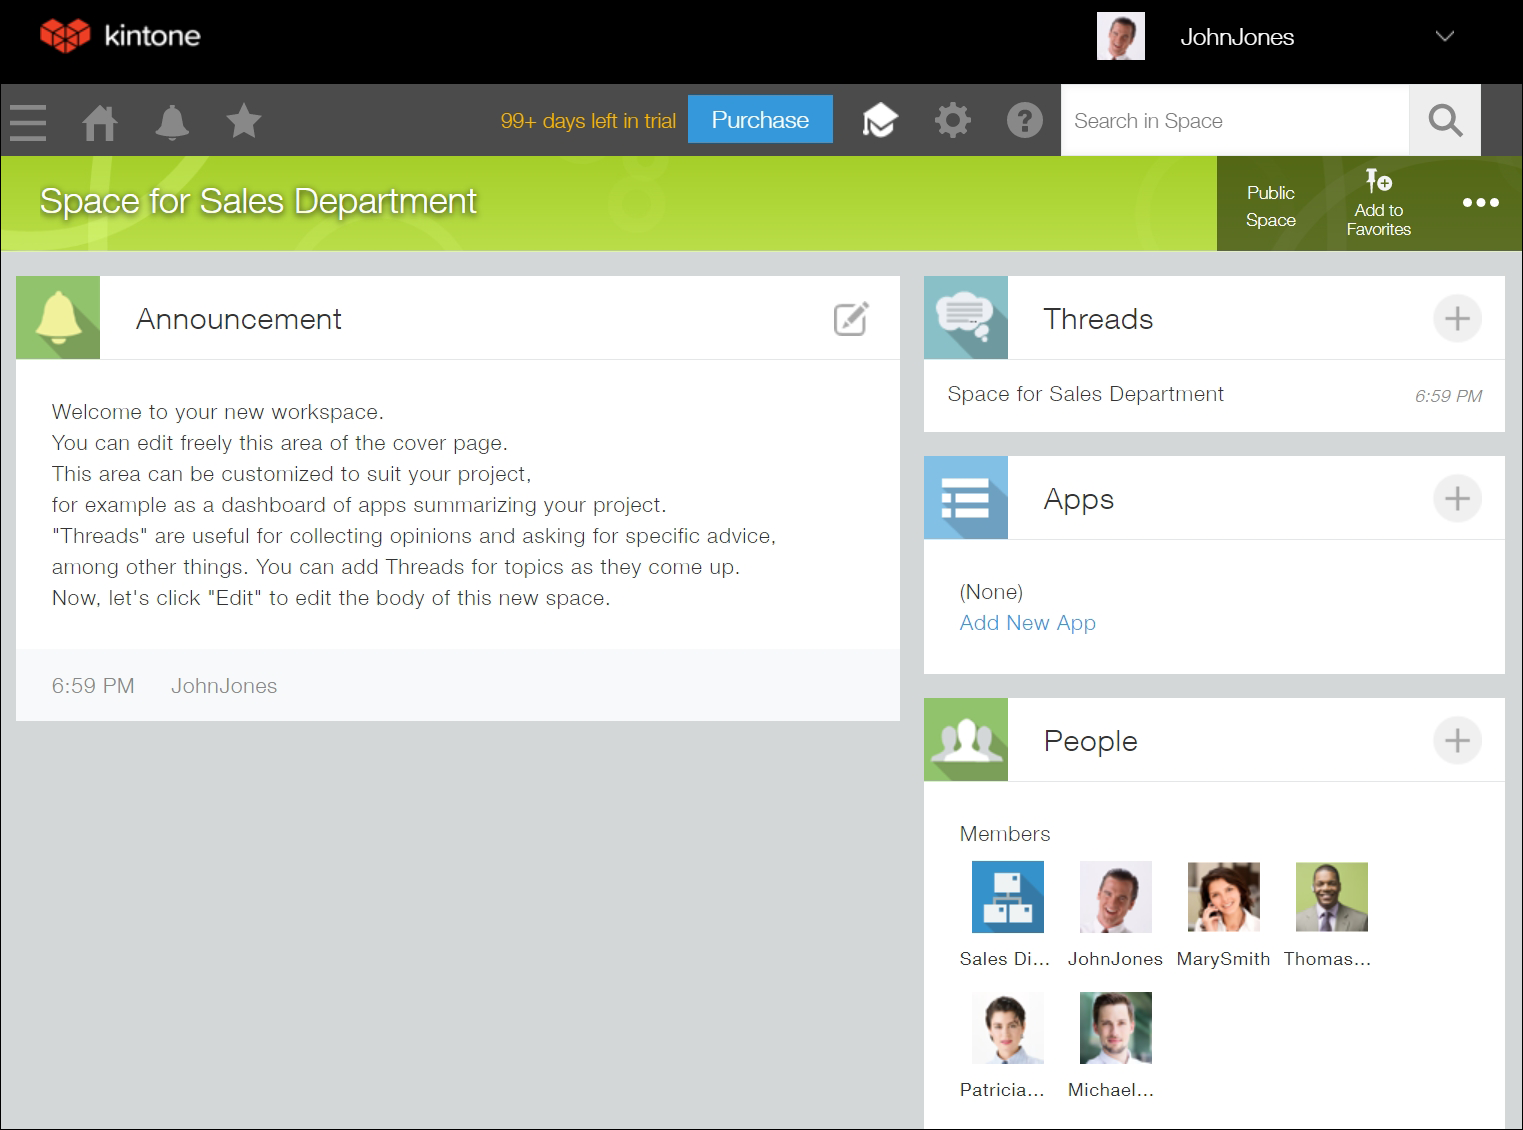
How a completed space will look
As an example, we will create a space called "Space for Sales Department" as shown below.

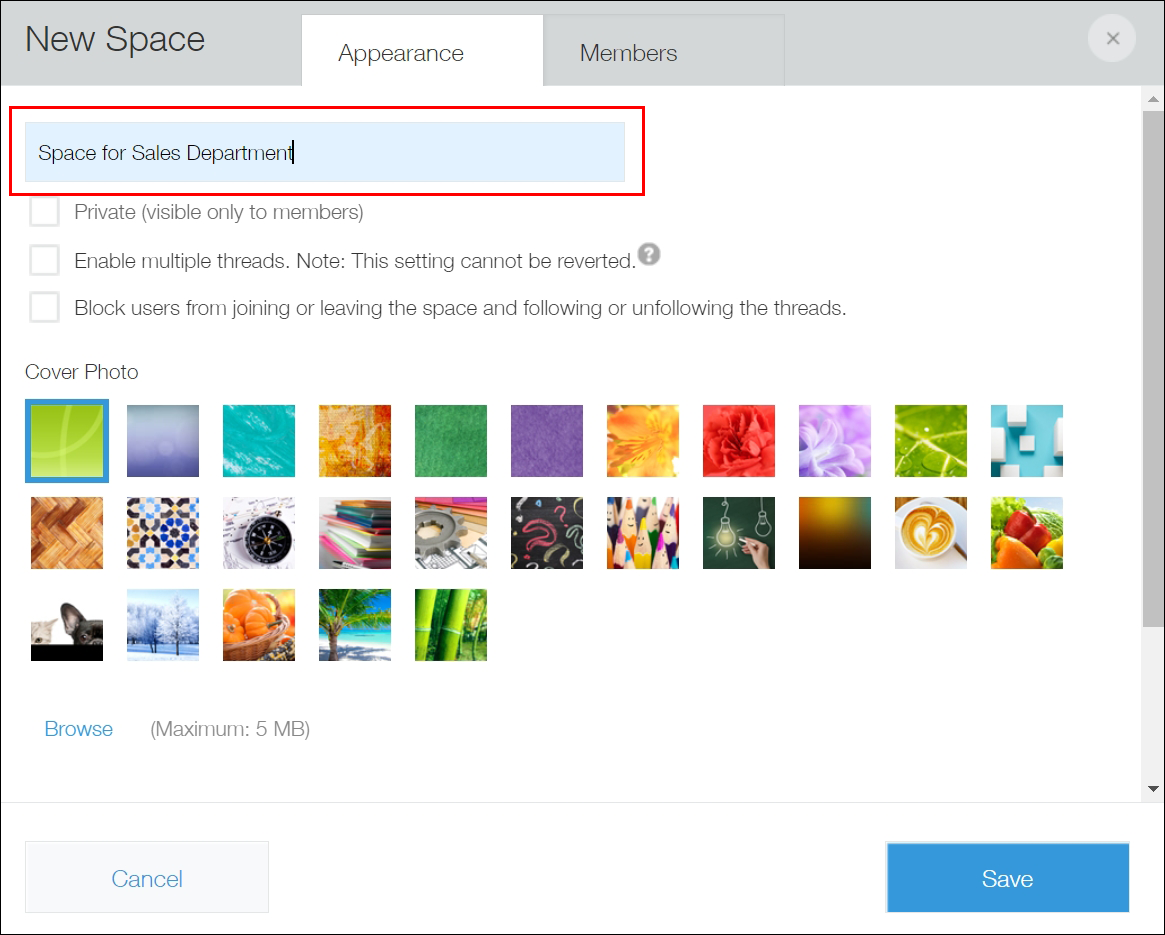
(1): Specify "Space for Sales Department" as the name of the space.
(2): A "thread" is a feature similar to a bulletin board and you can create threads by topic in your space. When you create a space, you can select whether you want to use multiple threads or a single thread. In this example, we will create a space with multiple threads enabled because we want to allow the creation of separate threads for various sales department-related topics.
(3): Add members of the sales department as space members.
Now, let's create the "Space for Sales Department".
-
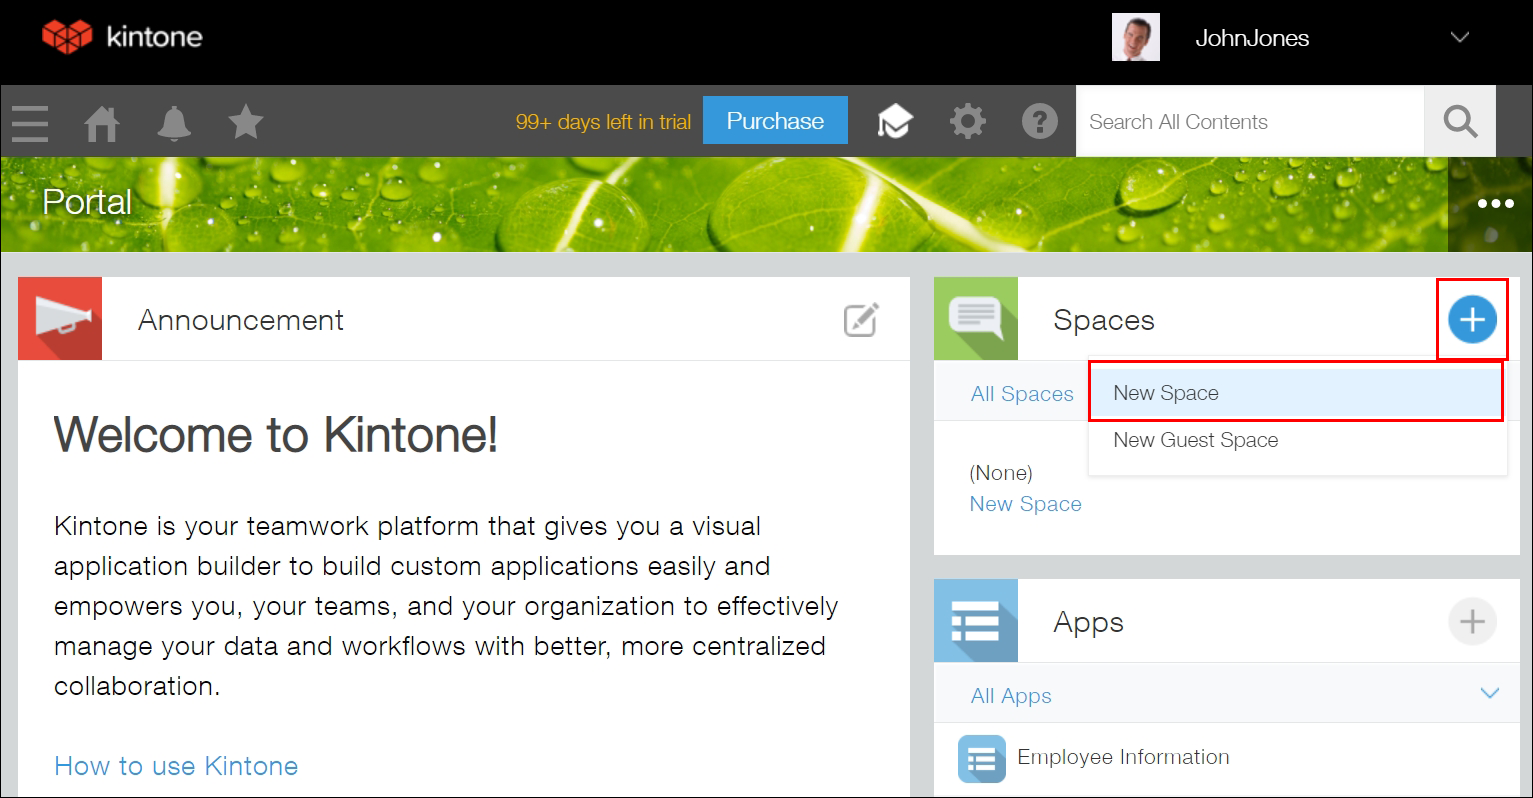
On the Kintone Portal, click the Create Space icon (the plus sign-shaped icon in the Spaces section), then click New Space.
-
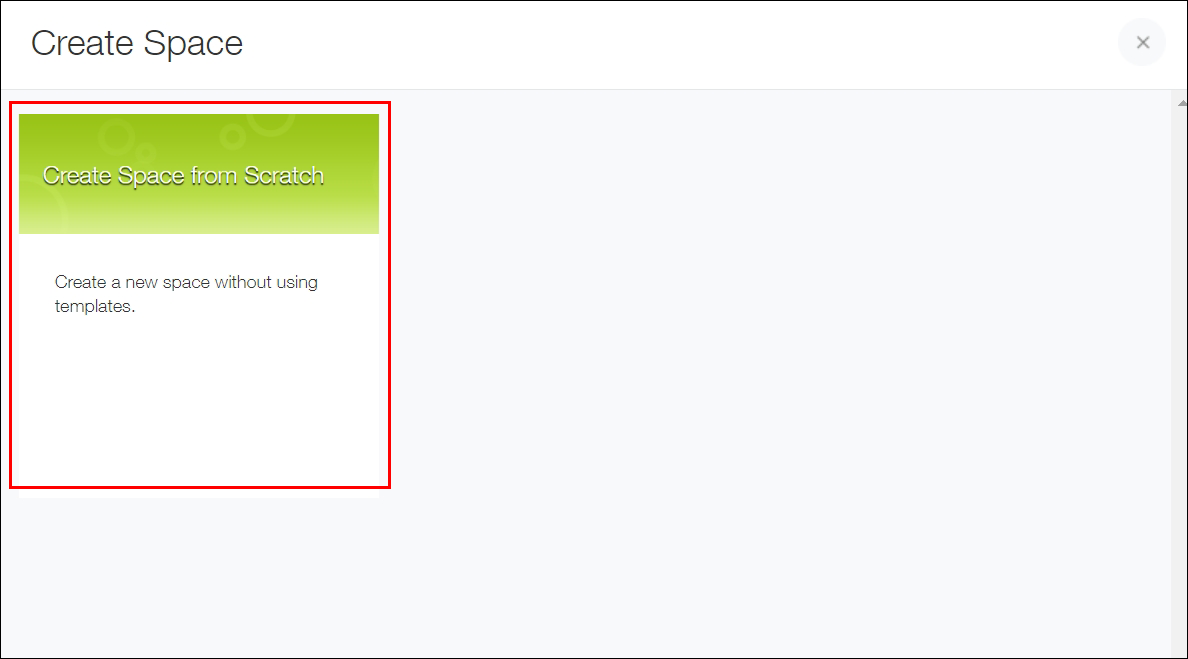
Click Create Space from Scratch.
-
On the Appearance tab, enter "Space for Sales Department" as the name of the space.
-
Select the Enable multiple threads checkbox.
Selecting this checkbox allows multiple threads to be created in the space. This lets you create separate threads for discussing various topics in the space (e.g., a thread for business meeting-related discussion, a thread for sharing business proposals).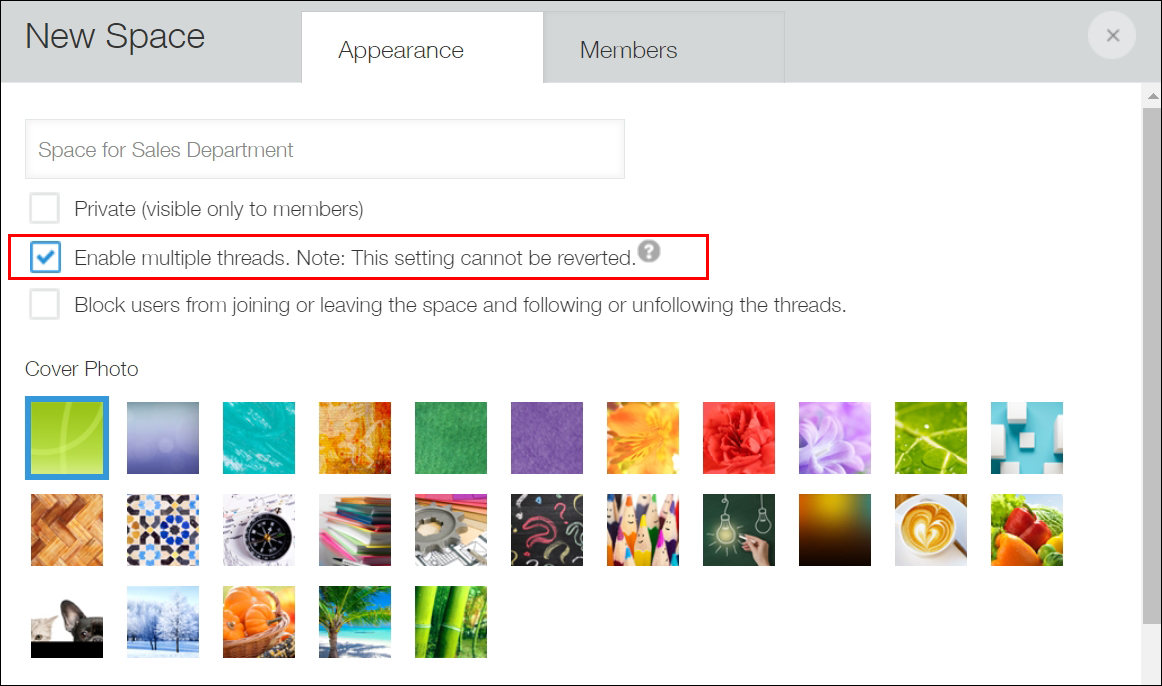
-
Click the Members tab.
-
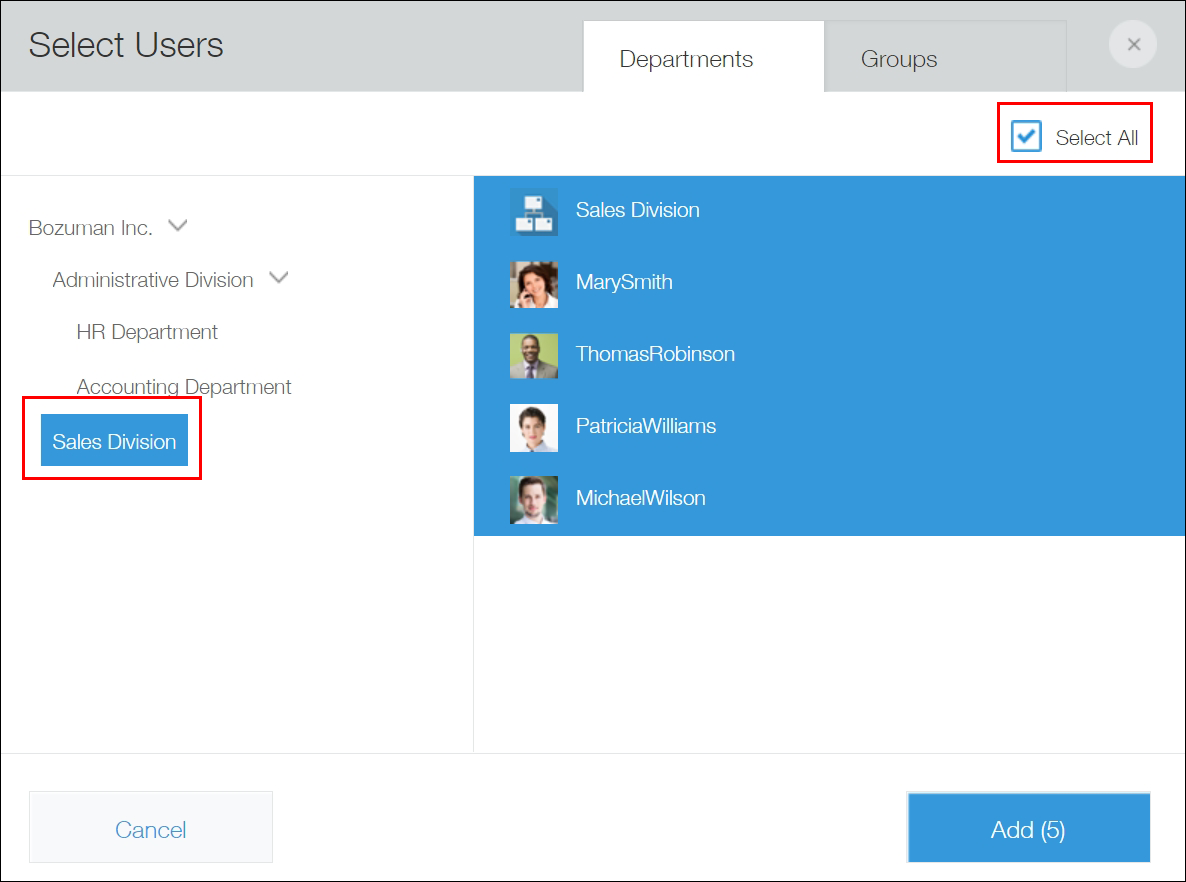
To add users as members of the space, either search for specific users or select a department or group by clicking the Select users from departments or groups icon to the right of the user search box, selecting a department or group, and clicking Add.
In this example, we want to add all of the members of the sales division, so click the Select users from departments or groups icon, select Sales Division, and then select the Select All checkbox in the upper right corner.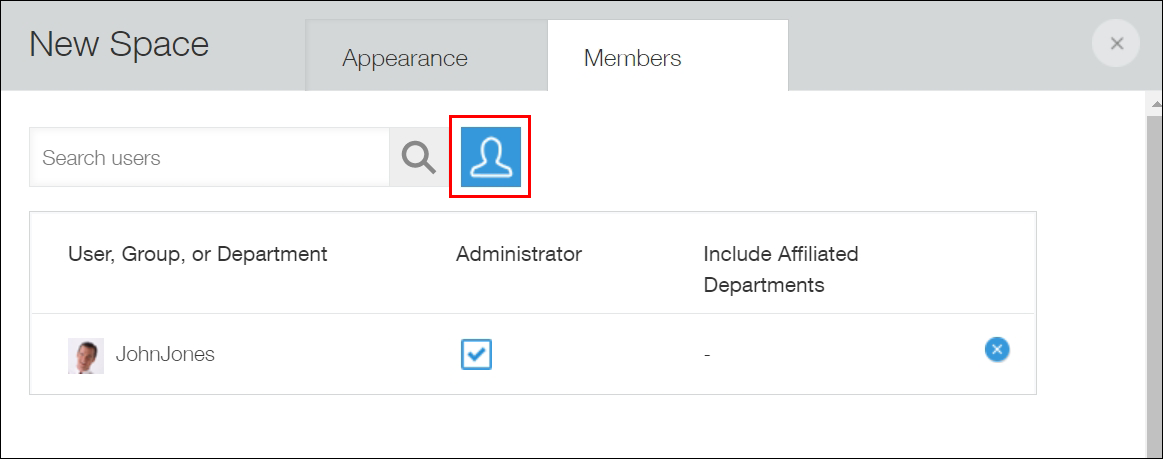
-
Click Save.
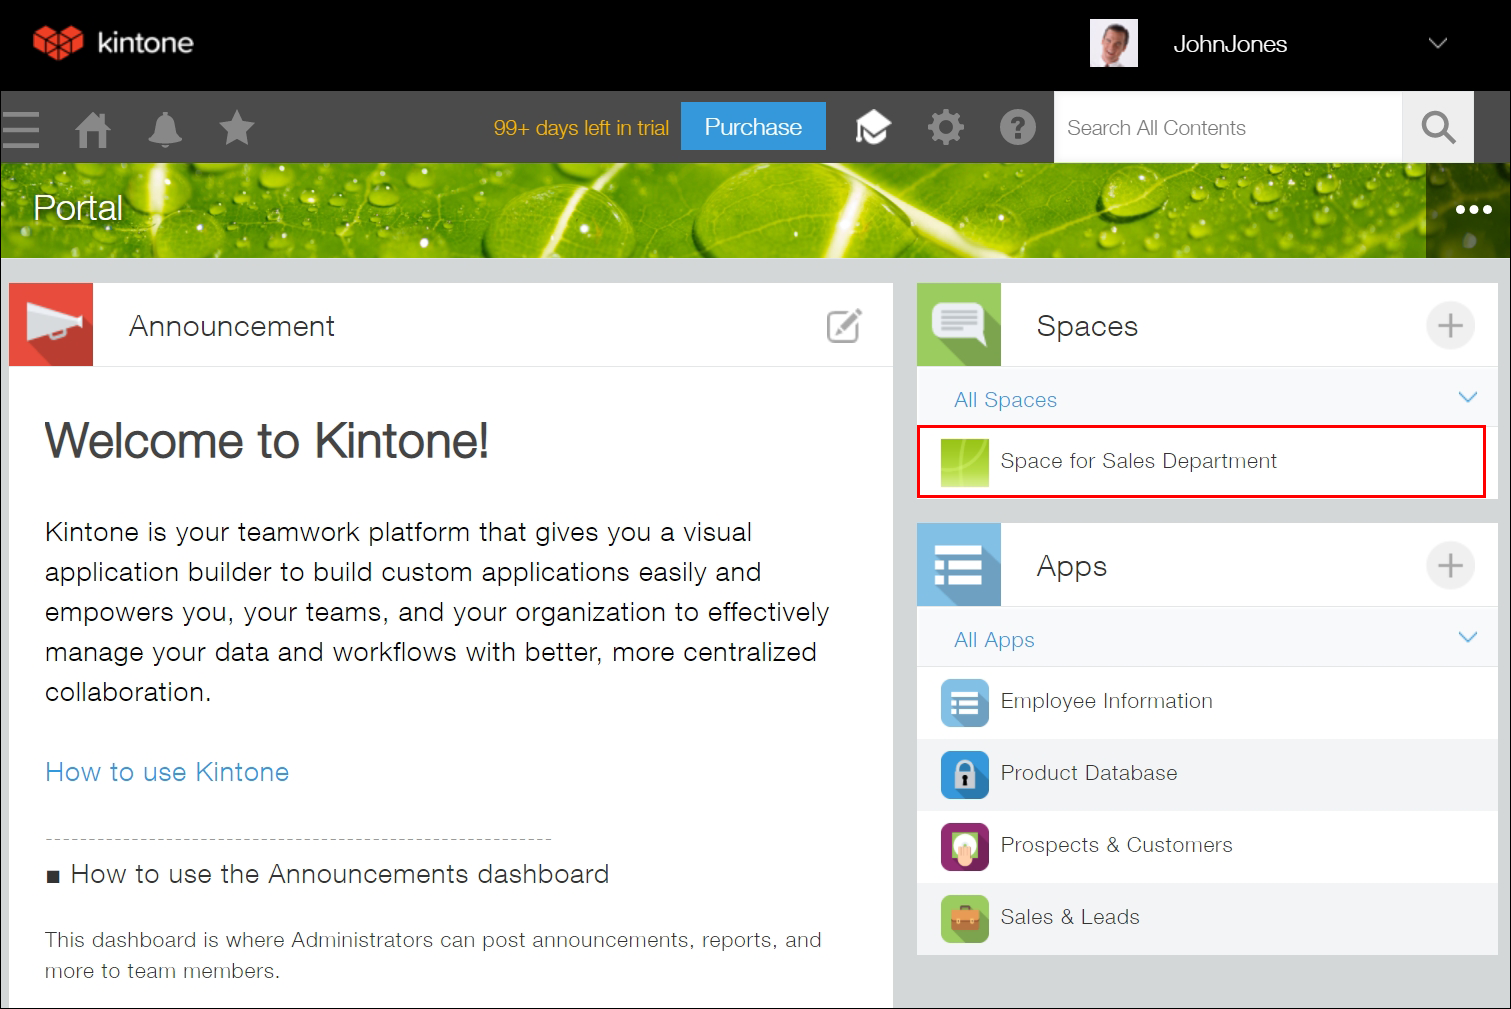
Now that you have finished creating your space, it should appear as shown below.
When you return to the top page of Kintone, you will see the "Space for Sales Department" in the "Spaces" section. You can click the name to open it. This space will be displayed for the users who are added as members of the space in Kintone.
Next, try creating a thread in the "Space for Sales Department" and posting in it with other members. Refer to Communicating with Team Members in a Thread.