
Check the app and record permissions, and configure the settings so that users are allowed to view the records that they create.
Configuring the "Permissions for app" settings
-
Click the App settings icon (the gear-shaped icon) at the upper right of the View screen.

-
On the App settings screen, select the App settings tab, and then click App under Permissions.
-
Grant the "View records" permission to the users you want to be able to view records.
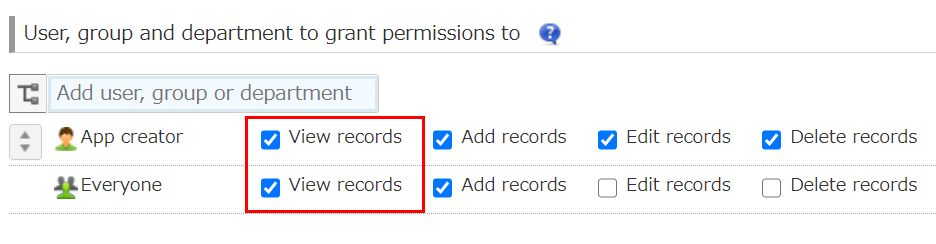
Example of granting the "View records" permission to all users:
-
Click Save on the upper left side of the screen.
-
Click Update app at the upper right of the screen.
-
On the confirmation dialog, click Update app.
Configuring the "Permissions for records" settings
The Permissions for records screen lets you set who can view individual records. By specifying field values as conditions, you can configure different permission settings for each record.
-
Click the App settings icon (the gear-shaped icon) at the upper right of the View screen.
-
On the App settings screen, select the App settings tab, then click Records under Permissions.
-
Under Target records, specify the conditions of the records for which you will set permissions.
-
Under User, group and department to grant permissions to, select the users to whom you want to give the "View" permission and select the View checkbox for them.
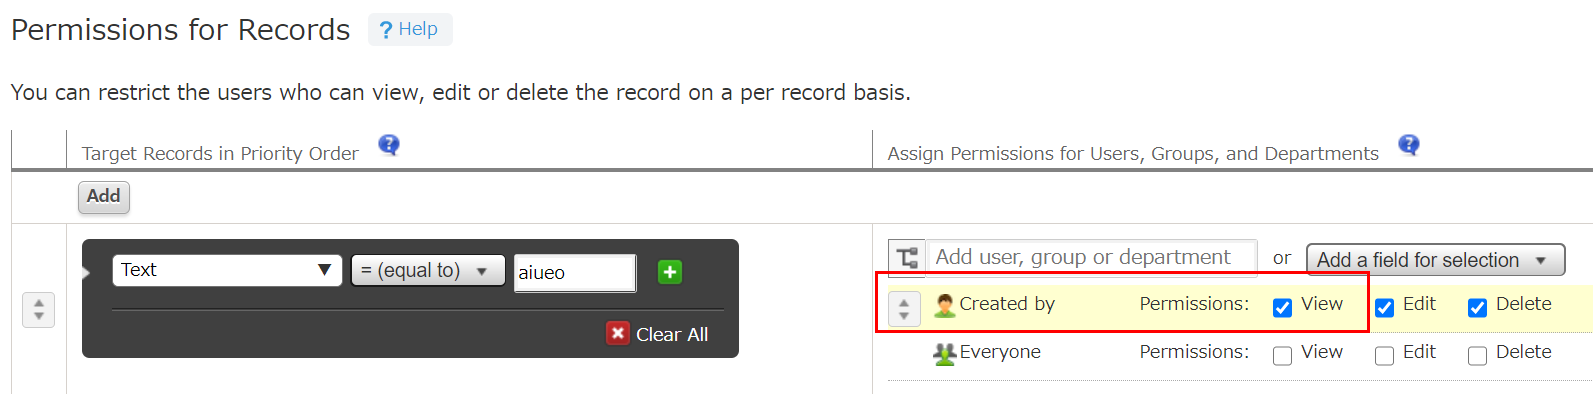
Example of granting permissions to the Created by user of a record when the record's Text field contains the value "aiueo":
-
Click Save on the upper left side of the screen.
-
Click Update app at the upper right of the screen.
-
On the confirmation dialog, click Update app.