Configurar Vista
Puede crear vistas y configurar sus ajustes para satisfacer sus necesidades. Por ejemplo, puede seleccionar los campos que se mostrarán en una vista o especificar condiciones de filtro de registros.
Los siguientes son los pasos para configurar una vista.
Paso 1: establecer un Ver nombre
-
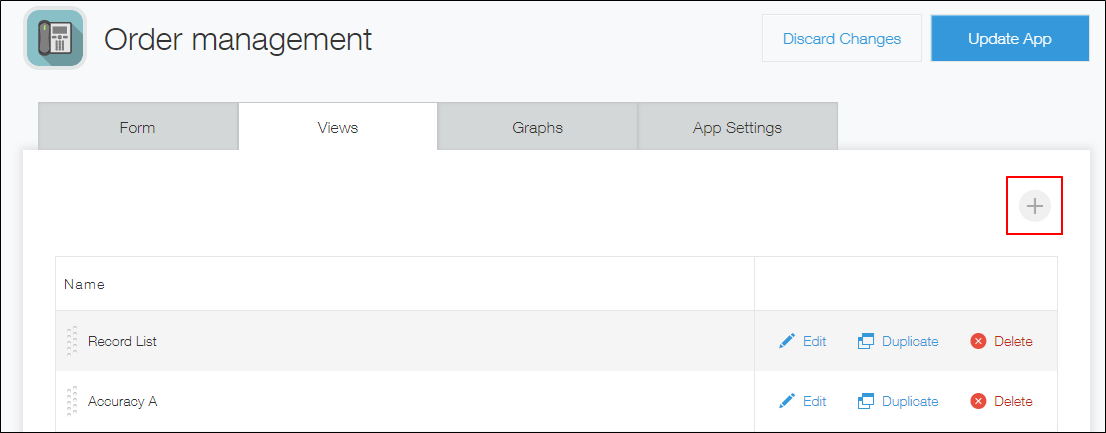
Haga clic en el ícono Ajustes app (el ícono con forma de engranaje en la parte superior derecha de la pantalla "Ver" de la aplicación), luego haga clic en la pestaña Vista.

-
Haga clic en el ícono Añadir nueva vista (el ícono con forma de signo más a la derecha de la pantalla).
-
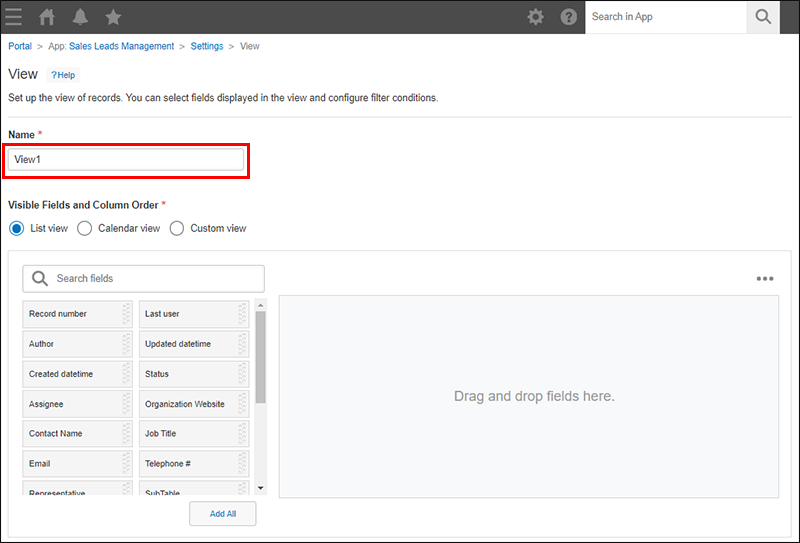
Ingrese un nombre de vista en la sección Nombre.
 Continúe con el Paso 2.
Paso 2: Especificar el formato de visualización de la Ver y los Campos que se mostrarán
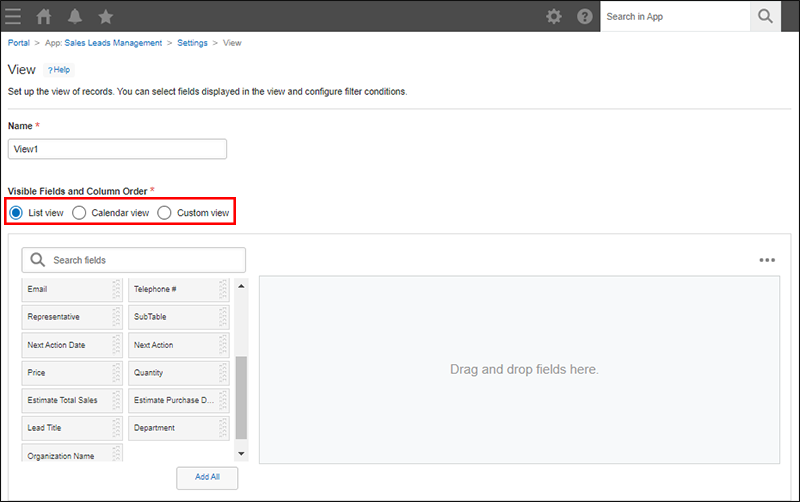
Specify a view display format in the Visible Fields and Column Order section.
To create or edit a custom view, Kintone administrative permission is required. If you do not have Kintone administrative permission, the Custom view option is not displayed in the Visible Fields and Column Order section on the View settings screen.
 Cuando haya configurado el formato de visualización, continúe con el Paso 3.
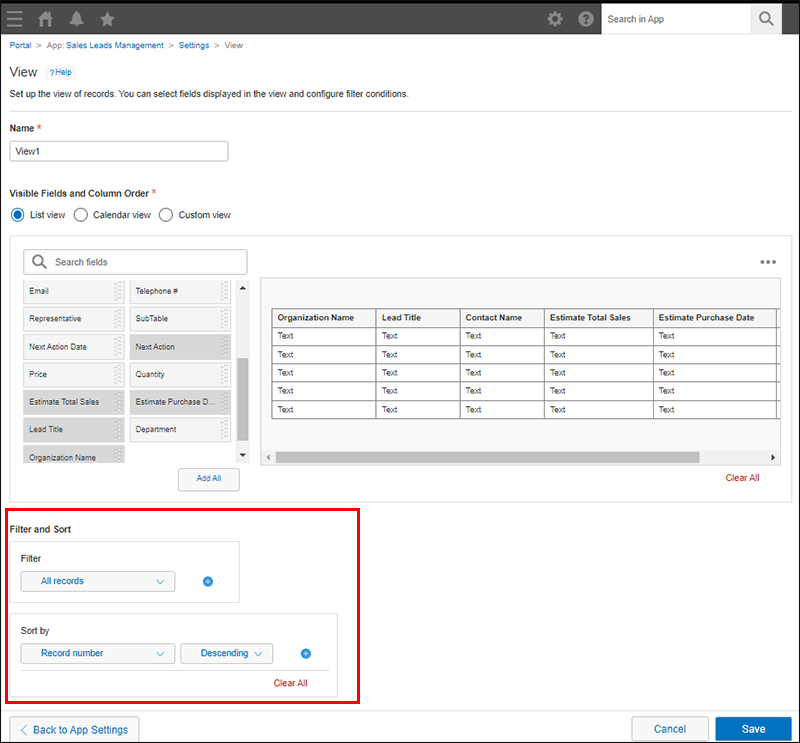
If you select "List view"
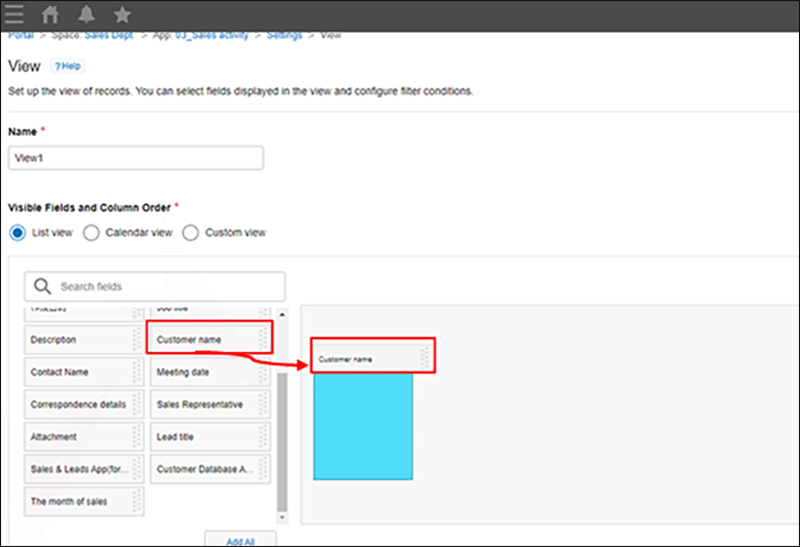
Place the fields that you want to be displayed on the "View" screen.
To place fields, drag them from the list on the left side of the screen and drop them in the area on the right.
Fields are displayed on the "View" screen in the order that they are listed in the area on the right side of the screen.
- If you click Add All, all of the remaining fields will be added to the right of the fields that are already placed.
This allows you to add all of the remaining fields with a single click, without needing to drag and drop the fields one by one.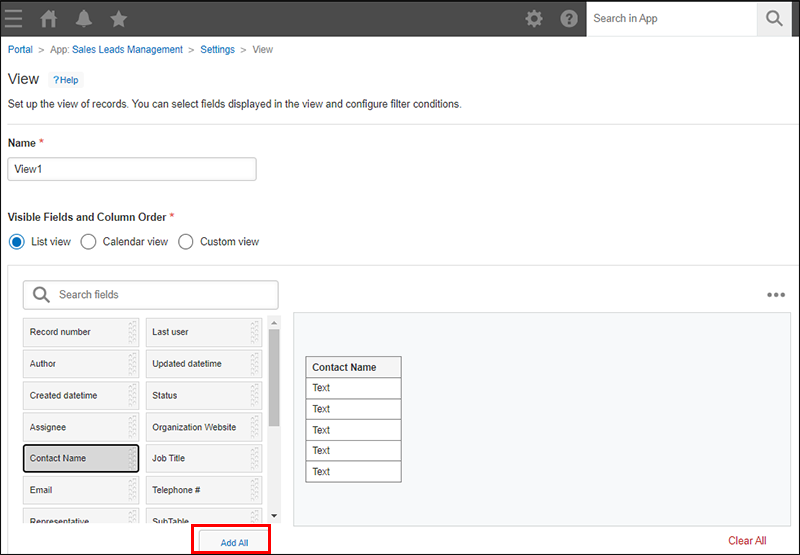
- If you click Clear All, all of the fields that have been placed will be cleared from the area on the right side of the screen.
This allows you to start placing fields again from the beginning, which can be beneficial when you want to edit an already configured view or reset the field order.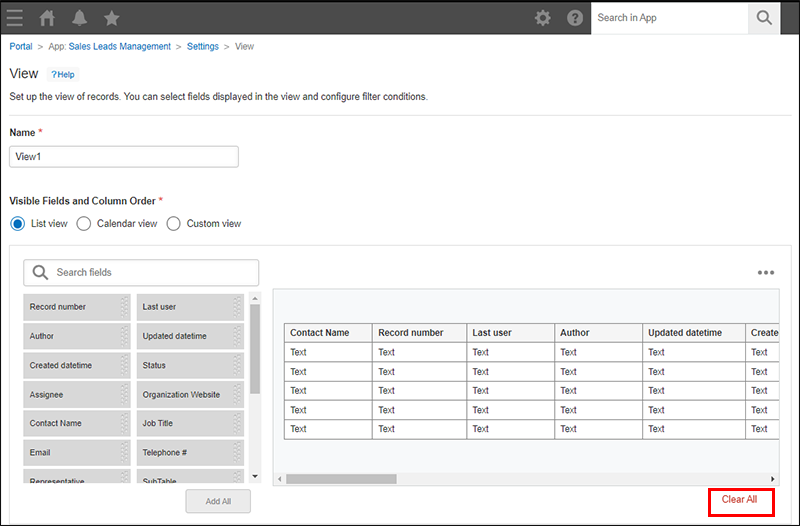
- You can reorder placed fields by dragging and dropping them.
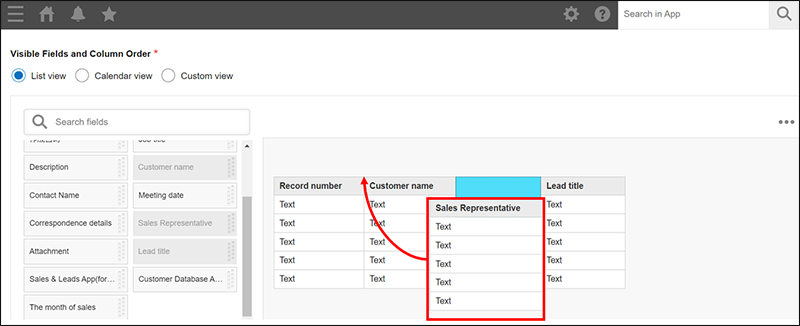
- If you want to remove placed fields one by one, click the Settings icon at the right of each field and select Delete.

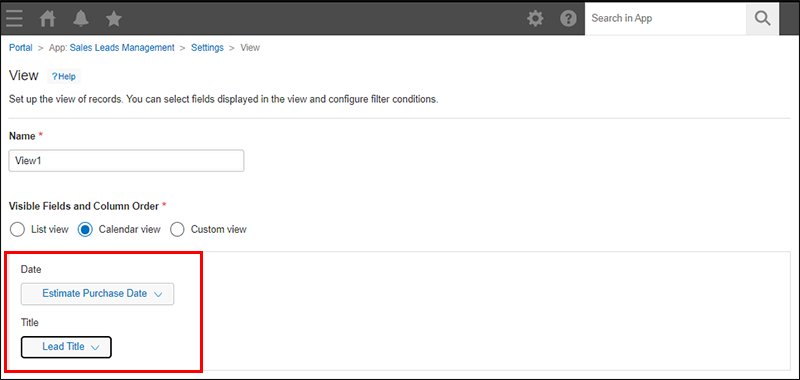
If you select "Calendar view"
-
Campo de fecha:
Seleccione un campo para especificar la fecha en la que se muestra un registro.
Registros se muestran en el calendario según la fecha o la fecha y hora ingresadas en el campo.
-
Campo de título:
Seleccione un campo para mostrar un título en el calendario.
Puede seleccionar los siguientes campos:- Número de registro
- Texto
- Área de texto
- Texto enriquecido
- Adjunto
- Selección del usuario
- Selección departamento
- Selección grupo
- Creado por
- Actualizado por
- Asignatario
- Número
- Calculado
- Enlace
- Búsqueda
If you select "Custom view"
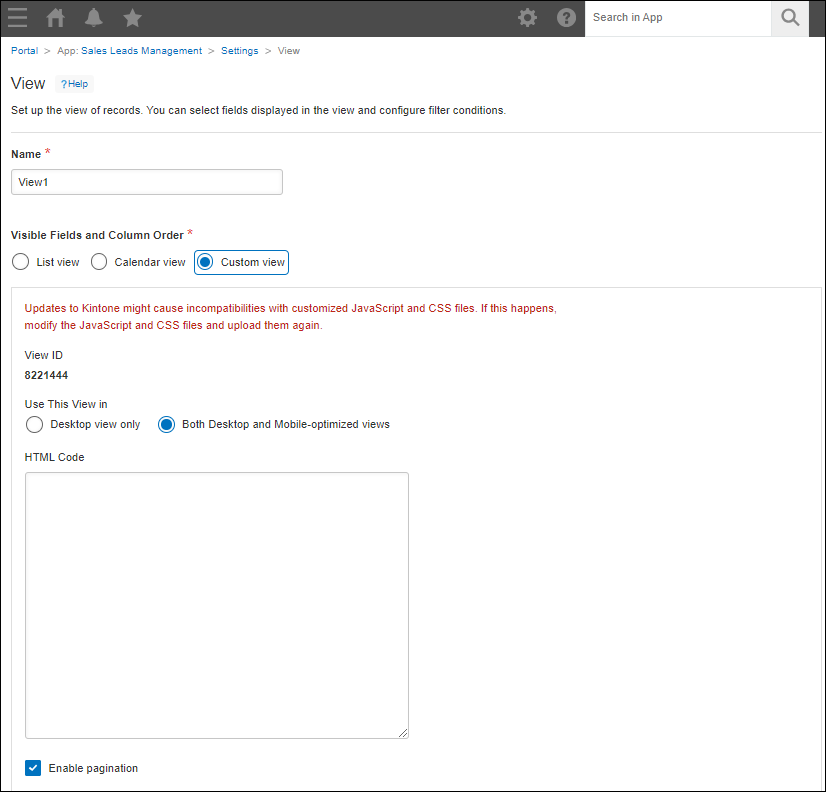
- Vista ID:
Muestra el ID asignado automáticamente de la lista. - Use This View in:
Select Desktop view only or Both Desktop and Mobile-optimized views. - HTML:
Utilice HTML5 para escribir código HTML para la vista.
Las siguientes etiquetas no son necesarias:
<html>
<cabeza>
<cuerpo>
No se puede utilizar código JavaScript. Si desea utilizar JavaScript, utilice la función Personalización JavaScript y CSS. - Activar la paginación:
Mostrar u ocultar la paginación.
De forma predeterminada, se selecciona Activar la paginación y aparece la paginación. Si se selecciona Activar la paginación, el sistema recupera información del registro cuando se muestra la vista personalizada.
Si anula la selección de la casilla de verificación, no será posible recuperar la información de registro de los objetos de evento de un evento de carga.
Paso 3: Configurar Condiciones para que Registros se muestren en una Ver
Si es necesario, filtre los registros que se mostrarán en la vista.
Para obtener detalles sobre el filtrado y la clasificación, consulte las páginas siguientes.
-
¿Qué campos y elementos se pueden utilizar para "Ordenar por"?
 Continúe con el paso 4.
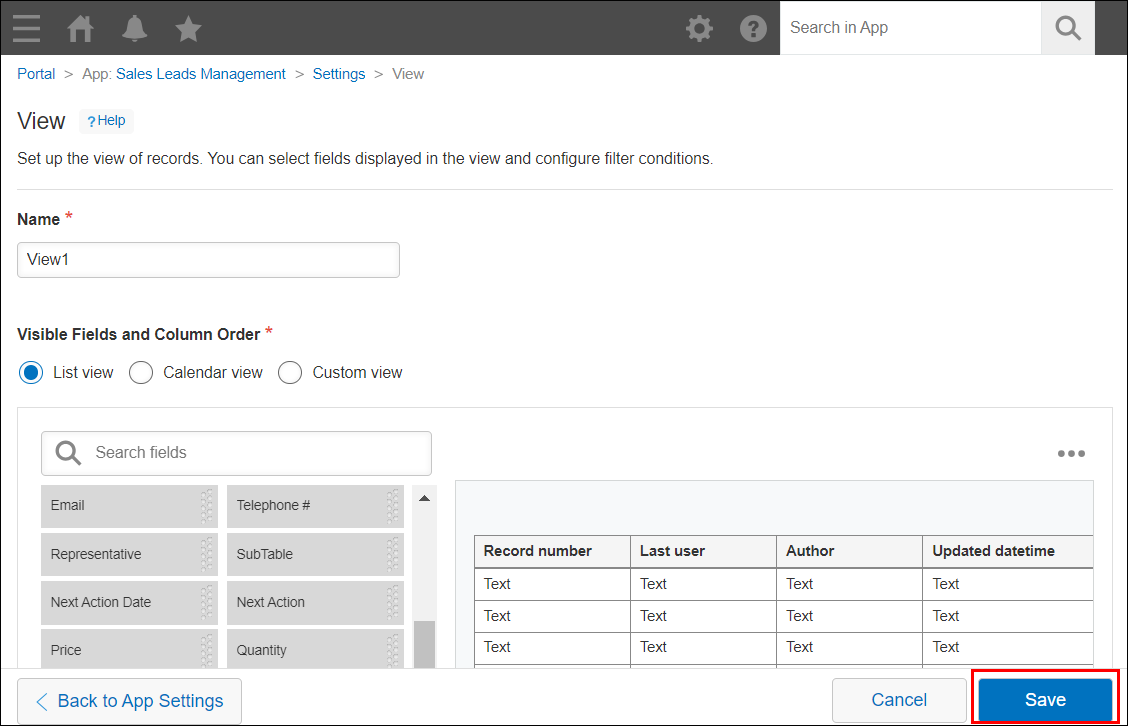
Paso 4: Guardar la Ajustes Ver
-
Haga clic en Guardar en la parte inferior derecha de la pantalla.
-
Haga clic en Act. app en la parte superior derecha de la pantalla.
-
En el cuadro de diálogo de confirmación, haga clic en Act. app.
Ha creado correctamente una vista.