Setting email notifications
This article provides an overview of email notifications and the settings required to receive email notifications.
What are email notifications?
The Email Notifications feature lets you receive notifications by email as well as in Kintone.
Notifications related to apps, spaces, People, and messages can be received via email.
The subject of the email depends on what you are notified of.
For details, refer to the following page.
Email notification subject
Required settings
To receive email notifications, the following settings must be configured.
- Set email addresses of users (by Kintone users & system administrator or each user)
- Enable the Email Notifications feature (by Kintone administrator)
- Configure notifications for each app as necessary (by app administrator)
- Configure email notifications in personal settings (by each user)
Set email addresses of users (by Kintone users & system administrator or each user)
The Kintone users & system administrator configures email addresses for users who need to receive notifications.
Changing user information (Kintone Help)
If users are allowed to edit their email address, they can set it by editing their own profile.
Changing profiles (Kintone Help)
Enable the Email Notifications feature (by Kintone administrator)
The Email Notifications feature must be enabled by a Kintone administrator.
-
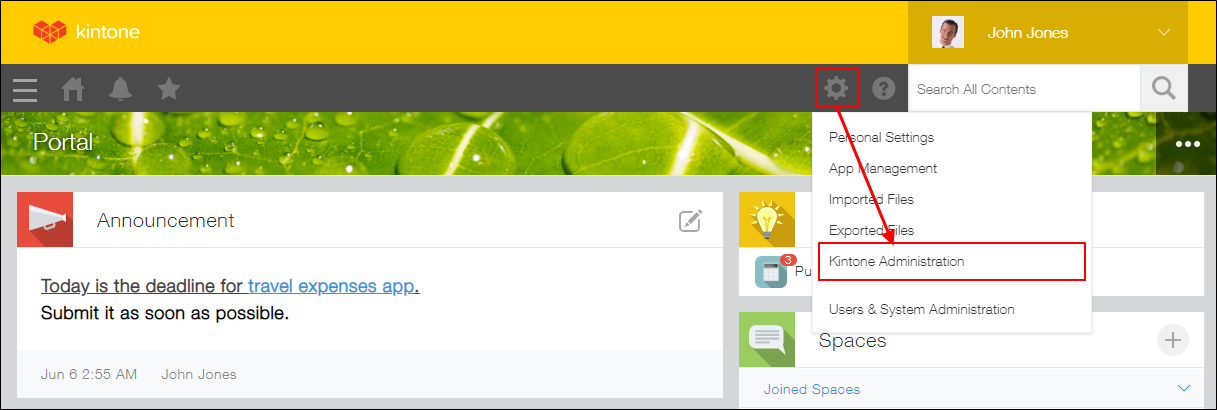
Click the Settings icon (the gear-shaped icon) at the top of Kintone, then click Kintone administration.
-
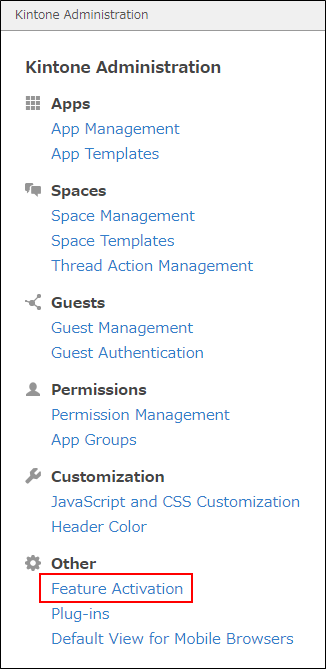
On the Kintone administration screen, click Feature activation.
-
On the Feature activation screen, select the Activate email notifications checkbox under Email notifications.
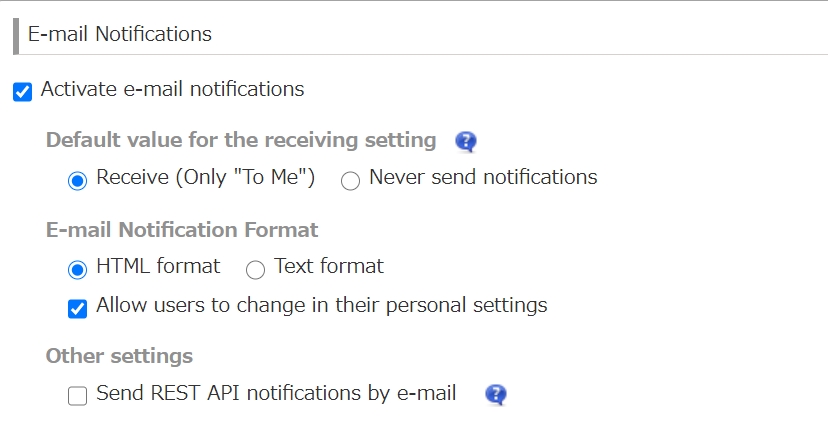
Configure Default value for the receiving setting, Email notification format, and Other settings as necessary.
For details on how to configure these settings, refer to the following page.
Settings to activate email notifications -
Click Save.
Configure notifications for each app as necessary (by app administrator)
To receive app notifications, app administrators must configure notification settings for their respective apps.
For details on available notifications, refer to the following page.
App notification settings
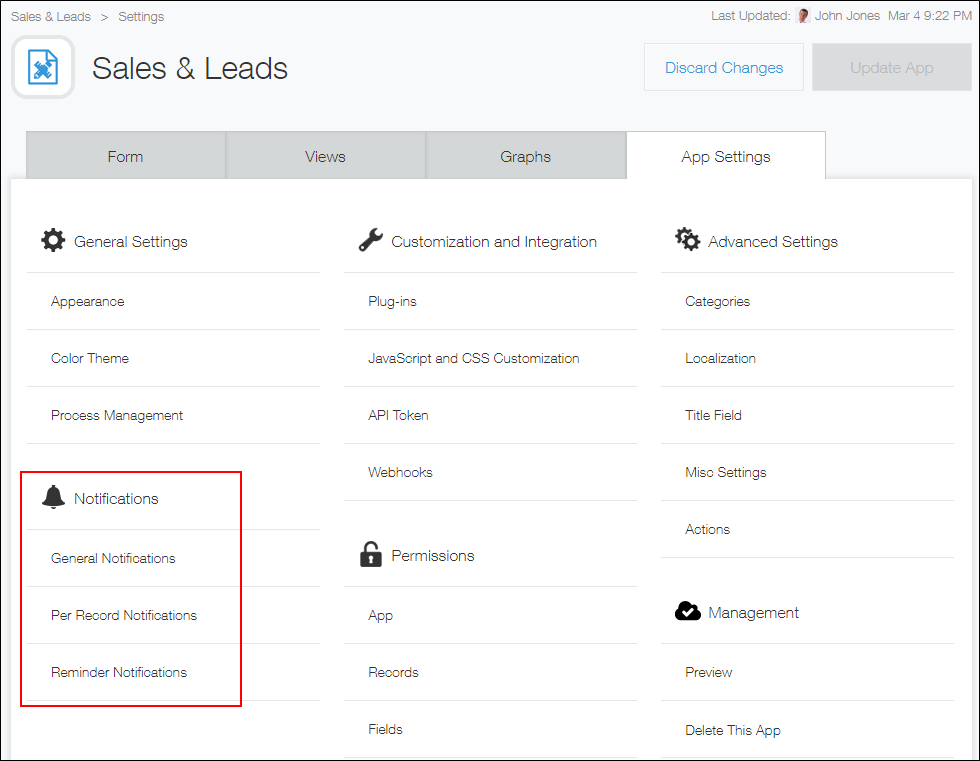
In the notification settings of the app, the administrator can configure various notification conditions.
For example, notification settings can be configured so notifications are sent to a specific user when a record is added, or so notifications are sent to the "Created by" user when a record's status is changed to "Approved".
Configure email notifications in personal settings (by each user)
To receive email notifications, users need to configure email notifications in their personal settings.
-
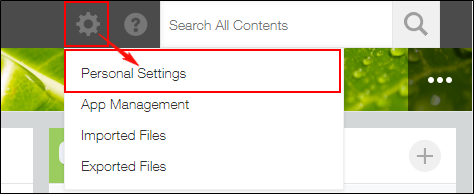
Click the Settings icon (the gear-shaped icon) at the top of Kintone, then click Personal settings.
-
On the Personal settings screen, select whether or not you want to receive email notifications, and configure the type of email notifications to receive and notification format as necessary.
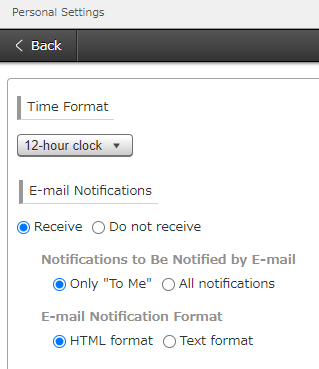
Differences between "To me" and "All" notifications are described in the following page:
Differences between "To me" and "All" notifications
For details on the actions that trigger notifications, refer to the following page:
When and to whom notifications are sent -
Click Save.
If access controls have been set
For two-factor authentication
When accessing the URL listed in the notification email, you will first log in with your user name and password, and then be asked to enter a verification code.
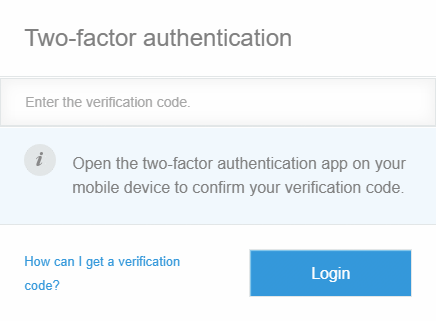
Launch an authentication app, such as Google Authenticator, check the six-digit verification code displayed in the app, and enter the code on the login screen.
For more information about getting a verification code, refer to the following page.
How can I get a two-factor authentication verification code?
