การเพิ่มผู้ใช้
เพิ่มผู้ใช้ที่จะใช้ Kintone
หน้านี้จะอธิบายวิธีการเพิ่มผู้ใช้ทีละคน
หากต้องการเพิ่มผู้ใช้หลายรายพร้อมกัน ให้ใช้ "นำเข้าจากไฟล์" สำหรับขั้นตอนโดยละเอียด โปรดดูหน้าต่อไปนี้:
การเพิ่มหรือเปลี่ยนแปลงผู้ใช้และแผนกโดยใช้ไฟล์
ขั้นตอน
-
การบริหารจัดการการเข้าถึง
การเข้าถึงการบริหารจัดการ -
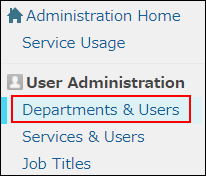
คลิก แผนกและผู้ใช้งาน
-
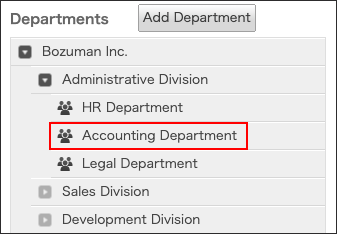
ขยายโครงสร้างแผนก และเลือกแผนกที่คุณต้องการเพิ่มผู้ใช้
-
คลิก เพิ่มผู้ใช้

-
กรอกข้อมูลของผู้ใช้ที่คุณต้องการเพิ่ม
สำหรับรายละเอียดเกี่ยวกับรายการที่ต้องป้อน โปรดดูหน้าต่อไปนี้:
รายการข้อมูลผู้ใช้
การสร้างรหัสผ่าน -
คลิก เพิ่มผู้ใช้
-
ในกล่องโต้ตอบ "เพิ่มผู้ใช้" เลือกที่จะส่งข้อมูลการเข้าสู่ระบบไปยังผู้ใช้ผ่านทางอีเมลหรือไม่
หากต้องการเพิ่มผู้ใช้ใหม่โดยไม่ส่งข้อมูลการเข้าสู่ระบบ ให้คลิก เพิ่มผู้ใช้โดยไม่ส่งอีเมล
หากต้องการส่งข้อมูลการเข้าสู่ระบบผ่านทางอีเมล ให้คลิก พรีวิวอีเมล ในกล่องโต้ตอบ "เพิ่มผู้ใช้"
 ในกล่องโต้ตอบ "ส่งข้อมูลการเข้าสู่ระบบผ่านอีเมล" ที่ปรากฏ ให้แก้ไขที่อยู่อีเมลและเนื้อหาข้อความตามต้องการ แล้วคลิก ส่ง
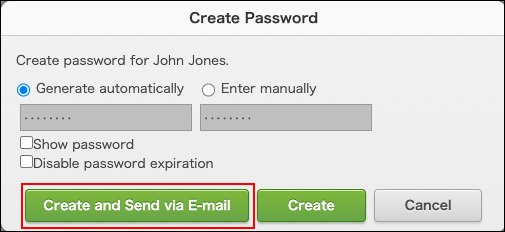
การสร้างรหัสผ่าน
รหัสผ่านแบบสุ่มจะถูกสร้างขึ้นโดยอัตโนมัติในช่อง รหัสผ่าน
คุณสามารถตั้งรหัสผ่านที่คุณต้องการแทนการใช้รหัสผ่านที่สร้างขึ้นโดยอัตโนมัติ
การป้อนรหัสผ่านด้วยตนเอง
ล้างค่า ช่องทําเครื่องหมาย "สร้างรหัสผ่านโดยอัตโนมัติ" และป้อนรหัสผ่านในช่อง "รหัสผ่าน"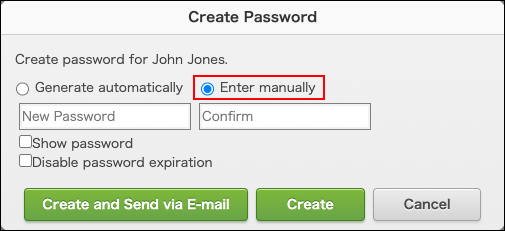
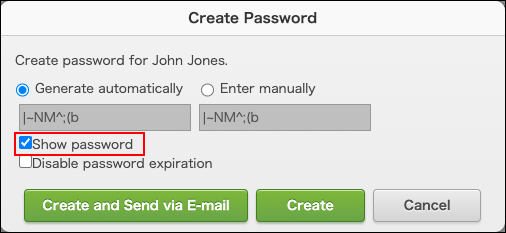
การดูรหัสผ่านที่ป้อน
เลือก ช่องกาเครื่องหมาย "แสดงรหัสผ่าน"