Configuring app actions
By configuring app actions, you can copy record data to apps that you specify.
The following sections explain how to configure and use an app action.
Setting up an app action
This section describes how to set up an app action.
In this example, we will configure an action to copy customer information from a customer list app to an order management app.
-
Open the customer list app.
-
Click the App settings icon (the gear-shaped icon) at the upper right of the View screen.

-
On the App settings screen, select the App settings tab, and then click Actions under Advanced settings.
-
Click Create action at the upper left of the Actions screen.
-
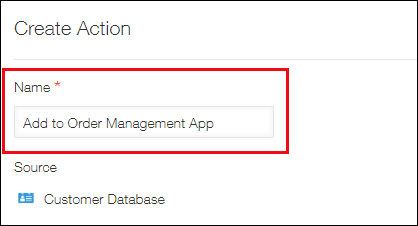
In the Name section of the Create action screen, enter the name that you want to be displayed for the action button on the Record details screen.
In this example, we will set the name to "Add to Order Management App".
-
In the Target section, select the app you want to copy data to.
In this example, we will select the "Order Management" app.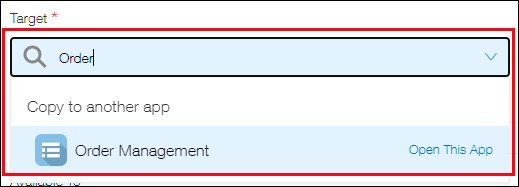
-
For Field mappings, specify the source field and the destination field for copying data.
Fields placed in a table are displayed in the following format: "Table name > Field name".
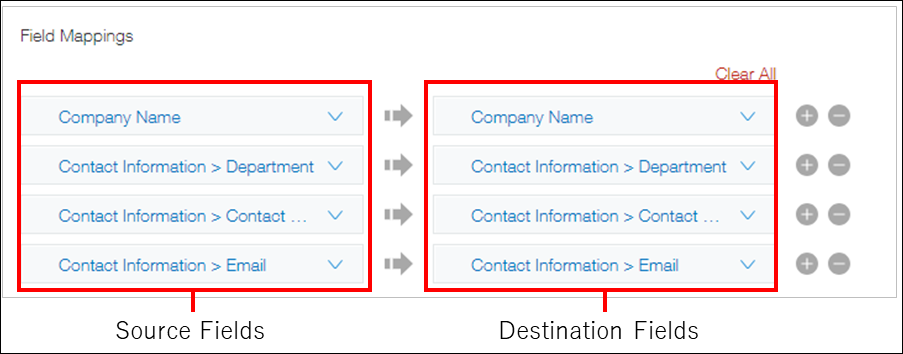 You can also click Clear all to delete all of the mappings you have already configured.
 -
Configuring the Available to setting lets you limit the users for whom the created action button will be displayed.
If necessary, delete the predefined setting (Everyone) and add the users, departments, or groups for whom you want the action to be available.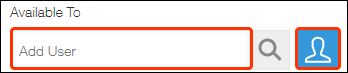
-
Click Save at the bottom right of the screen.
-
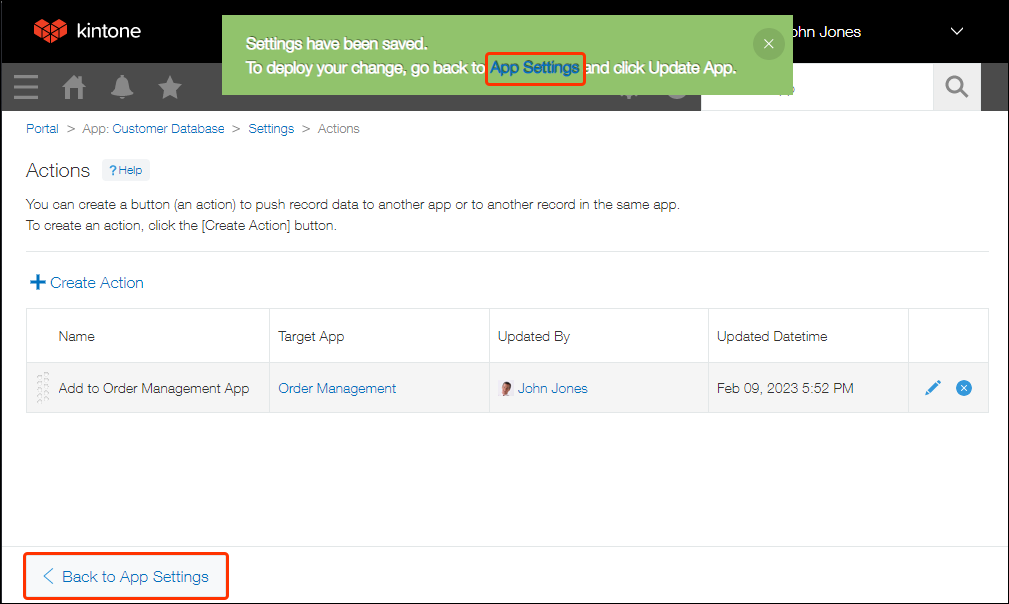
Click App settings in the message displayed at the top of the screen, or click Back to app settings displayed at the bottom left of the screen.
-
Click Update app at the upper right of the screen.
-
On the Update app dialog, click Update app.
The Add to Order Management App action button will now be displayed on the Record details screen.
If process management settings are configured, the action button will be displayed next to the process management action button.
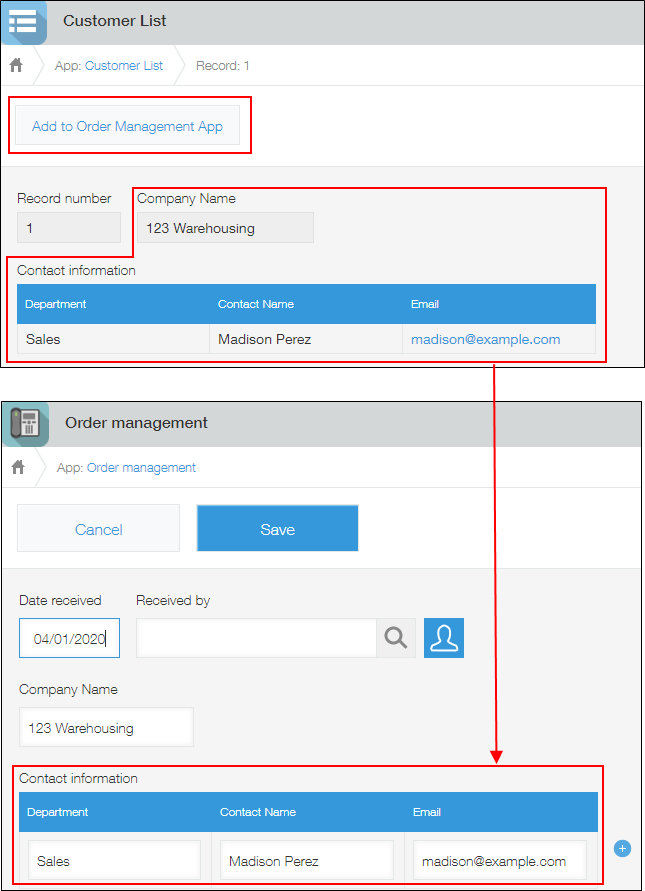
Adding a record using an app action
Clicking an action button on the "Record details" screen creates a new record with the necessary information copied to it.
As an example, we will use the Add to Order Management App action button that was created in the section above to copy data from the "Customer List" app to the "Order Management" app.
-
Open the "Customer List" app.
-
Open the Record details screen of the record whose data you want to copy.
-
Click the Add to Order Management App action button.
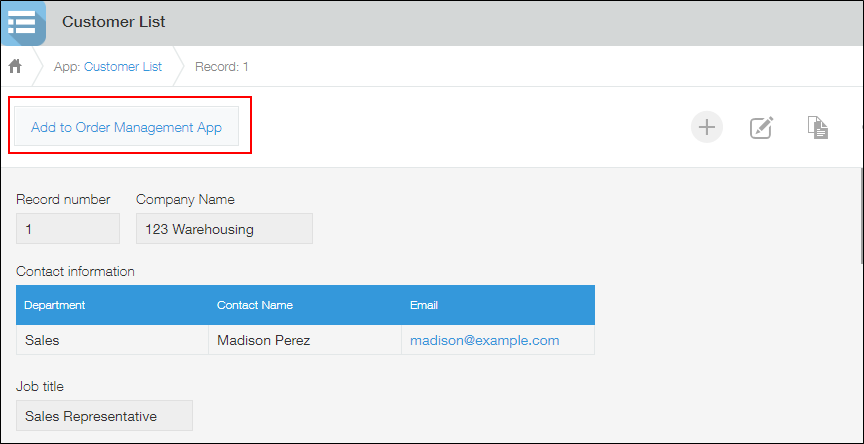
The New record screen of the "Order Management" app will open, and the destination fields will be filled in with data copied from the "Customer List" app record.