Editing/Deleting records on the "View" screen
You can edit or delete records on an app's View screen.
Note, however, that there are limits to the fields that can be edited. For details, refer to the following section.
Fields that can be edited on the "View" screen
It may also not be possible to edit or delete records on an app's View screen due to the settings configured by a Kintone administrator or app administrator. For details, refer to the following section.
What to do if you cannot edit or delete records
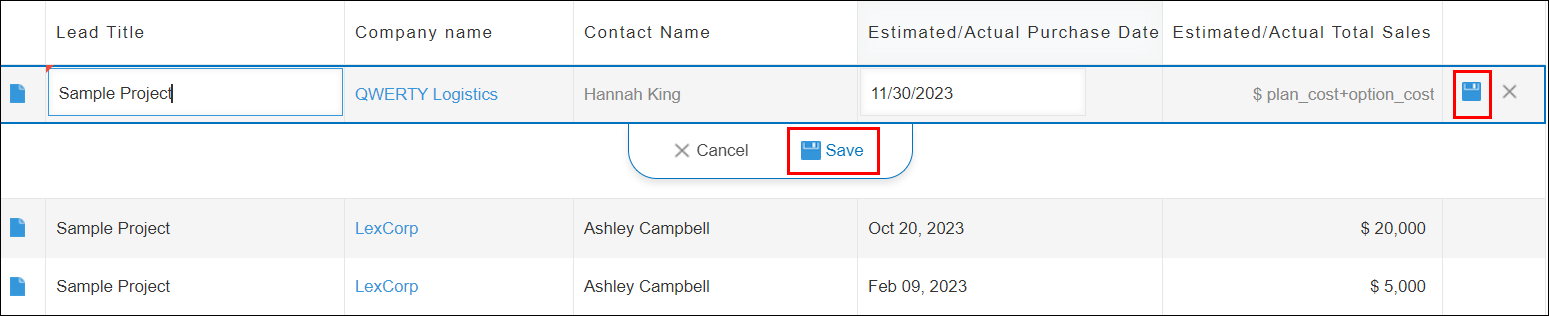
Editing records on the "View" screen
-
Click an app to open its View screen.
-
Click the Edit icon in the far right column of the record you want to edit.
You can also start editing a record by double-clicking it.

-
Edit the record, then click the Save icon in the far right column or Save directly under the record.
To cancel editing without saving the changes you made, click the Cancel icon in the far right column or Cancel directly under the record.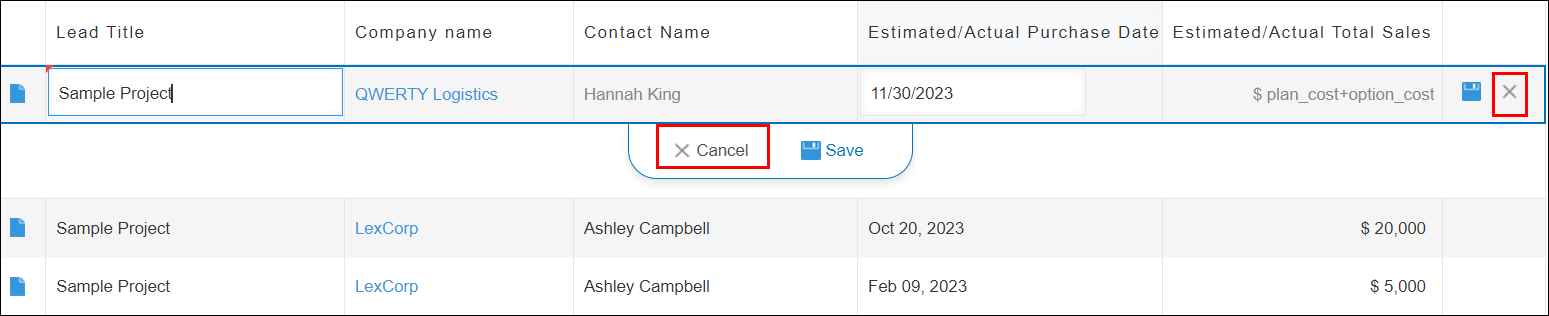
Deleting records on the "View" screen
-
Click an app to open its View screen.
-
Click the Delete icon in the far right column of the record you want to delete.

-
Click Delete.

Fields that can be edited on the "View" screen
The field types that can be edited on the View screen are as follows.
- Text
- Text area
- Number
- Radio button
- Check box
- Multi-choice
- Drop-down
- Date
- Time
- Date and time
- Link
- User selection
- Department selection
- Group selection
Note that even if a field is listed above, it cannot be edited on the View screen in any of the following cases.
- The field is specified under Fetch criteria in the settings of a Related records field
- The field is specified under Field mappings in the settings of a Lookup field
- The field is set in a table
What to do if you cannot edit or delete records
If you cannot edit or delete records on the View screen, it may be due to restrictions put into place by a Kintone administrator or app administrator. Check the settings below depending on your situation.
The "Edit" or "Delete" icons are not displayed on records
If the Edit or Delete icons are not displayed for records on the View screen, check the following settings.
- Inline record editing on record list views:
Check if the app administrator has enabled the Inline record editing on record list views setting on the Misc settings screen. For details, refer to the following page.
Disabling inline record editing/deleting on record list views - Permissions for app:
Check if the app administrator has configured the Permissions for app settings to restrict users from editing or deleting records. For details, refer to the following page.
Configuring permissions for apps
The "Edit" or "Delete" icons for records cannot be selected
If the Edit or Delete icons for records on the View screen are grayed out and cannot be used, check if an app administrator has configured the Permissions for records settings to restrict users from editing or deleting records. For details, refer to the following page.
Configuring permissions for records