Creating spaces
This article describes how to create a space.
You can open the space you created from the Spaces section of Portal.
What is Portal?
There are two ways to create a space: from scratch or using a space template.
Regardless of the method you choose, you can change the settings of your created space later on.
Users who can create spaces
- Users who have been granted the "Create spaces" permission in Kintone administration
- Kintone users & system administrators
Creating a space from scratch
-
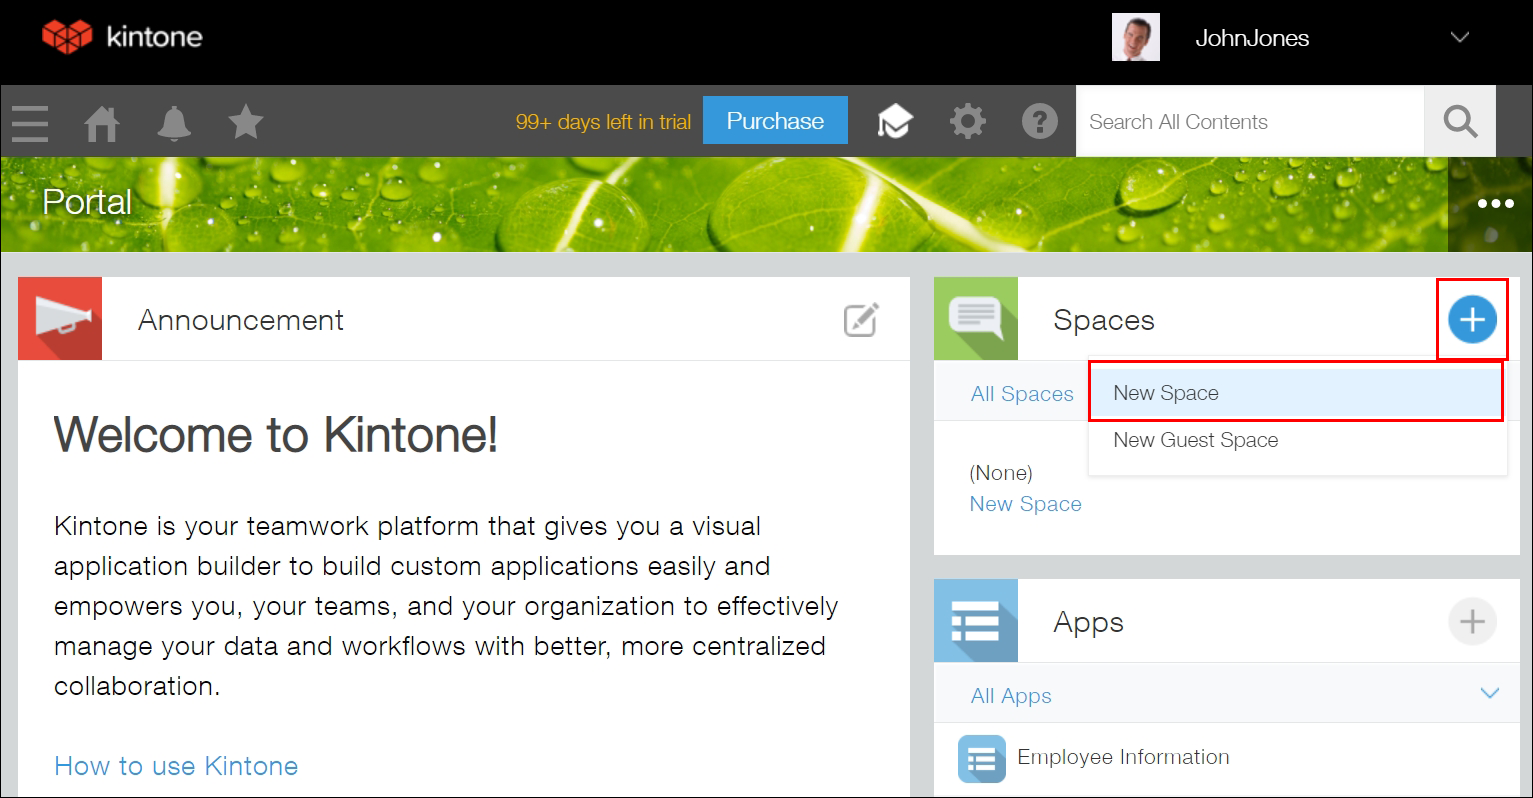
On the Kintone Portal, click the Create space icon (the plus sign-shaped icon in the Spaces section), then click New space.
-
On the Create space dialog, click Create space from scratch.
-
On the Appearance tab, configure the necessary settings.
For details on the settings, see the following section. Space settings -
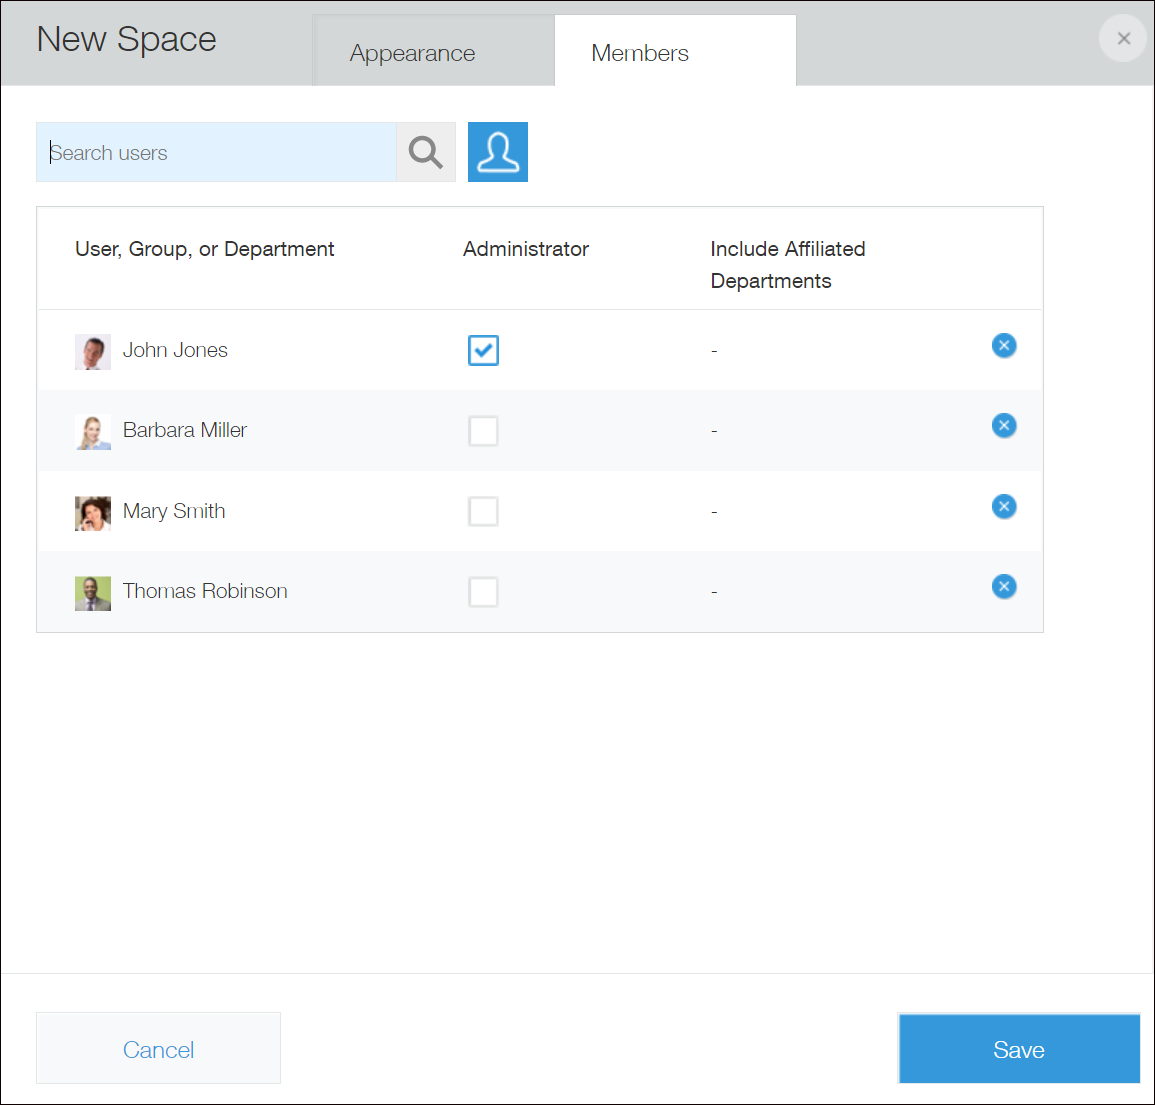
On the Members tab, add members to the space.
To add members, search for users or use the Select users from departments or groups icon to the right of the user search box.- When you select the Administrator checkbox for a user, the user is granted administrative permission for the space. At least one member must be specified as an administrator.
- When you select the Include affiliated departments checkbox, users who belong to affiliated departments are added as the members of the space.
-
Click Save.
Creating a space using a space template
You can create new spaces from space templates registered in your Kintone environment.
If you do not have any space templates registered, only the Create space from scratch option will be displayed on the Create space dialog.
-
On the Kintone Portal, click the Create space icon (the plus sign-shaped icon in the Spaces section), then click New space.
-
On the Create space dialog, click the template you want to use.
Space settings
Space name
Enter the space name.
Private (Visible only to members)
Set whether or not to make the space public.
If this checkbox is selected, the space will be visible only to users who have joined it.
Enable multiple threads
Selecting this checkbox will allow multiple threads to be created in the space. When the space is opened, its space portal will be displayed.
 When this checkbox is not selected, only one thread can be used in the space. When the space is opened, its only thread will be displayed.
After creating a single-thread space, you can change it to a multi-thread space later on.
However, a multi-thread space cannot be changed to have only a single space.
Changing space settings
Block users from joining or leaving the space and following or unfollowing the threads.
Set whether or not to allow users to join or leave the space and follow or unfollow its threads.
If this checkbox is selected, space members will not be allowed to leave the space or unfollow its threads.
Also, anyone who is not already a member of the space will not be allowed to join the space or follow its threads.
Only allow space administrators to create apps
Set whether or not to limit the ability to create apps in the space to space administrators. Space administrators can be added or deleted on the Members tab on the Space settings dialog.
Cover photo
Set a cover photo for the space.
Select an image registered in Kintone or click Browse and choose an image of your choice.
The maximum file size is 5 MB.
Recommended cover photo dimensions
The cover photo you specify will be enlarged or reduced to match the window size of the web browser being used.
However, the height is fixed at 64 px for the desktop view, so it is recommended that you prepare an image with the following dimensions.
- Width: Maximum web browser width or greater
- Height: 64 px
Also, you can prevent text or a logo in the image from being cut off or running off the screen by placing it in the middle of your image.
Contents in space portal page
You can hide the content on the space portal (e.g., the Announcement or Threads section) as necessary.
This allows you to, for instance, hide the existing content when you customize the space portal using APIs.
For information on space portal customization, refer to the following page.
Customizing space portals
This setting is displayed only when space settings have been changed.