Adding views
You can create additional views for displaying records in your app that show certain record fields or have specific record filtering conditions applied.
The steps to configure a view are as follows.
Set a view name
-
Click the App settings icon (the gear-shaped icon) at the upper right of the View screen.

-
On the App settings screen, click the Views tab.
-
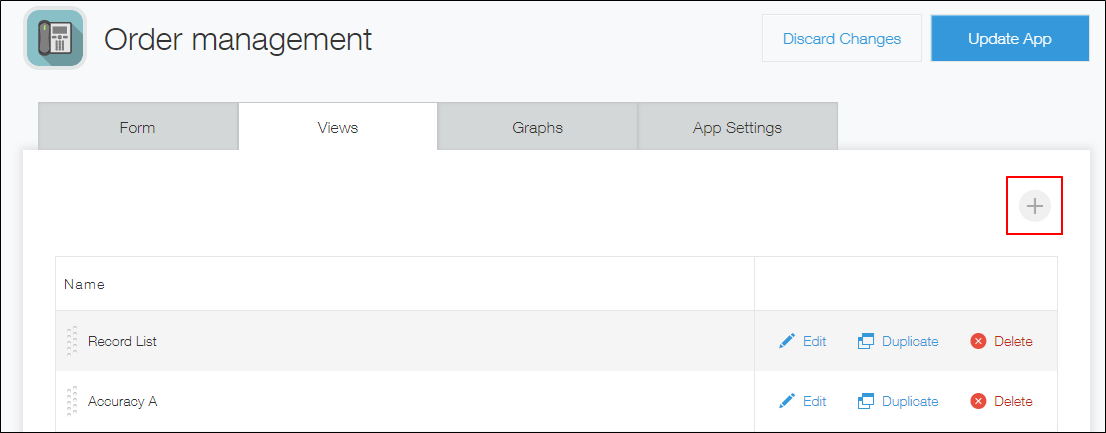
Click the Add view icon (the plus sign-shaped icon) at the right of the screen.
-
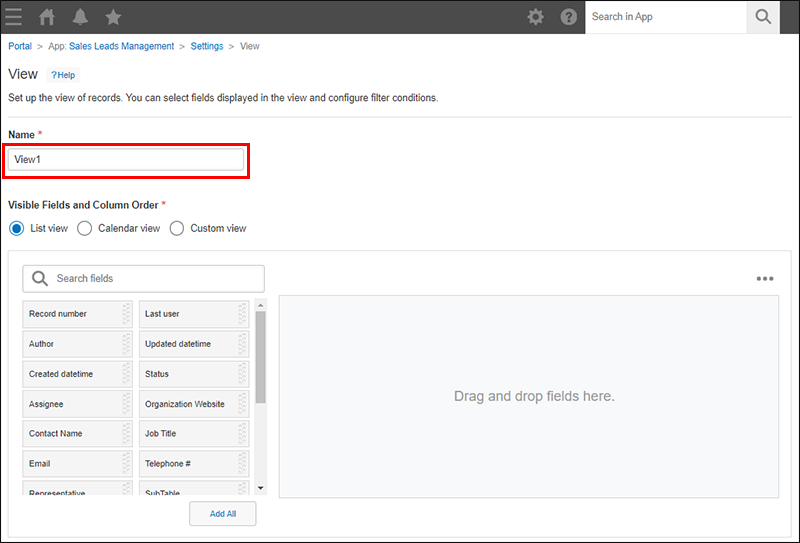
On the View screen, enter a view name in the Name section.
Set a view display format and the fields to be displayed
-
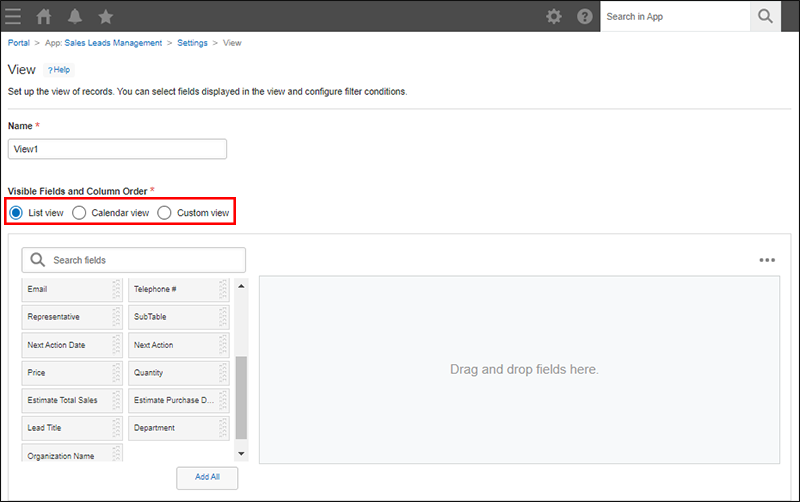
Specify a display format in the Visible fields and column order section.
The following three display formats can be selected.- List view
- Calendar view
- Custom view
To create or edit a custom view, Kintone administrative permission is required. If you do not have Kintone administrative permission, the Custom view option is not displayed in the Visible fields and column order section on the View settings screen.
-
Configure what to display in the view. The settings you can configure depend on the display format that you selected.
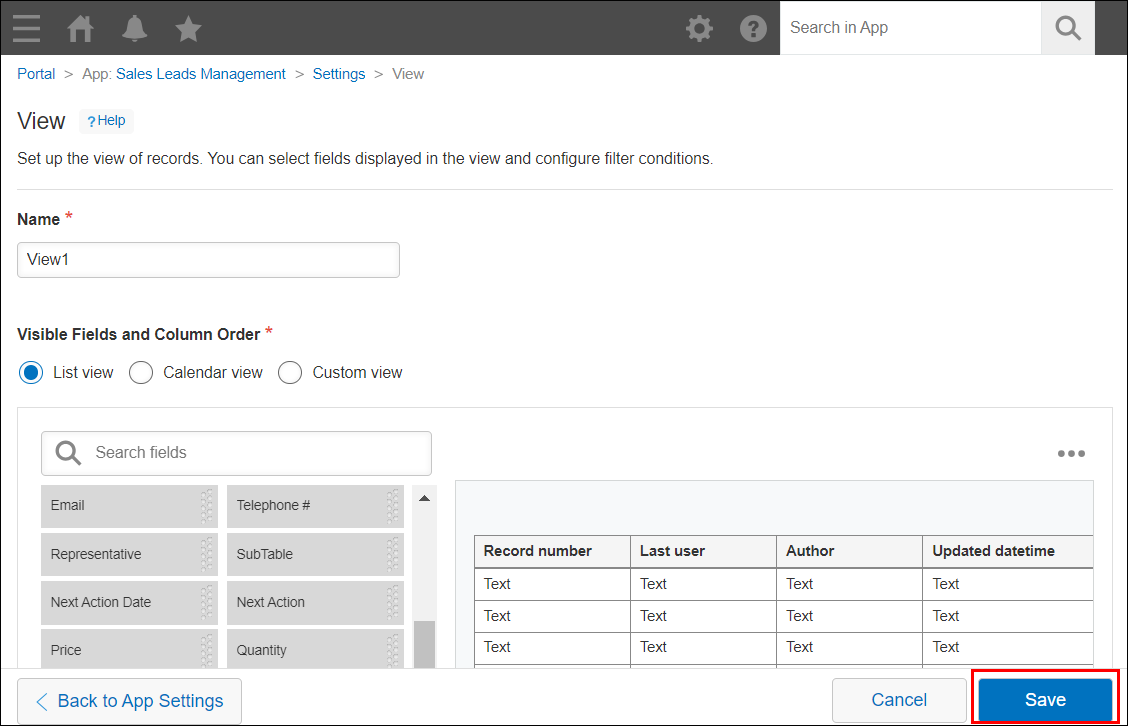
If you selected "List view"
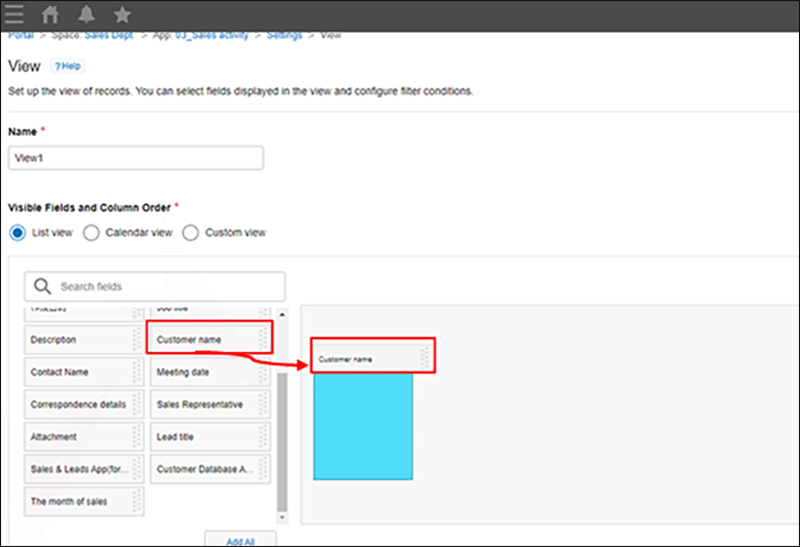
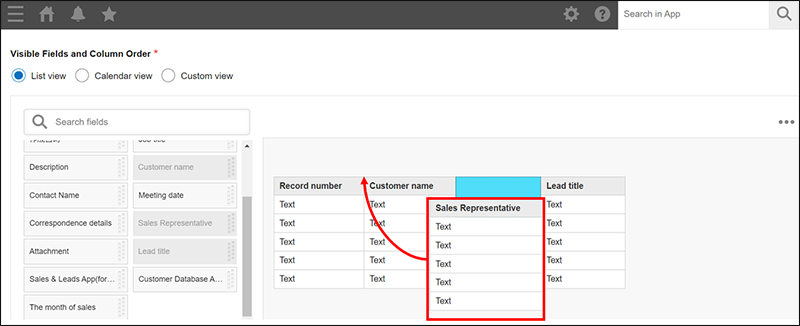
Place the fields that you want to be displayed on the View screen.
To place fields, drag them from the list on the left side of the screen and drop them in the area on the right.
Fields are displayed on the View screen in the order in which they appear in the area on the right side of the screen.
You can reorder placed fields by dragging and dropping them.
If you want to remove fields one by one, click the Settings icon (the gear-shaped icon) at the right of each field and select Delete.

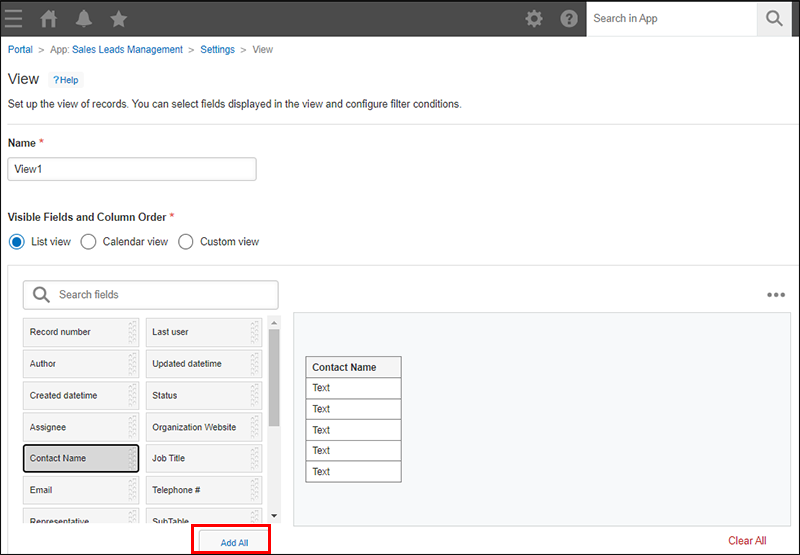
Adding all of the available fields
To add all of the available fields, click Add all.
This allows you to add all of the remaining fields with a single click, without needing to drag and drop the fields one by one.
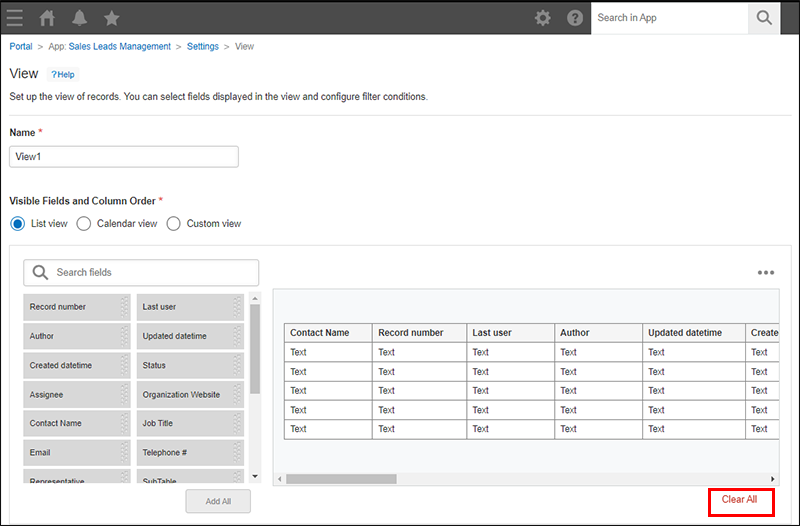
Clearing all of the fields
To clear all of the fields that have been placed, click Clear all.
This is beneficial when you want to edit an already configured view, or when you want to reset the field order and start from the beginning.
If you selected "Calendar view"
Configure the Date and Title settings.
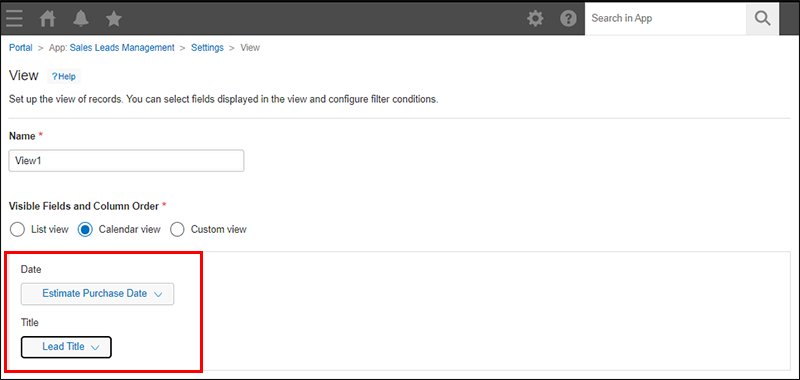
Date
Select a field for specifying on which date to display calendar titles.
Records will be displayed on the calendar based on the date or datetime specified in the field.
You can select the following field types.
- Created datetime
- Updated datetime
- Date
- Date and time
Title
Select a field to be displayed as a title on the calendar.
You can select the following field types.
- Record number
- Text
- Text area
- Rich text
- Attachment
- User selection
- Department selection
- Group selection
- Created by
- Updated by
- Assignee
- Number
- Calculated
- Link
- Lookup
If you selected "Custom view"
Configure the Use this view in, Enable pagination, and HTML settings.
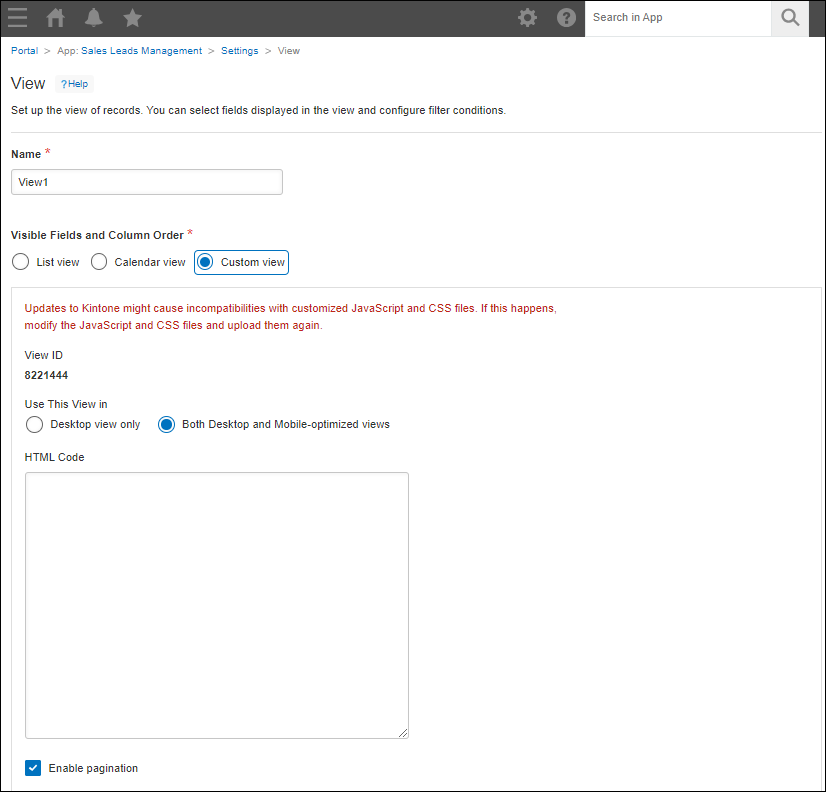
Use this view in
Select Desktop view only or Both desktop and mobile-optimized views.
View ID
Displays the view's ID. The ID is automatically assigned.
Enable pagination
If this checkbox is selected, pagination is displayed on the View screen.
HTML
Write HTML code for the view.
The following tags are not required:
<html>
<head>
<body>
JavaScript code cannot be used. If you want to use JavaScript, use the JavaScript and CSS customization feature.
Set the conditions for displaying records in the view
If necessary, configure the conditions for displaying records on the View screen.
In the Filter section, specify one or more fields to filter records by, along with the filtering conditions.
When you specify filter conditions, refer to the following page.
Filtering records to display in a view
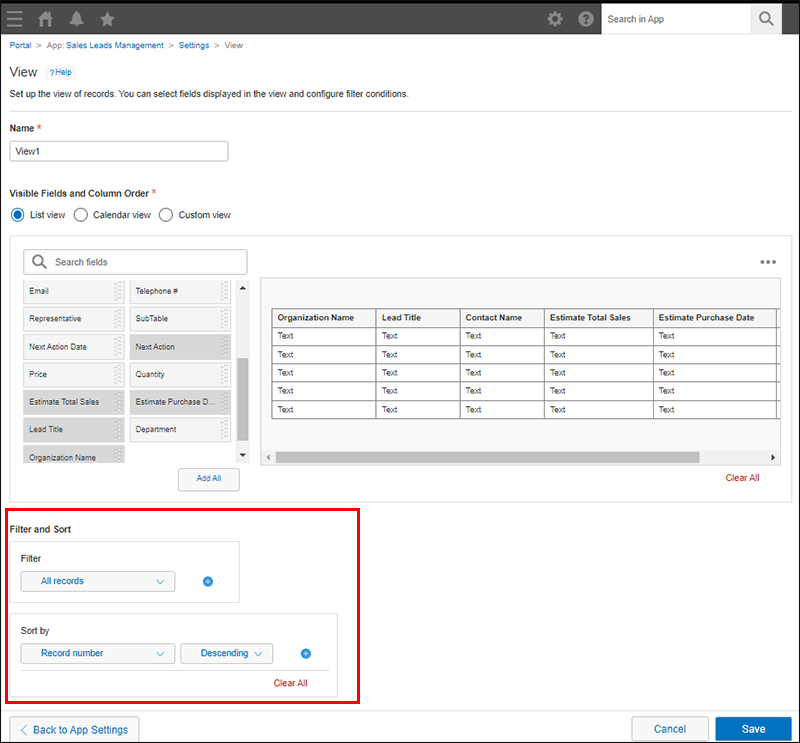
Set the display order for records displayed in the view
If necessary, configure the display order for records displayed on the View screen.
In the Sort by section, specify the display order of records. You can specify up to 5 display order conditions.
Save the view settings
-
Click Save at the bottom right of the View screen.
-
On the App settings screen, click Update app.
-
On the Update app dialog, click Update app.