Restricting the use of webhooks
You can delete or temporarily disable configured webhooks.
It is also possible to prohibit the use of webhooks for all users.
Disabling a configured webhook
You can disable webhooks without deleting their settings. To do so, follow the steps below.
-
Click the App settings icon (the gear-shaped icon) at the upper right of the View screen.

-
On the App settings screen, select the App settings tab, then click Webhooks under Customization and integration.
-
On the Webhooks screen, click the Edit icon in the far right column of the webhook that you want to disable.
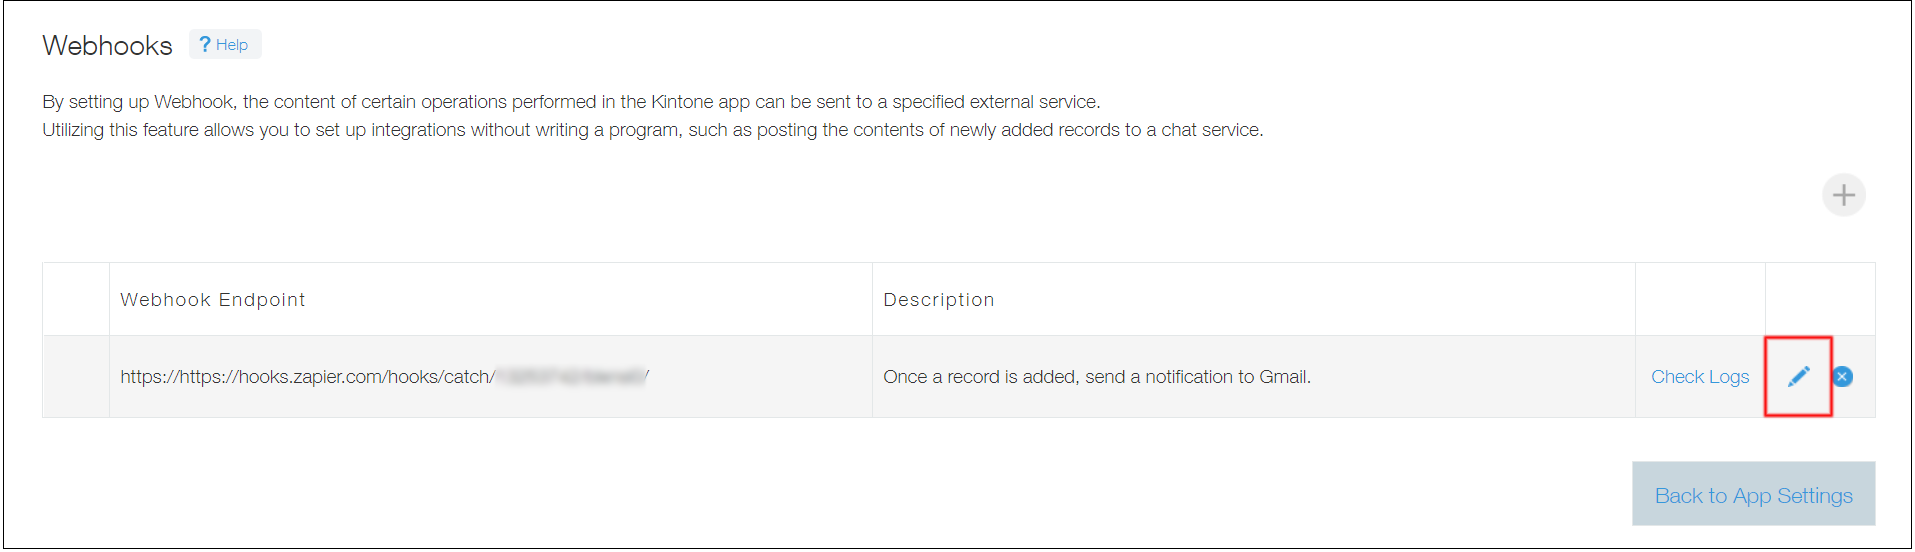
-
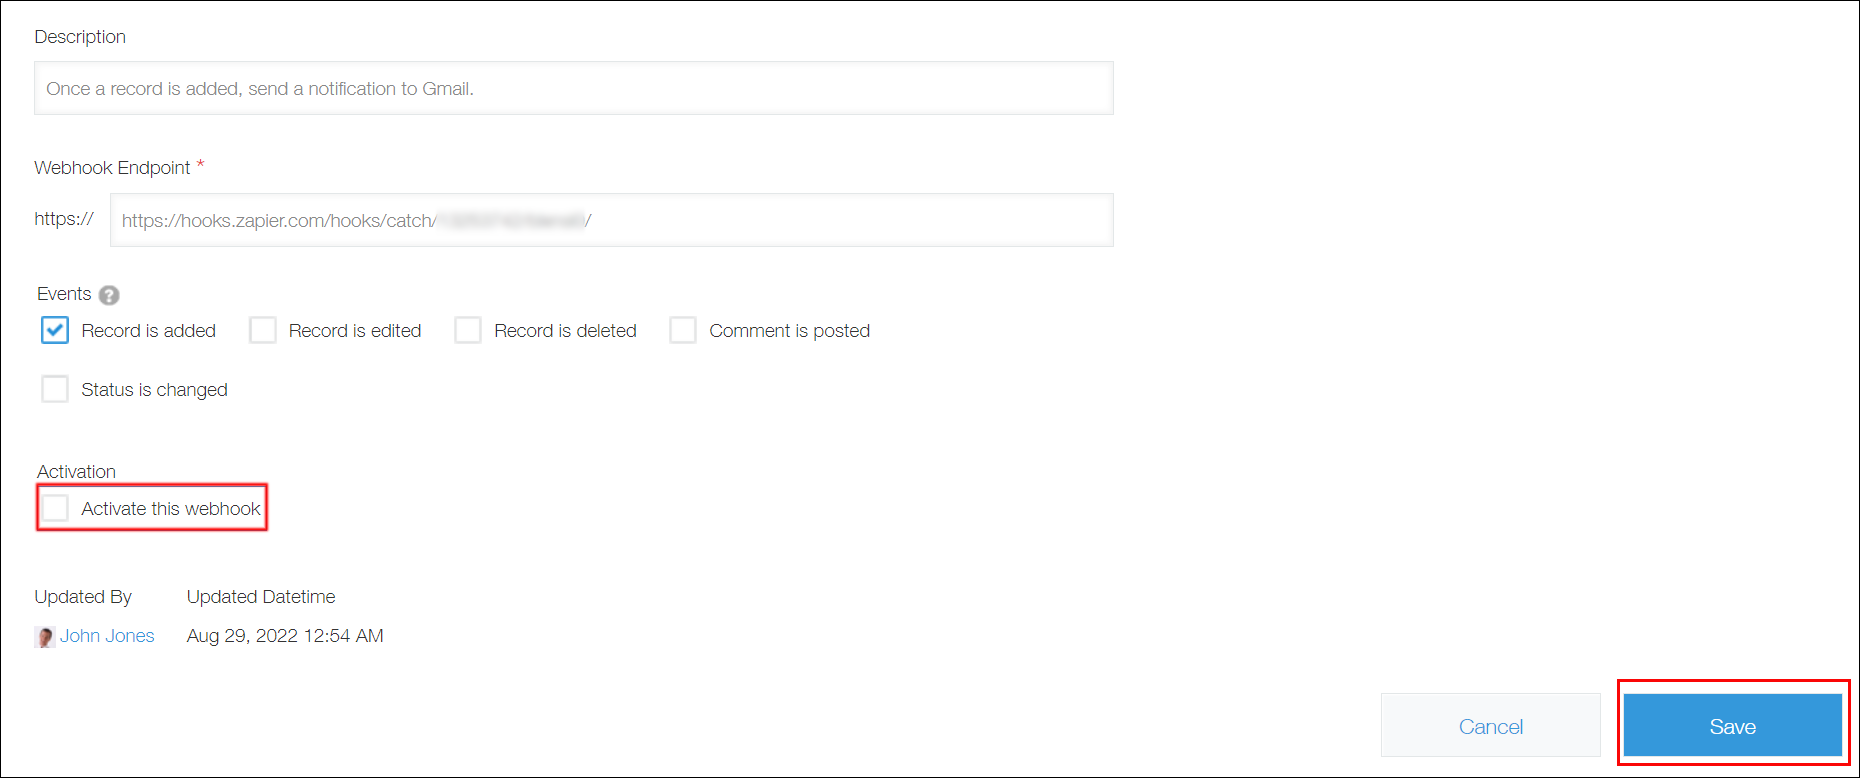
On the Edit webhook screen, deselect the Activate this webhook checkbox and click Save.
-
On the Webhooks screen, click App settings in the message displayed at the top of the screen or click Back to app settings displayed at the bottom left of the screen.
-
On the App settings screen, click Update app.
-
On the Update app dialog, click Update app.
If you want to re-enable the webhook, re-select the Activate this webhook checkbox on the Edit webhook screen.
Prohibiting the use of webhooks (Operation by Kintone users & system administrators)
Kintone users & system administrators can prohibit all users from using webhooks. (It is not possible to control the use of webhooks on a per-user basis.)
When the use of webhooks is prohibited, the Webhooks menu option disappears from the settings screen of all apps, and users will not be able to add, view, or edit webhooks. Additionally, configured webhook notifications are no longer sent.
For the steps to prohibit the use of webhooks, refer to the following page. Controlling sending webhook
Deleting a configured webhook
To delete a configured webhook, follow the steps below.
-
Click the App settings icon (the gear-shaped icon) at the upper right of the View screen.
-
On the App settings screen, select the App settings tab, then click Webhooks under Customization and integration.
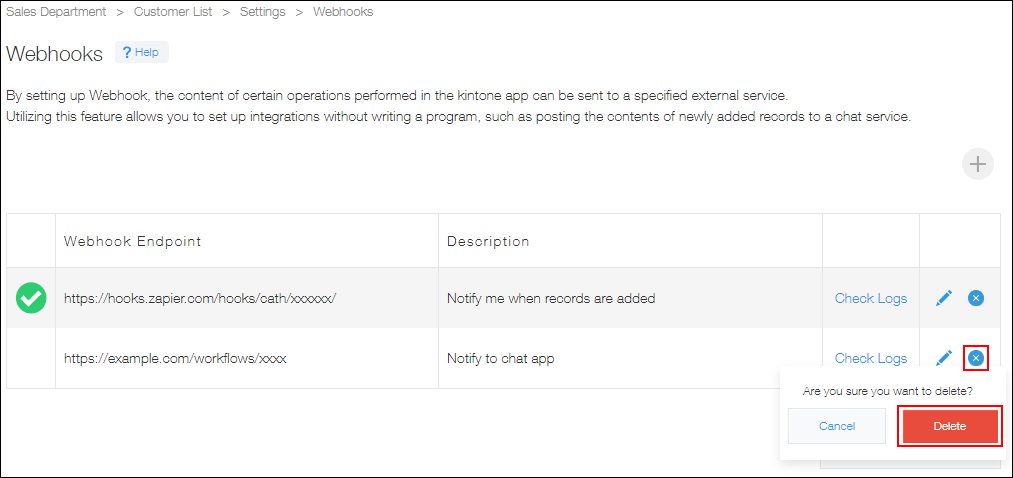
-
On the Webhooks screen, click the Delete icon in the far right column of the webhook that you want to delete, then click Delete.
-
Click App settings in the message displayed at the top of the screen, or click Back to app settings at the bottom left of the screen.
-
On the App settings screen, click Update app.
-
On the Update app dialog, click Update app.