Basic process management setup
This article covers how to set up a basic workflow using the Process Management feature.
As an example, we'll show how to create a workflow for a purchase request app.
Prepare a workflow for process management
Organizing your workflow and planning ahead of time makes process management setup go more smoothly.
Our example workflow will allow users to create records for purchase requests that need to be approved by an assignee.
Workflow diagram
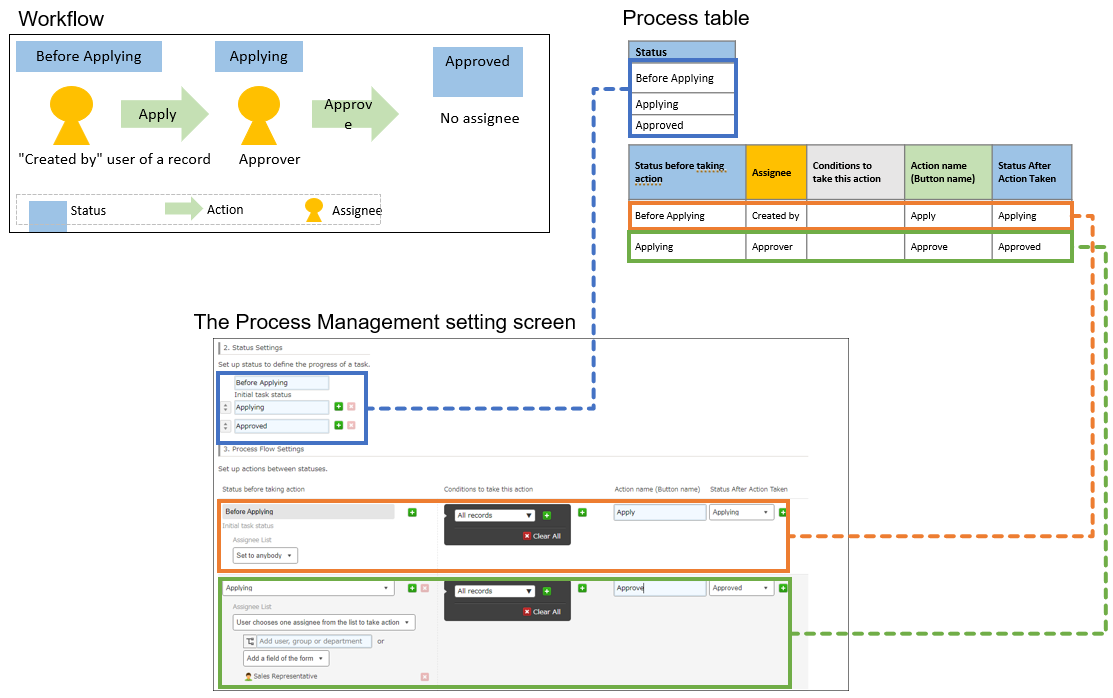
Status settings
- First status: Before applying
- Next statuses:
- Applying
- Approved
Process settings
First process
- Status: Before applying
- Assignee: User in "Created by" field
- Conditions: None
- Action: Apply
- Status after action taken: Applying
Next process
- Status: Applying
- Assignee: Approver
- Conditions: None
- Action: Approve
- Status after action taken: Approved
Enable process management
-
Click the App settings icon (the gear-shaped icon) at the upper right of the View screen.

-
On the App settings screen, select the App settings tab, then click Process management under General settings.
-
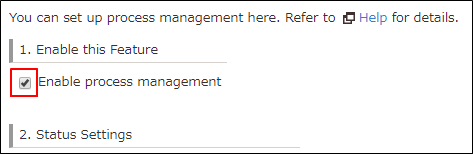
In the 1. Enable this feature section of the Process management screen, select the Enable process management checkbox.
Next, we'll set the record statuses.
Set statuses
The status of a record indicates which step of the workflow the record is currently on.
-
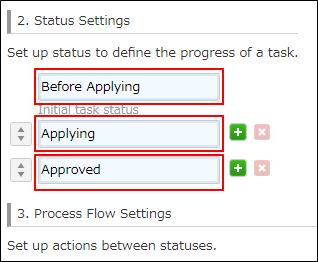
In the 2. Status settings section, set the record statuses you need for your workflow.
The following three statuses are set by default.- First status: Not started
- Next statuses:
- In progress
- Completed
You can add or remove statuses as necessary. You can also change the status names.
For this example, we'll change the default statuses to have the following names.- First status: Before applying
- Next statuses:
- Applying
- Approved
Next, we'll configure the record processes.
Set processes
Set up a process for each of the statuses that you set. The steps to set up the processes are as follows.
Set up the first process
-
Check the status of the first process.
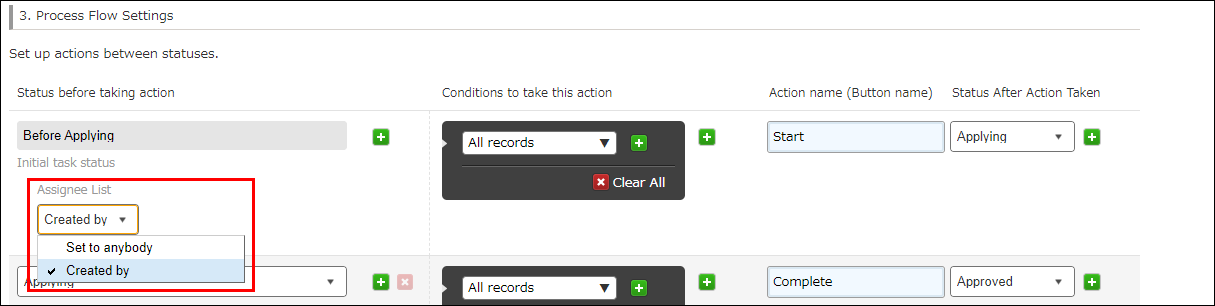
The first status set in the 2. Status settings section is automatically set under Status before taking action in the 3. Process flow settings section.
For this example, we'll check to make sure the "Before applying" status has been automatically set.

-
Configure the Assignee list setting for the first process.
You can select either of the following options from the drop-down. For this example, we'll select Created by.- Set to anybody
- Created by (Selecting this option makes the user who created a record the assignee)
-
Configure the Conditions to take this action setting for the first process.
By configuring these settings, you can create a workflow with branching criteria. For this example, we'll leave All records selected.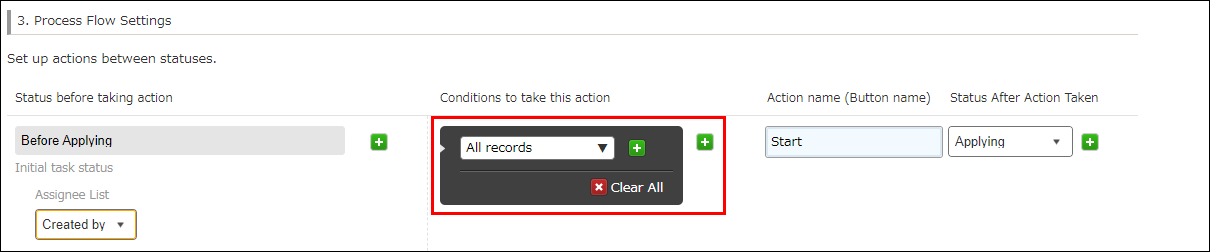
-
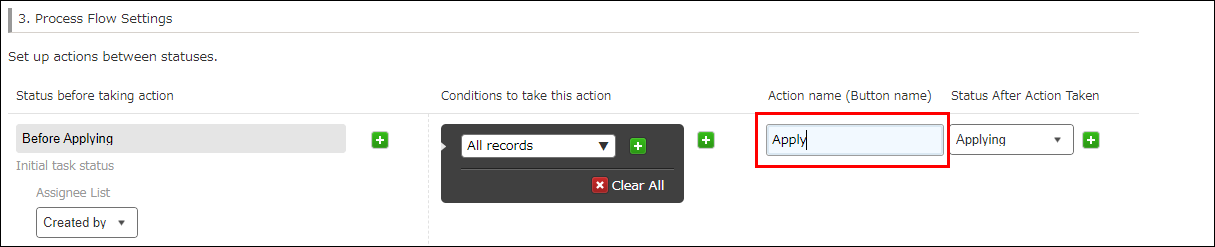
Configure the Action name (Button name) setting for the first process.
This will set the name of the button for performing the action for this process. The button will appear only for assignees.
For this example, we'll enter "Apply".
-
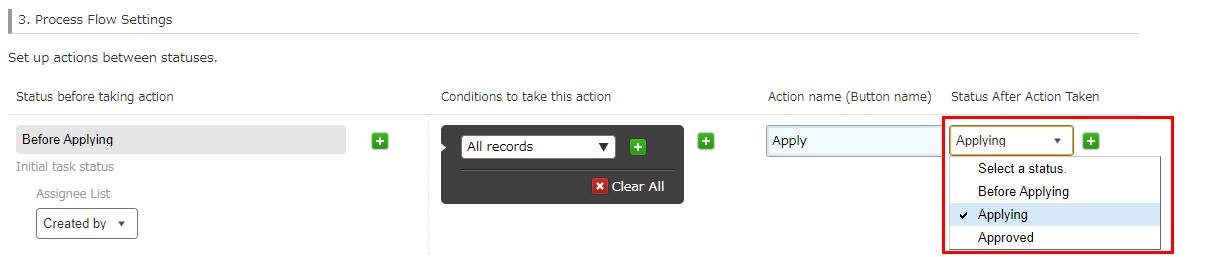
Configure the Status after action taken setting for the first process.
When the action for this process is performed, the status will change from the one set under Status before taking action to the one set under Status after action taken.
For this example, we'll select "Applying".
You've now set up the first two statuses of the workflow ("Before applying" and "Applying").
Now let's set up the remaining processes.
Set up the next processes
Set up the next process in the workflow in the same way as the first.
-
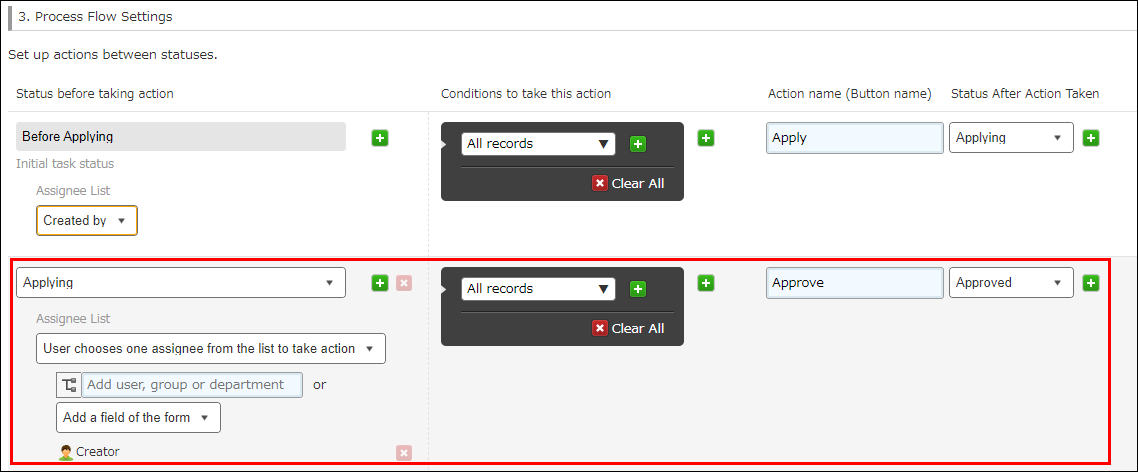
Configure the Status before taking action setting for the next process.
For this example, we'll select "Applying" from the drop-down list.

-
Configure the Assignee list settings for the next process.
First, choose one of the following ways to specify assignees from the drop-down list. In this example, we'll select User chooses one assignee from the list to take action.- User chooses one assignee from the list to take action
- All assignees in the list must take action
- One assignee in the list must take action
After choosing a way to specify assignees, choose who to set as the assignees.
For this example, we'll click Add a field of the form and select the "Approver" field as the assignee field.
-
Configure the Conditions to take this action settings for the next process.
For this example, we'll leave All records selected. -
Configure the Action name (Button name) setting for the next process.
In this example, we'll enter "Approve". -
Configure the Status after action taken setting for the next process.
In this example, we'll select "Approved" from the drop-down list.
We've now set up the process for the "Applying" status.
 If your workflow has additional processes that need to be set up, follow the same steps as above for each of them.
Note that you don't need to configure the settings for the last status (in this example, "Approved").
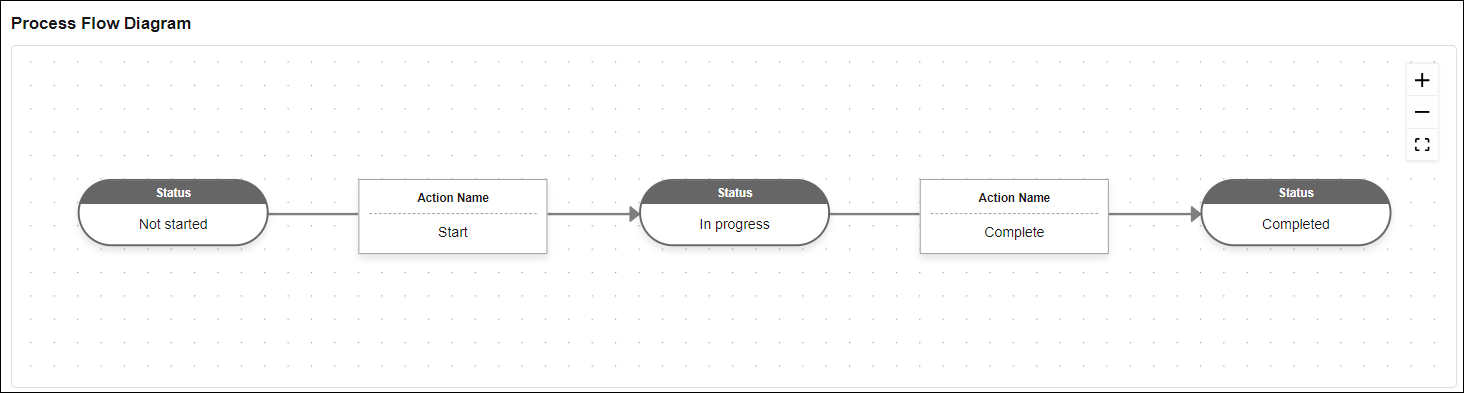
Finally, we'll check the flow diagram to make sure the workflow is set up correctly.
Check the process flow diagram and update the app
-
Check the diagram under Process flow diagram at the top of the screen to make sure that your workflow is set up as you intended.
-
Click Save at the bottom right of the screen.
-
On the App settings screen, click Update app.
-
On the Update app dialog, click Update app.
This completes the process management setup.
When you add and save a record in the app, the first status in the workflow and the button (action) to move the status forward are displayed on the Record details screen.

When you need more flexible settings
For information on how to set up assignees and actions for more complicated workflows, refer to the following pages.