Enabling/Disabling plug-ins
You can enable and disable plug-ins from the Plug-ins screen in App settings.
A plug-in is set to the "Enabled" status when it is added. If you disable the plug-in, it will not be loaded to the screen (such as record details and view) and stops functioning for app users.
For example, if there are some problems with the app after adding a plug-in, you can temporarily suspend (disable) the plug-in. You do not need to delete the entire plug-in setting to identify the cause of the problems and fix them.
To enable or disable the plug-ins, follow the steps below.
-
Click the App settings icon (the gear-shaped icon) at the upper right of the View screen.

-
Select the App settings tab in App settings, then click Plug-ins under Customization and integration.
-
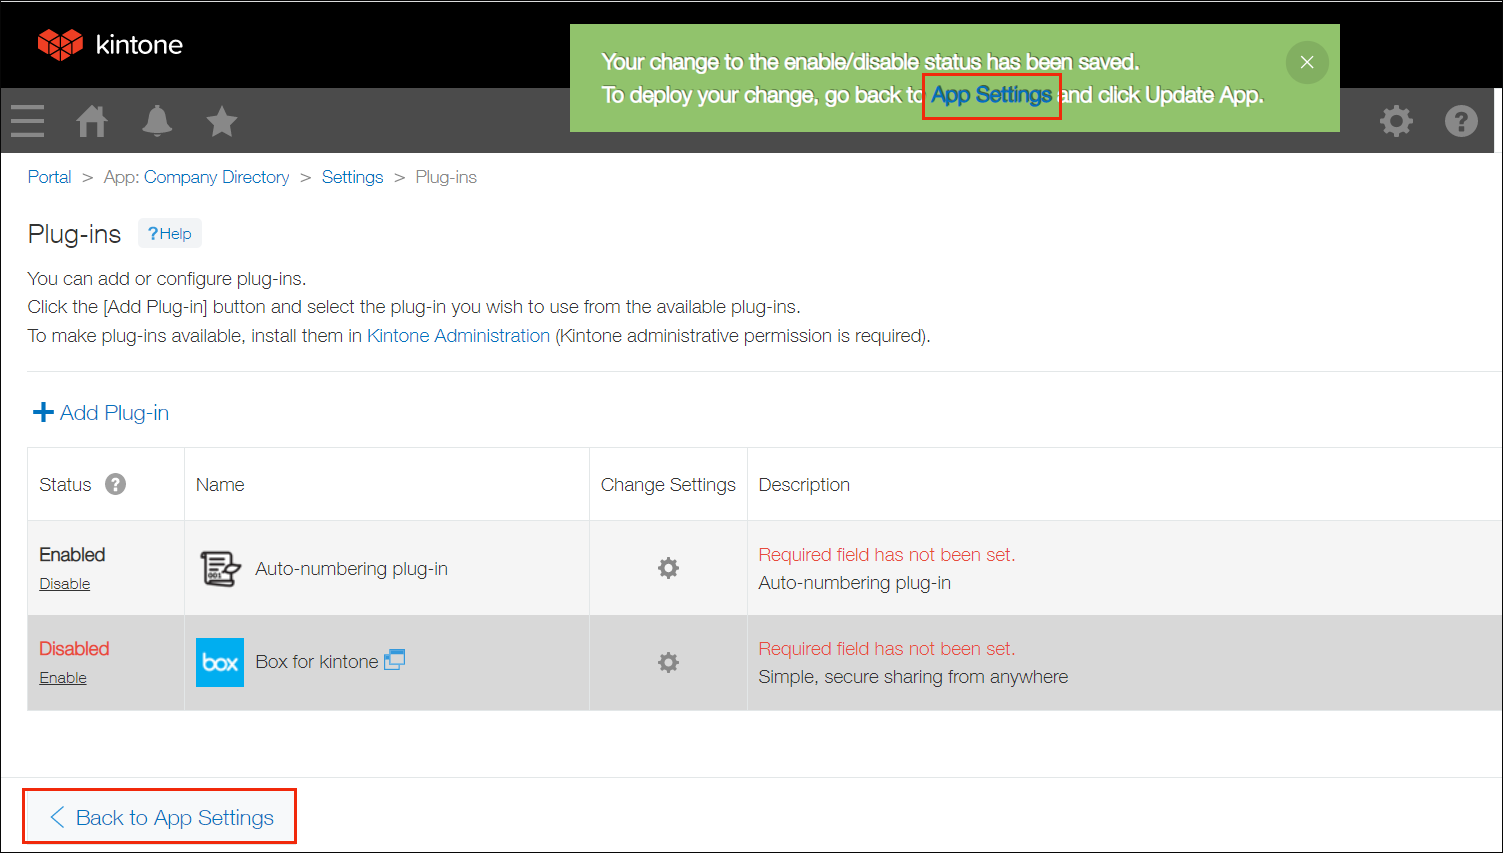
On the "Plug-ins" screen, click Disable if you want to disable an enabled plug-in.
If you want to enable a disabled plug-in, click Enable.

-
Click App settings in the message displayed at the top of the screen or click Back to app settings displayed at the bottom left of the screen.
-
Click Update app at the upper right of the screen.
-
On the Update app dialog, click Update app.